
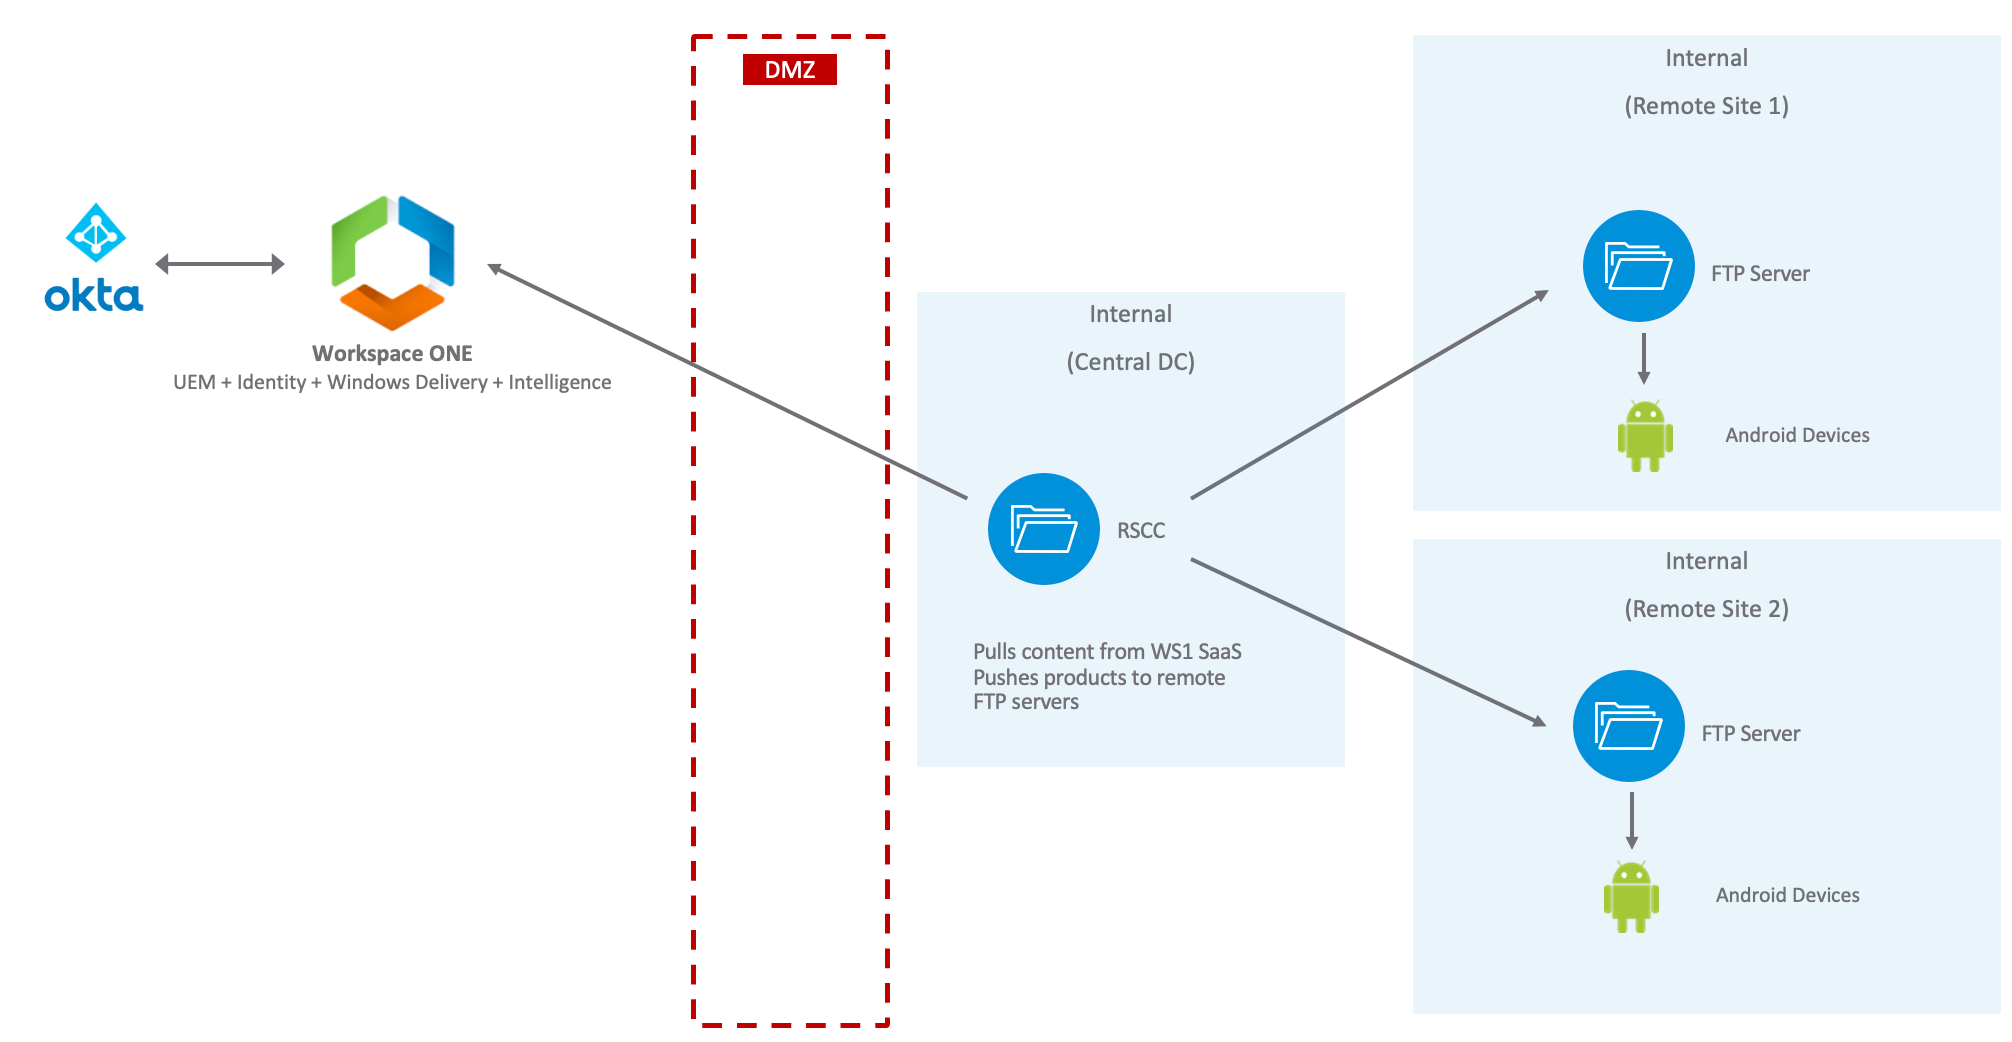
The Workspace ONE UEM Relay Server Cloud Connector (RSCC) is a hybrid solution that pulls content (products only) from a content service endpoint and distributes that content to the relay servers (Push). The concept of a Relay server and how to set one up, I detailed in my previous blog article titled Setting up a Workspace ONE UEM Relay Server for Android Rugged devices.
By introducing RSCC servers to a client’s on-premises network, it can provide the following advantages:
- With RSCC in place, there would be reduced need for software installations on relay servers. For example, remote relay software can be removed and you simply have remote FTP servers in place (no relay software anymore)
- RSCC provides a 3-tier architecture so that there can be less outbound connections from Customer environment to a SaaS UEM tenant
- RSCC provides improvement in performance as it has multiple threads in action (pushes content in parallel to the down stream relays), multiple RSCC’s can be employed to distribute load and improve overall performance
- RSCC resumes any interrupted file transfers between RSCC and relay servers
- In a horizontally scaled environment with multiple RSCCs, they are software load balanced to better distribute the content to the relay servers
- Works with CDN to better serve the content
The relay architecture with RSCC’s is illustrated as follows:
The purpose of this article is to detail the steps you need to follow to install an RSCC server and switch your existing pull relay servers over to push relay servers (which will receive applications from your RSCC server(s).
Note: You essentially enable this capability globally within your UEM tenant. There is no ability to have a mixture of pull relay servers and RSCC/push relays simultaneously.
Installing Internet Information Services (IIS) and FTP Server
Please refer to my previous blog article and follow the instructions to enable IIS and install an FTP server on your RSCC server.
In my lab, I called my RSCC server rscc1.lab.int.
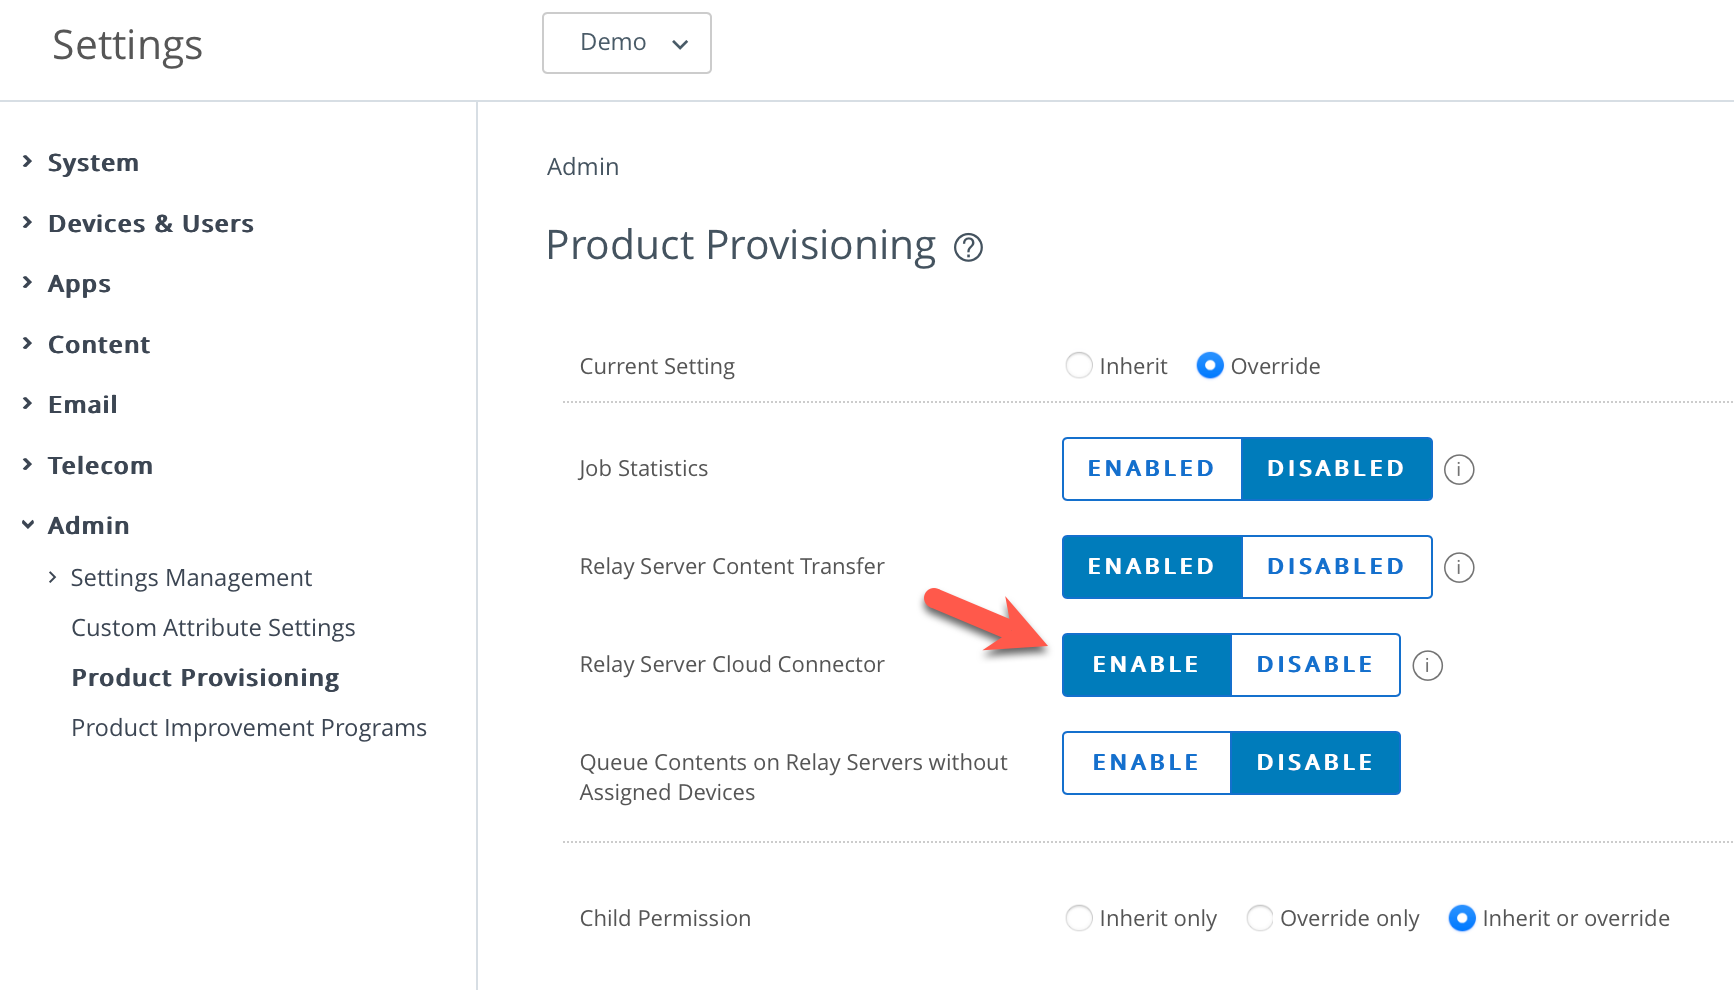
Enable the Relay Server Cloud Connector capability
To get started, login to your Workspace ONE UEM admin console and select Group & Settings – All Settings – Admin – Product Provisioning and for the Relay Server Cloud Connector setting, select Enable as shown:
Install the RSCC Server
1. Login to the Workspace ONE UEM admin console and select Groups & Settings – Enterprise Integration – Pull Service Installers. Click Generate if the Download Configuration button is not available.
2. Click Download Configuration

3. Enter an appropriate certificate password and click Download.

4. Save this configuration file.
5. Click Download Windows Pull Service Installer (assuming your relay server is running Windows) and copy the downloaded install file to your relay server along with the configuration file.
6. Place the installer and configuration file in the same directory.
7. Run the installer and accept the installation defaults.
8. Enter the certificate password when prompted and click Next

9. Enter a proxy server if required and click Next
10. When prompted to provide customer discovery text, click Next
11. Click Install.
Note: If the relay installer requires any prerequisite software, this will be automatically downloaded and your relay server may need to be restarted. In which case, after the restart, the relay installation continues on from before.
12. When the installation is finished the Relay Service service is shown as follows:

13. Open the settings file C:\Airwatch\Airwatch Pull Service\bin\appsettings.json file.
14. Copy the Discovery Text value, in my case it was this value:

Save this information into a text document as we’ll use it in the next section.
Configure a RSCC Server
1. From the Workspace ONE UEM Admin console, select Devices – Provisioning – Relay Servers – List View.
2. Then select Add – Add Relay Server as follows:

3. Enter an RSCC server name (in my case it’s rscc1) and change the Relay Server Type to Cloud Relay as shown:

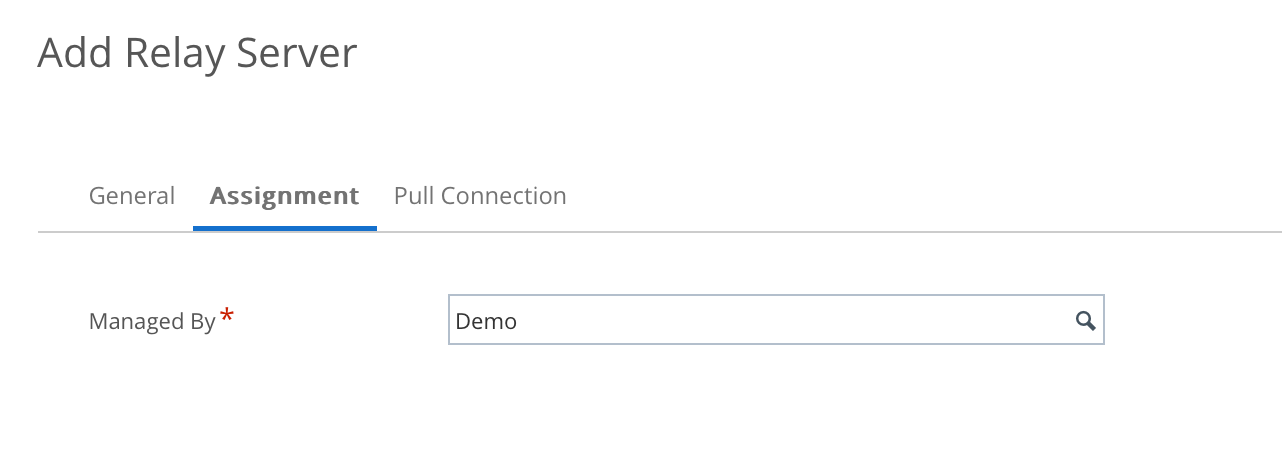
4. Select the Assignment tab and update the Managed By option to be associated Organisational group as required. In my case, I left the top most OG called Demo.
5. Select the Pull Connection tab and enter applicable settings for your FTP server at your remote site/office. Copy in the pull discovery text you copied from the settings.json in step 14 above. For example for my lab:

6. Click Save.
7. Click the red icon next RSCC you’ve just added as shown:

8. This should change to green and the RSCC status should include a green tick under Relay Server as shown in my lab:

Configure Push Relay Servers
You might already have a number of Pull Relay servers in place from your previous architecture. I’d suggest taking note of each of those Pull Relay servers details such as their IP address, FTP directory etc. Save this information into a spreadsheet for easy reference.
Then delete all existing Pull Relays that might have been already configured. Also, remove any remote relay software and leave the existing FTP server in place.
You next need to create a Push Relay to take the place of existing Pull relays. So in my lab I deleted the two Pull Relay servers and created a Push Relay as follows:
1. From the Workspace ONE UEM Admin console, select Devices – Provisioning – Relay Servers – List View.
2. Then select Add – Add Relay Server as follows:

3. Enter a relay server name (in my case it’s relayy1) and change the Relay Server Type to Push as shown:

4. Select the Assignment tab and update the Managed By option to be associated Organisational group as required. In my case, I left the top most OG called Demo.
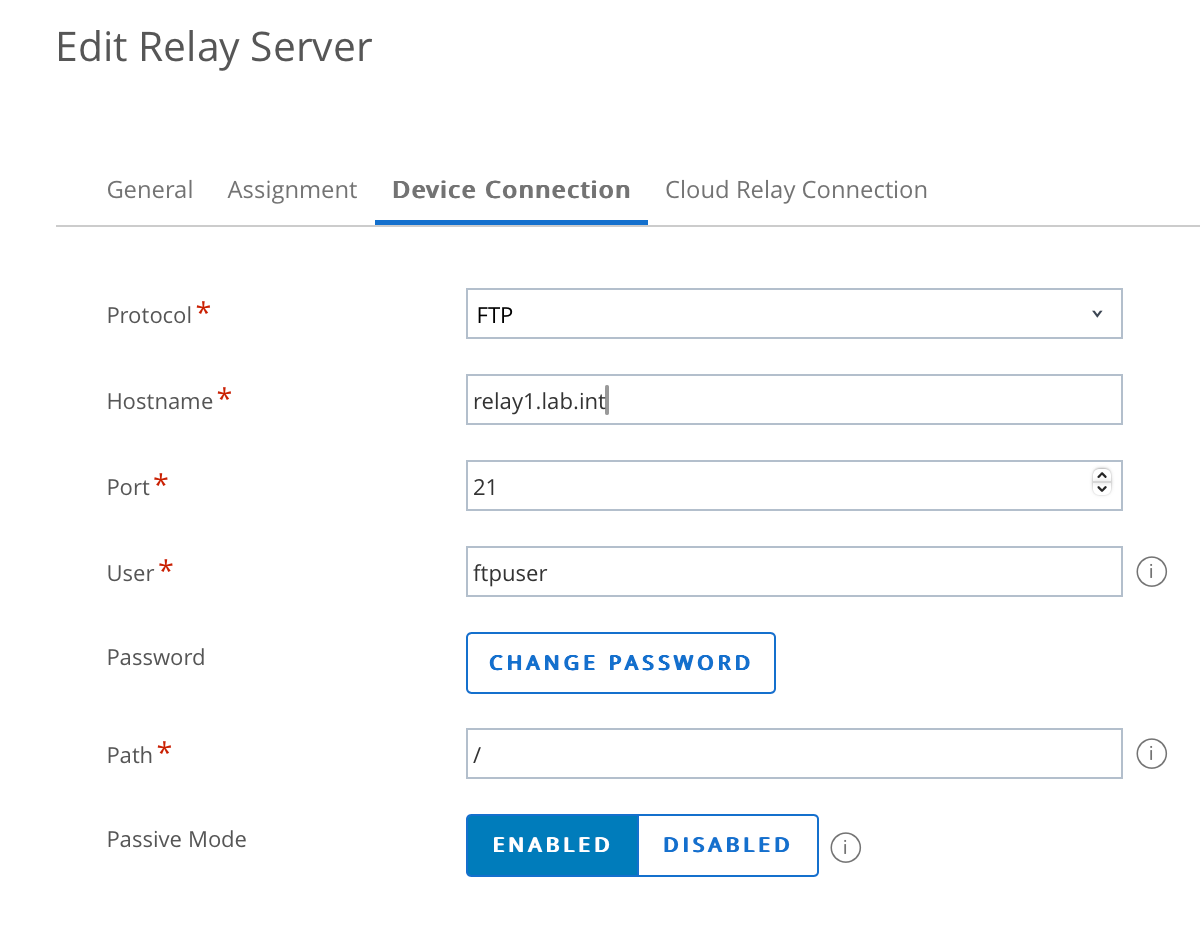
5. Select the Device Connection tab and enter applicable settings for your FTP server at your remote site/office. For example for my lab:
6. Select Cloud Relay Connection tab and click the button Copy Values from Device Connection. This then pre-populated the values.

7. Click Save
8. The relay will then be added to the UEM console but will be in a disabled state (red circle). Note the orange warning alert under Relay Server. This is expected until the RSCC can correctly connect to the remote FTP server (which was already installed on the server)

9. Click the red circle and the relay will change to a green circle as follows:

10. You may now connect remotely to the relay server and remove the Airwatch Pull Service application (leave the FTP service on the server).
11. Repeat the above steps 1-10 for as many relay servers as required for your environment.
Once I had completed this for my lab I had one RSCC server and two push relay servers.

Testing your RSCC and Push Relays
Within a few minutes, applicable product files will be downloaded to the RSCC relay server and remote push relay servers (FTP directory). For example in my lab:

If you have a product configured (for example) to install an Android application, you can review this application and check on it’s relay distribution status as shown:

You can also select your RSCC server and select More Actions – Advanced Info as shown:

This will report any errors with the RSCC server:

That’s it! You’ve now installed and configured an RSCC relay server with remote push relay servers, which can be used by your Android rugged devices.
Official Documentation
- Relay Server Cloud Connector (RSCC) Hardware Requirements and Installation – link
- Configure a Relay Server Cloud Connector – link
Updates
- 15th July 2025 – to (hopefully) better clarify that when changing to this model, remote site Relay server software is removed. Only an FTP server remains at each remote site.
