
Customers often integrate Workspace ONE Access with Microsoft Entra ID (formerly Azure AD) to enhance identity and access management, improve security, and streamline user experiences. I’d previously written about this integration in this article: Workspace ONE Access with Microsoft Entra.
However, some customers haven’t yet enabled Workspace ONE Access, and still wish to leverage Entra ID for it’s comprehensive identity services to provide single sign-on (with optional MFA) to the UEM administration console and user self service portal.
The following article provides you step by step instructions to integrate both solutions. I’d like to acknowledge the author of this blog article, from which these instructions were tested and tweaked to suit Microsoft Entra Connect.
NOTE: These instructions assume a hybrid Entra ID/Active Directory configuration where all users/groups are synchronized to Entra ID using Microsoft Entra Connect (Cloud Sync).

Enabling SAML in Workspace ONE UEM
1. Log into the UEM console under Groups and Settings – All Settings – System – Enterprise Integration – Directory Services
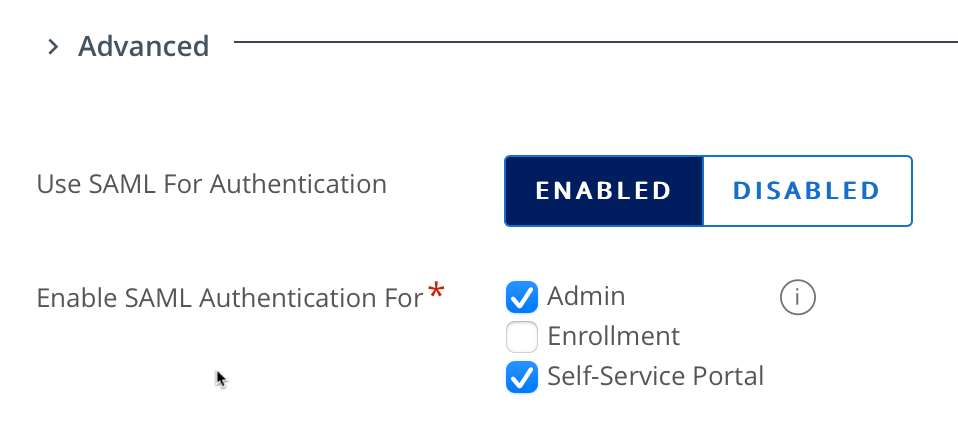
2. Under Advanced, select Use SAML For Authentication click Enabled
3. Select appropriate features such as SAML for the Admin (Console) and Self-Service Portal as shown:
4. Scroll to the bottom of the page and click on Export Service Provider Settings as shown:

5. Save the AirWatchSamlSettings.xml file to your computer. Edit the file with your favorite editor. You’ll notice the entityID is empty.
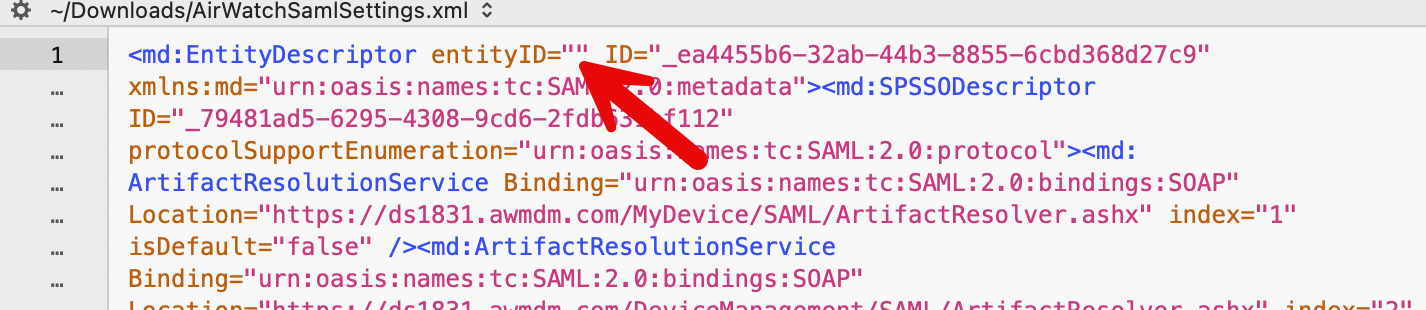
6. Enter in a name for your UEM tenant. In my case CN1831EUCAU (which is one of my test tenants). Save this configuration file.

Creating an Enterprise Application for Workspace ONE UEM
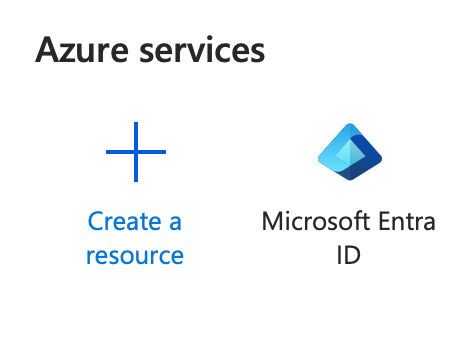
1. Login to portal.azure.com
2. Under Azure Services, select Microsoft Entra ID
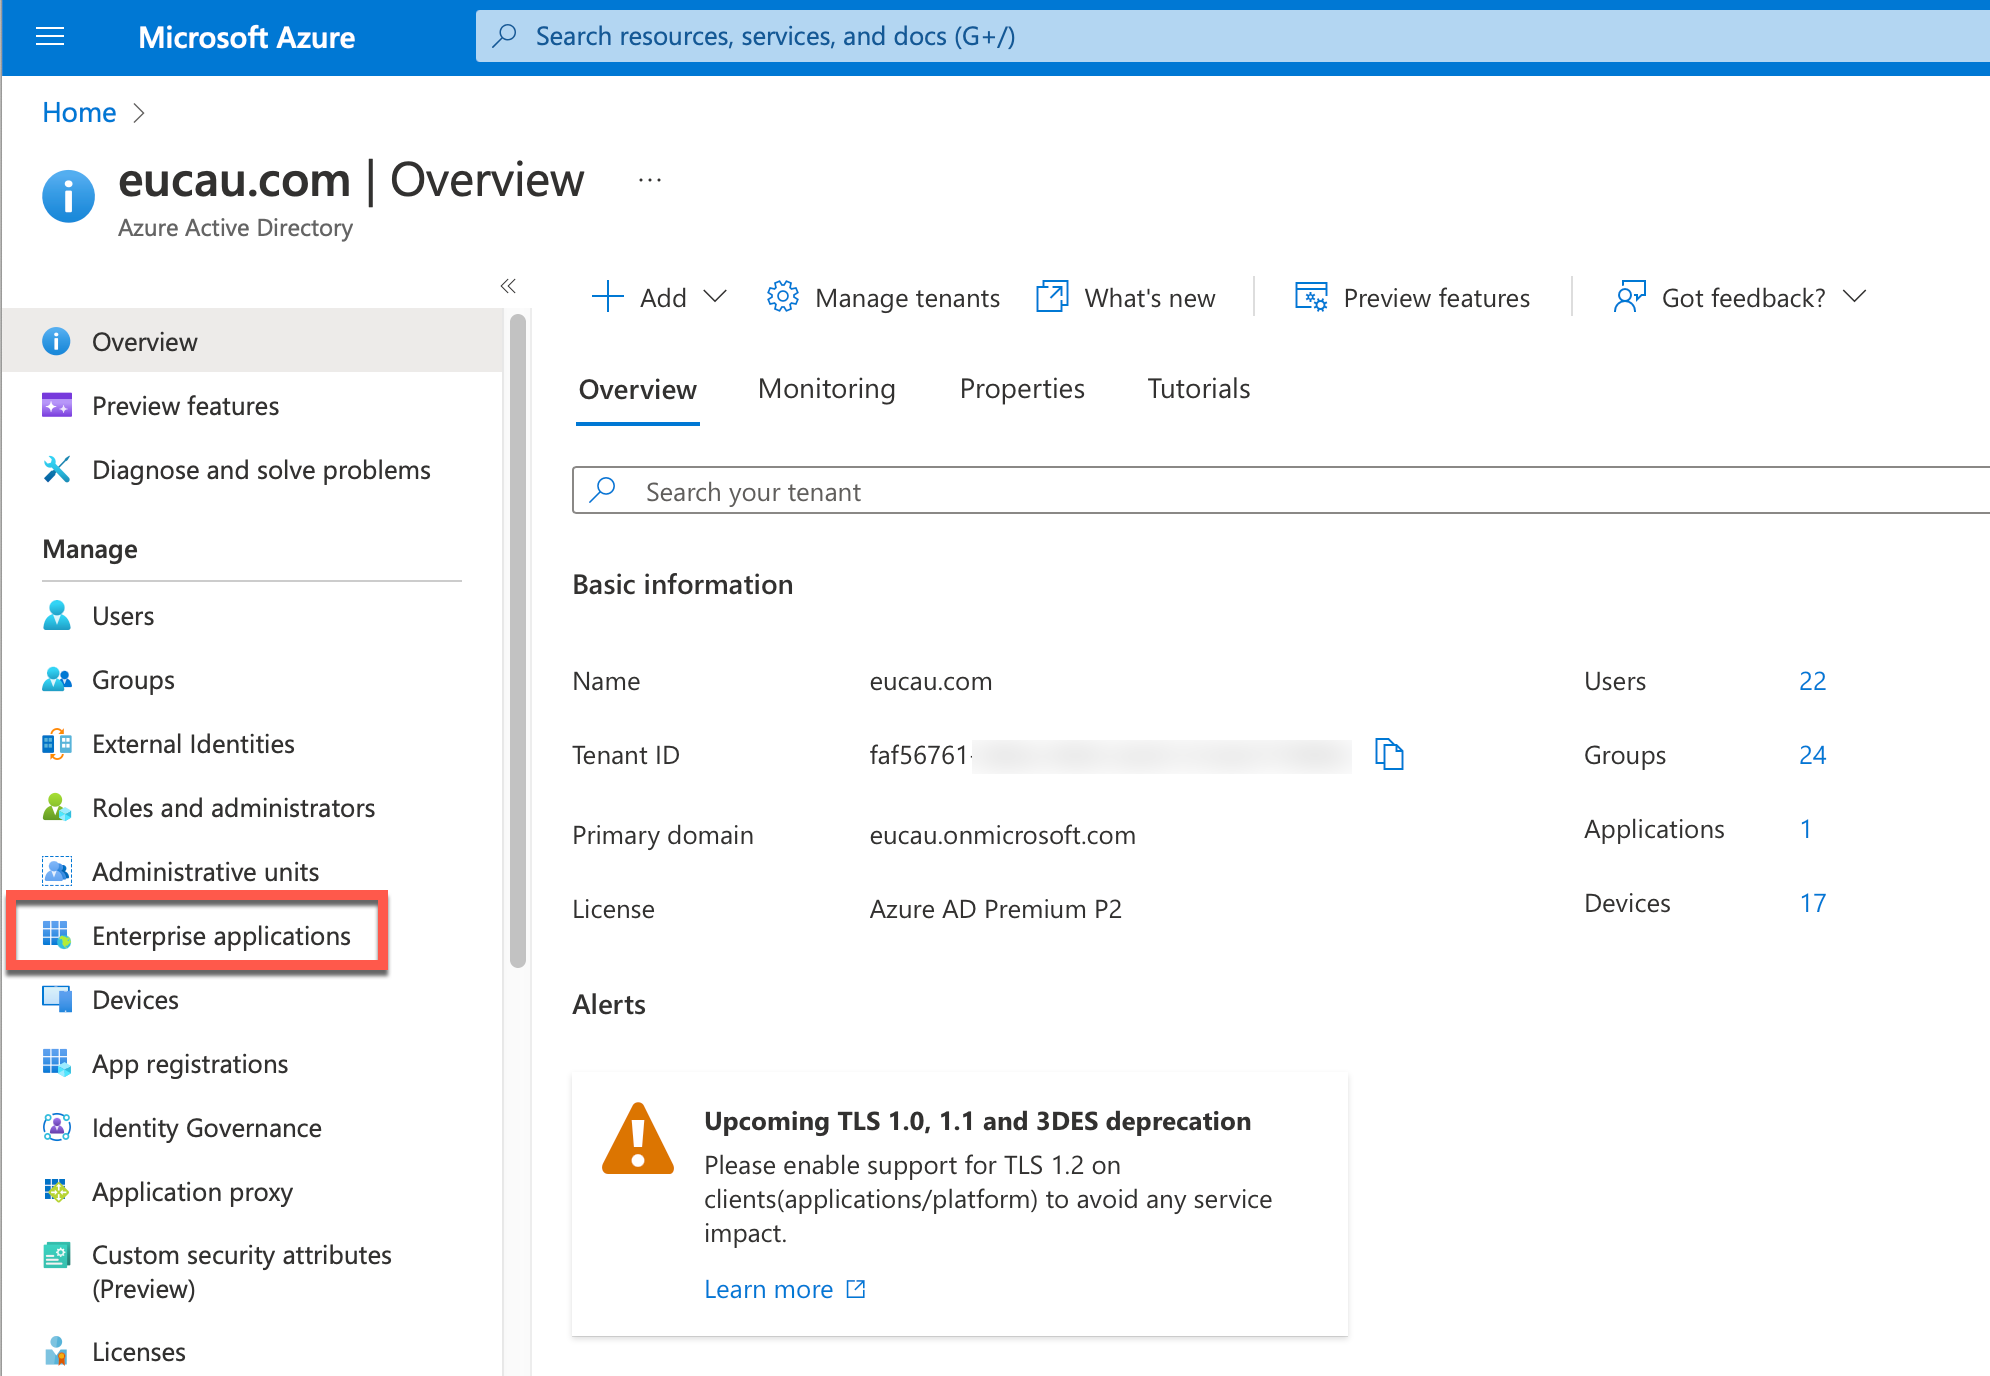
- Select Enterprise Applications

4. It can sometimes take a while to create this application
5. Next select the option 1. Assign users and groups
6. In my case I selected a group I had already created called EUCAU Admins, which contains all my test admins in my lab. Click Assign. When your users/groups are added they will be shown as follows:
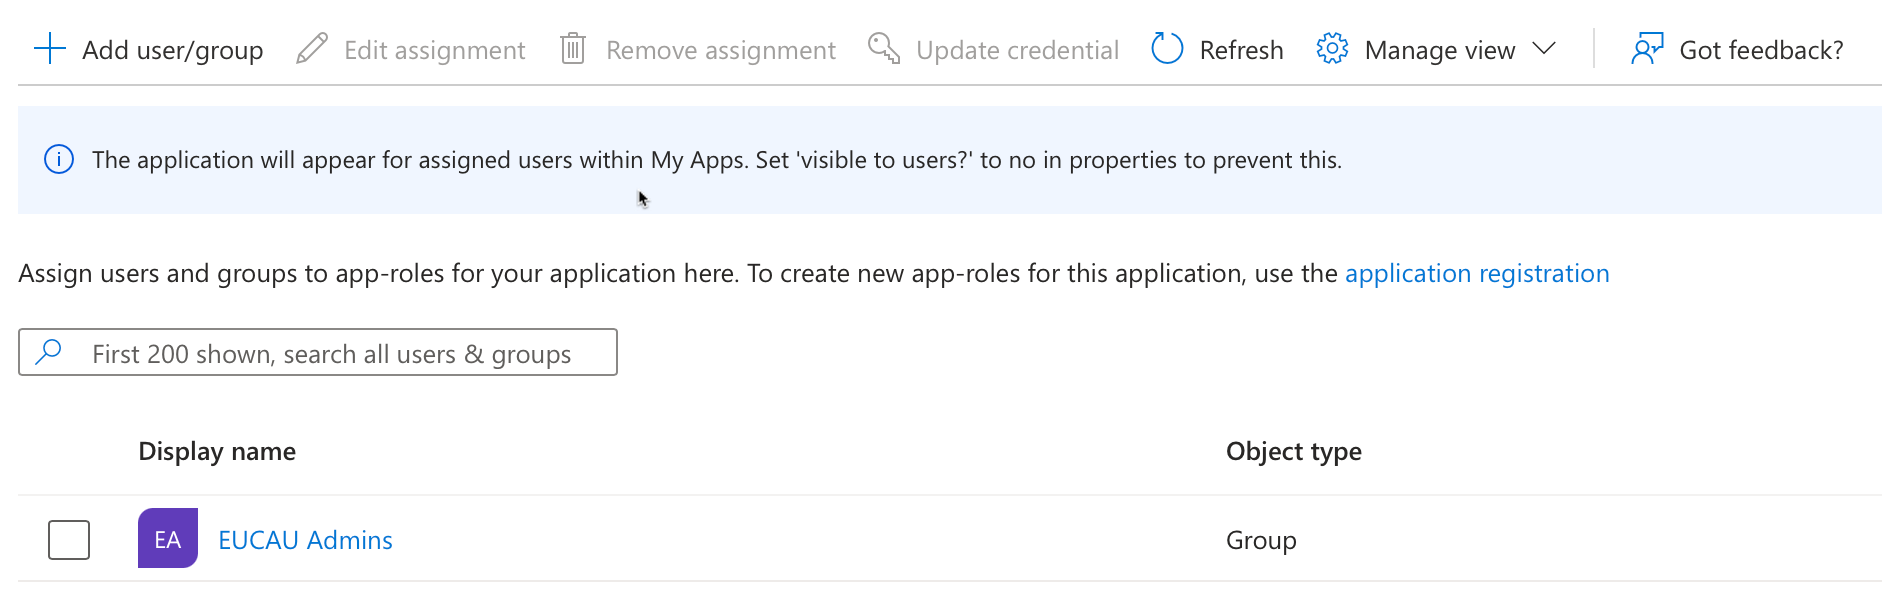
Note: I later added a group called All Staff (since I needed a group that contacted users who would access the Self Service Portal)
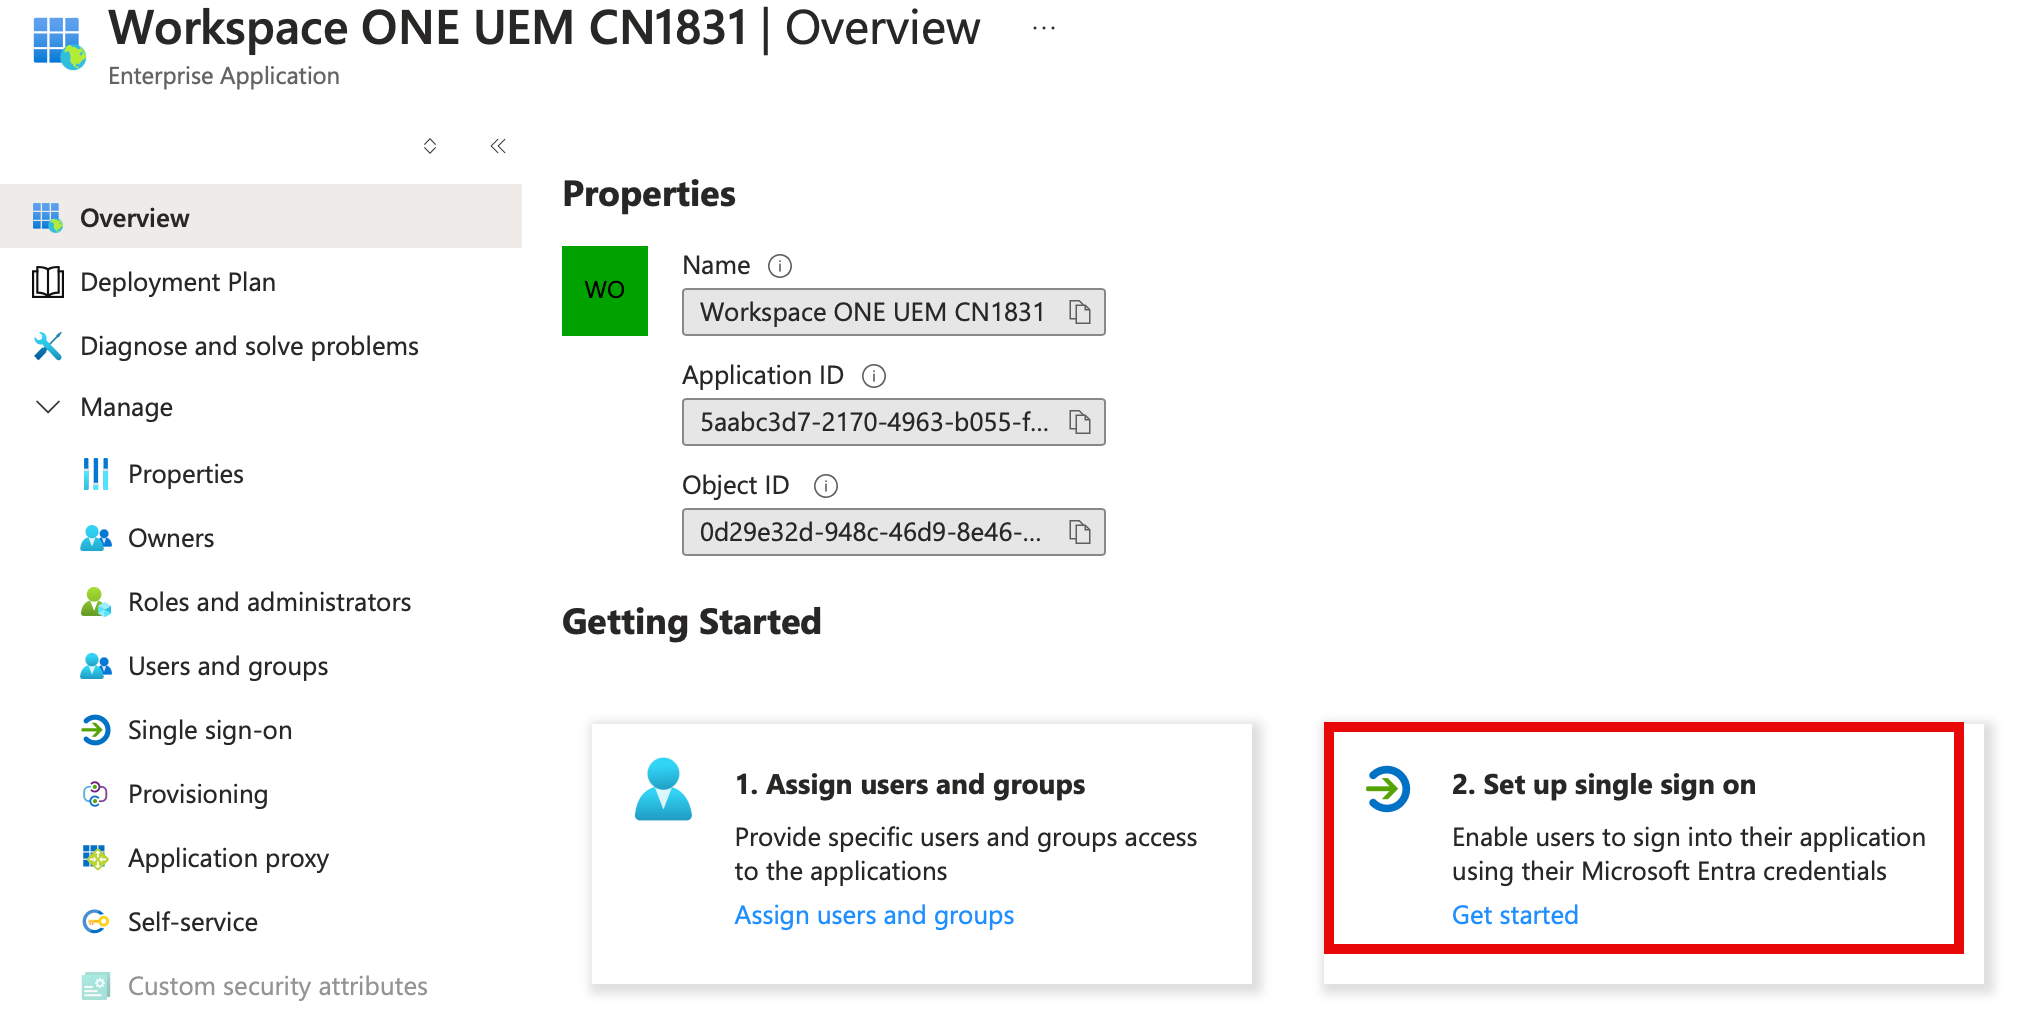
6. Next select 2. Set up single sign on
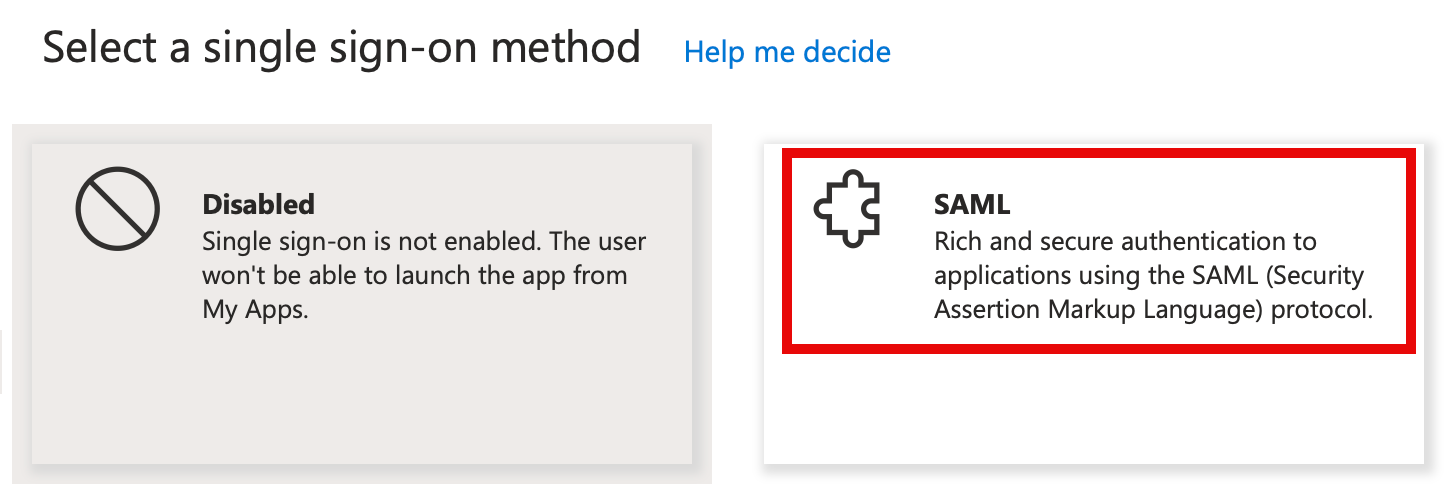
8. Select SAML as shown:
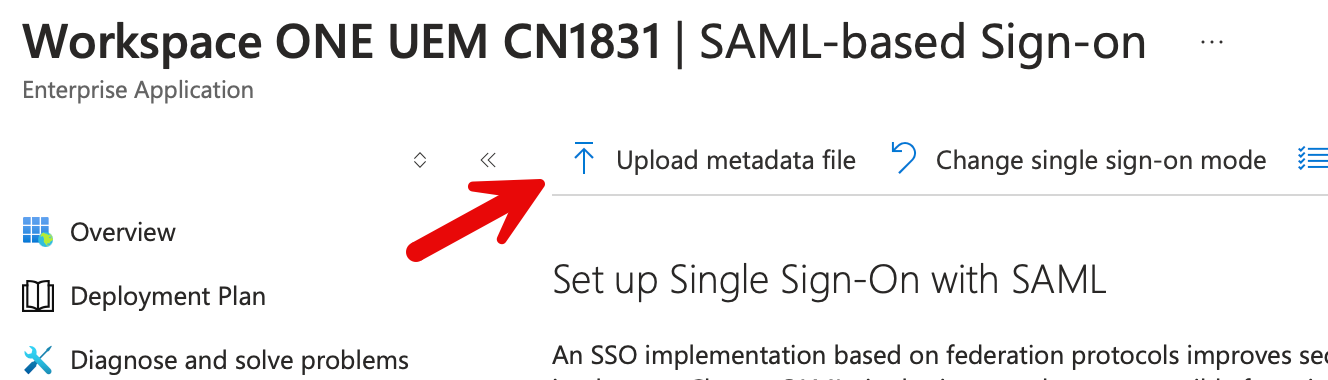
9. Select Upload metadata file as shown. Select the edited AirWatchSamlSettings.xml and click Add.
10. Review and Save the configuration as shown:

11. Scroll down to SAML certificates and next to Federation Metadata XML, select Download.
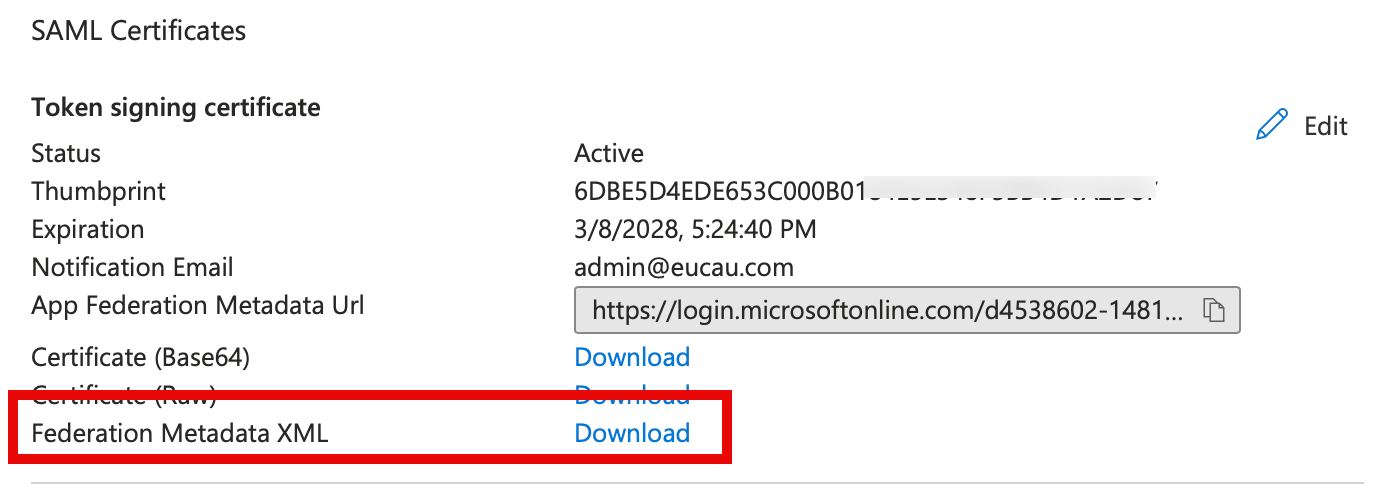
12. Save the file to your computer. In my case the file was called Workspace ONE UEM CN1837.xml.
Setting up the SAML application in Workspace ONE UEM
1. Navigate back to the Workspace ONE UEM console and under the SAML 2.0 section, click the Upload button as shown.

2. Upload the file you had previously downloaded from Entra ID, and click Save.
3. Scroll to the bottom of the screen and click Save. WS1 UEM will then process the SAML file.
You’ll note the Service Provider (AirWatch) ID has been set to AirWatch.
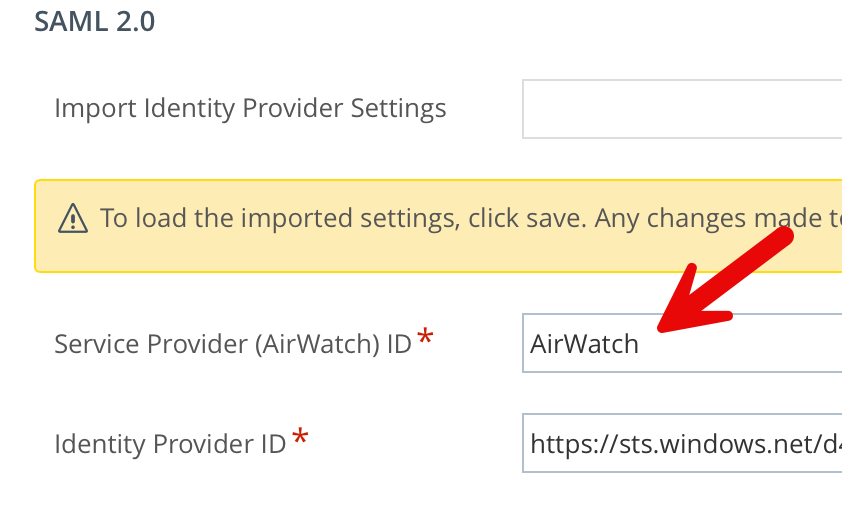
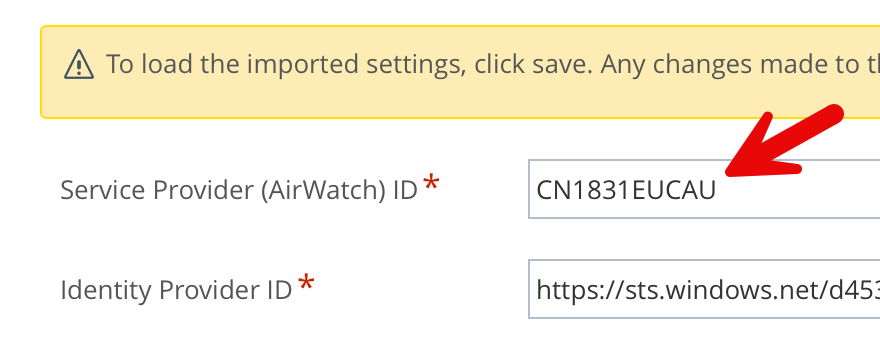
4. I then changed this to the value I had set in the AirWatchSamlSettings.xml. In my case the value of CN1831EUCAU as shown:
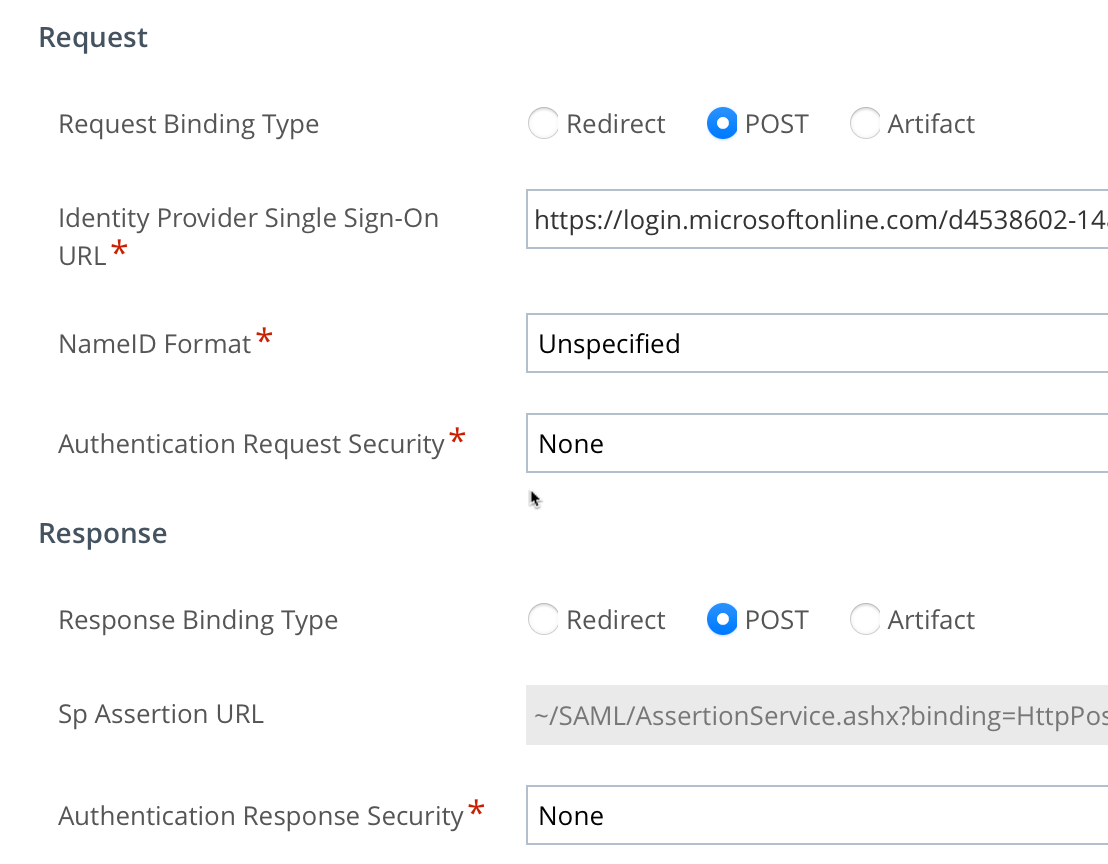
5. Switch the Request and Response types to POST as shown:
6. Scroll to the bottom of the page and click Save.
7. Again, scroll to the bottom of the page and click on Export Service Provider Settings as shown:
Final changes to the Enterprise Application in Entra ID
1. Return to the Enterprise application in Entra ID. Select Upload metadata file as shown. Select (in my case) the AirWatchSamlSettings-2.xml file and click Add.
2. Click Save.
3. Click Edit Attributes & Claims.
Remove all existing claims and map the following. All are selected from drop down and you don’t need to enter them manually.
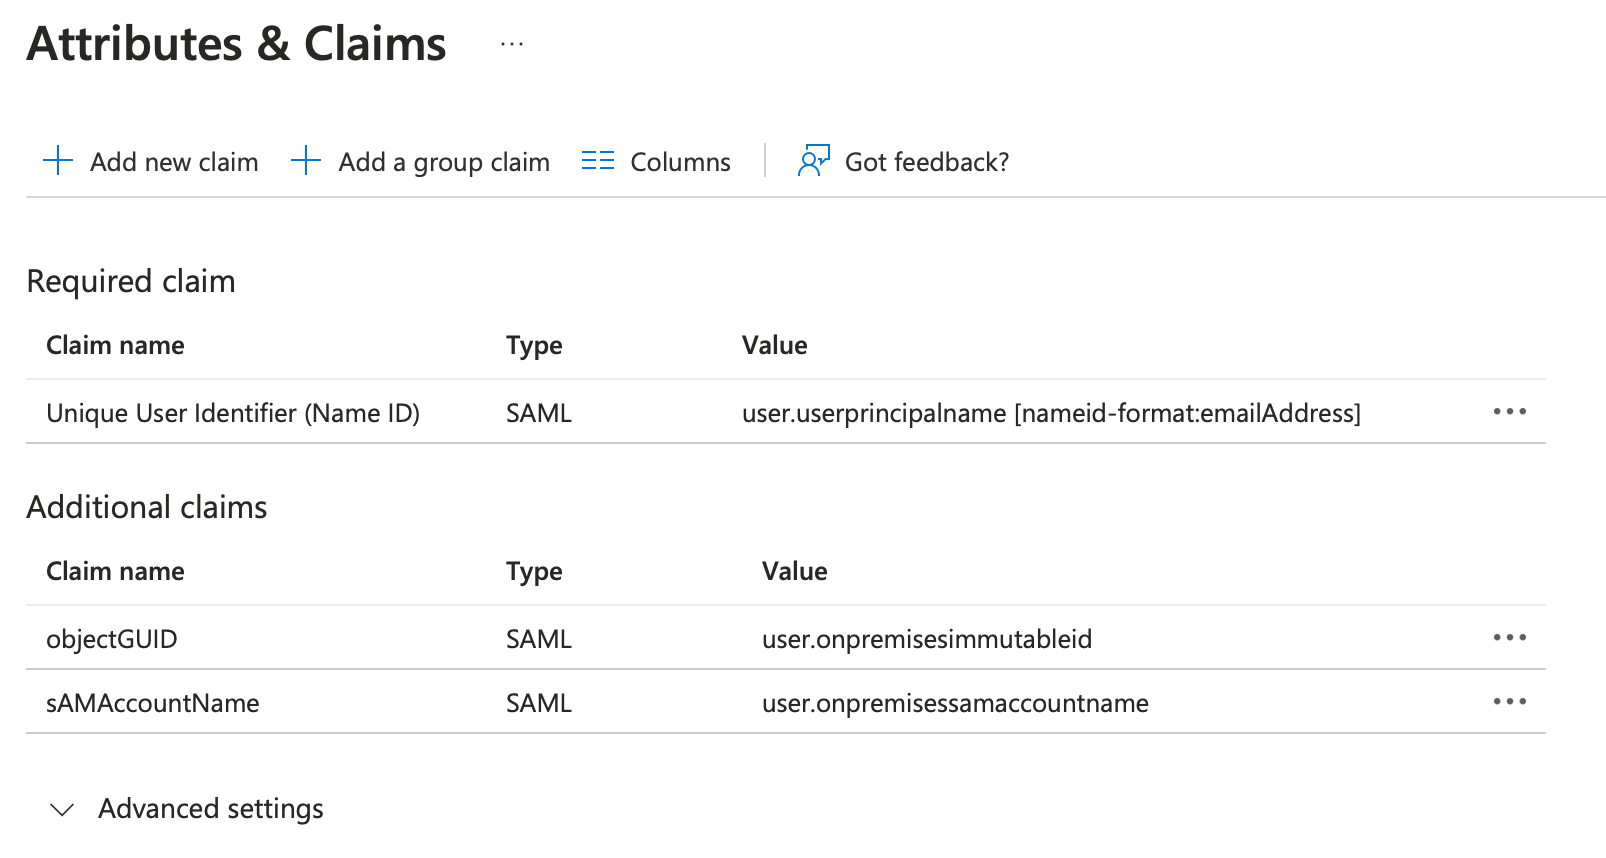
The values shown in the main screen are as follows:

4. In my lab, I had setup Microsoft Entra Connect – Cloud Sync.
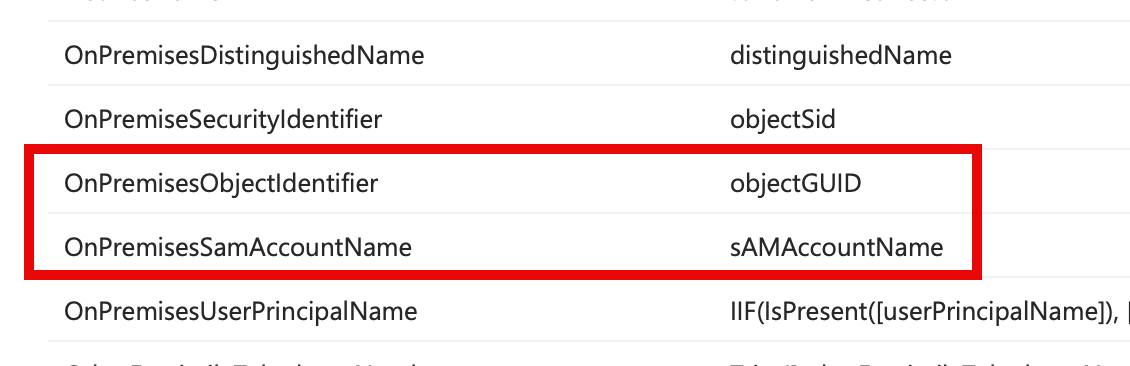
So needed to ensure the three values were mapped appropriately:
- Name ID – user.userprinicpalname
- objectGUID – user.onpremisesimmutableid
- sAMAccountName – user.onpremisessamaccountname
Testing this out
Self Service Portal
Browse to your UEM’s Self Service Portal URL. In my case, https://ds1831.awmdm.com/MyDevice. Then enter your appropriate OG and userid/password. You should then be redirected to Entra ID to authenticate with your appropriate Entra Userid/password. Once successfully logged into Entra, you’ll be redirected back to the Self Service Portal.
Would you like to bypass the first step of entering your OG, userid & password and immediately logging into Entra ID? Thanks to the suggestion by Sascha Warno (Solutions Architect at Omnissa) you can create a deep link such as:
https://dsxxxx.awmdm.com/MyDevice/Login?gid=ogname (Note the ds, and replace xx with your tenant number)
Console Login
Browse to your UEM’s console. In my case, https://cn1831.awmdm.com/ and enter the domain\admin account format and password. You should then be redirected to Entra ID to authenticate with your appropriate Entra Userid/password. Once successfully logged into Entra, you’ll be redirected back to the admin console.
Would you like to bypass the first step of entering your userid & password and immediately logging into Entra ID? Thanks to Sascha again, you can create a deep link such as:
https://cn1xxxx.awmdm.com/AirWatch/login?gid=ogname (Note the cn this time, and replace xx with your tenant number)
