
Workspace ONE can integrate with Microsoft Entra ID (formerly Azure AD) to provide a seamless Anywhere Workspace.
The following article provides you step by step instructions to integrate both solutions.
The following architecture diagram in details the various components of how Workspace ONE Access and Workspace ONE UEM is integrated with Entra ID. For the purposes of this article we’ll be focusing only on the integration the integration between Workspace ONE Access and Entra ID.
(shown in red)

A PDF of this diagram is available here
You might have a number of questions about this architecture, which I’ll now answer.
Q: Why do you want to integrate Access with a 3rd party identity provider such as Entra ID?
Entra ID might be your organisations strategy for managing your users and groups, plus you’ll then start to leverage OOBE or Windows 10 Autopilot. Some organisations also leverage Entra ID’s MFA capabilities as well.
Many organisations enable this capability for VMware Horizon. Ensuring that all authentication occurs via Entra ID before a list of virtual desktops and applications are available for the user.
Q: Why are their still connectors setup for Workspace ONE UEM and Access from an on-premises Active Directory?
This is still required to ensure users/groups are synchronised from Active Directory to Workspace ONE UEM and Access. Authentication (AuthN) still occurs by Entra ID but this relies on the required users (and groups) being synchronised into Access.
I’ll now walk you through how to integrate Workspace ONE Access with UEM.
Creating a Workspace ONE Access SAML application in Entra ID
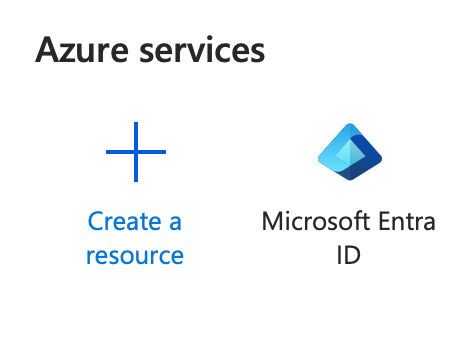
- Login to portal.azure.com
- Under Azure Services, select Microsoft Entra ID
- Select Enterprise Applications
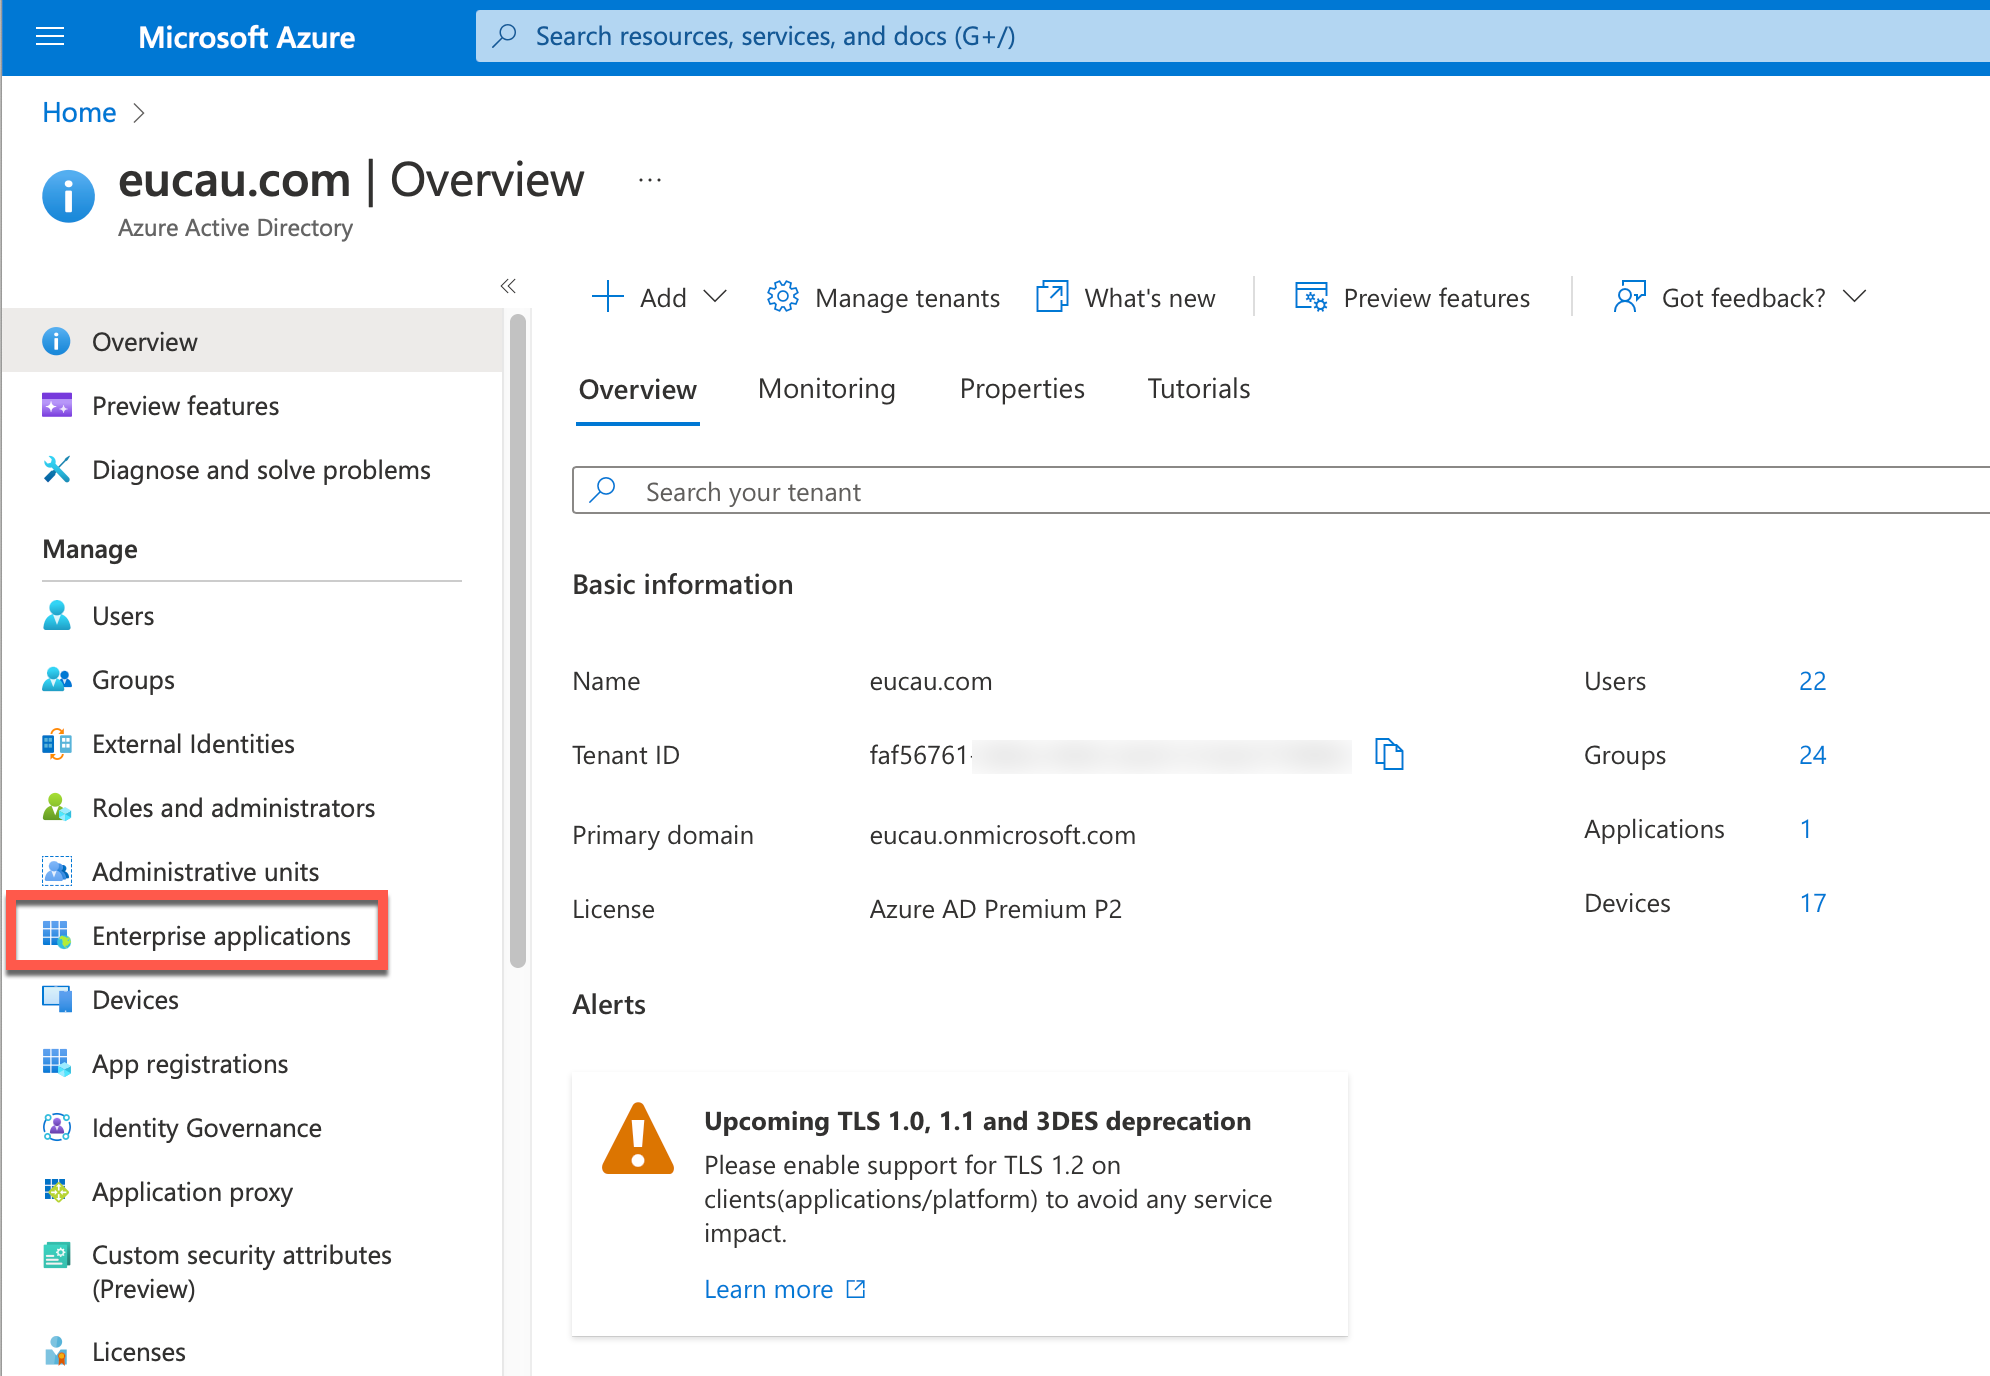
- Select New Application
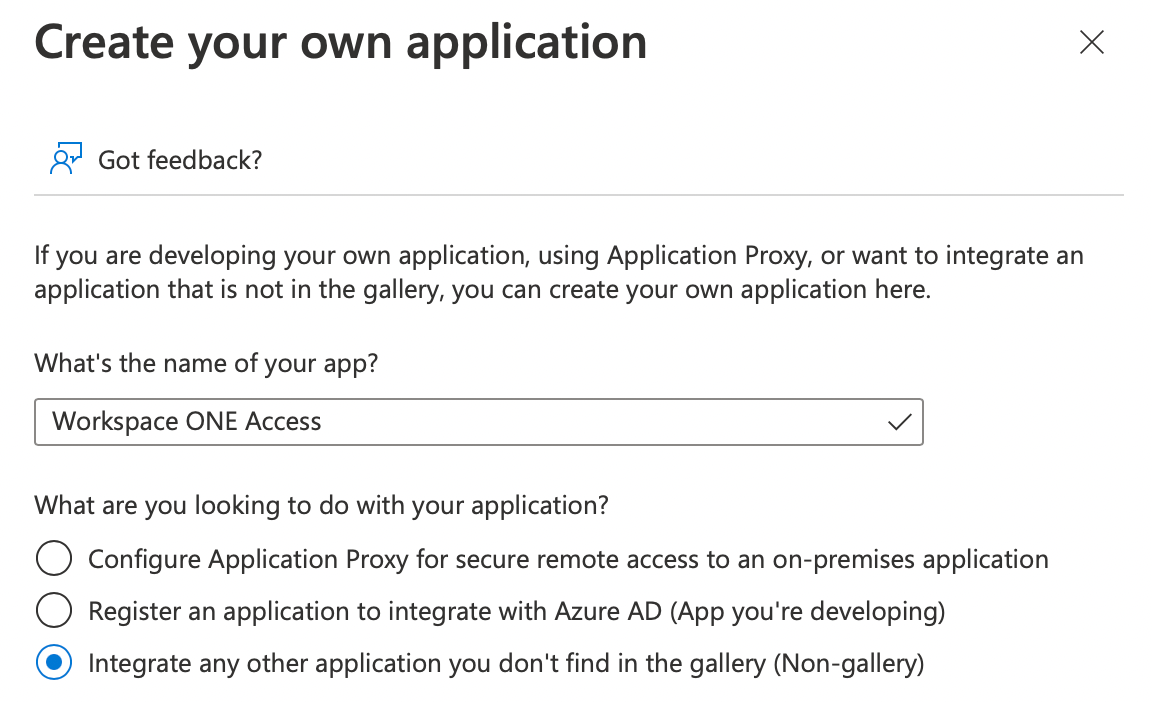
- Select Create your own application
- Enter the following details and click Create
- It can sometimes take a while to create this application
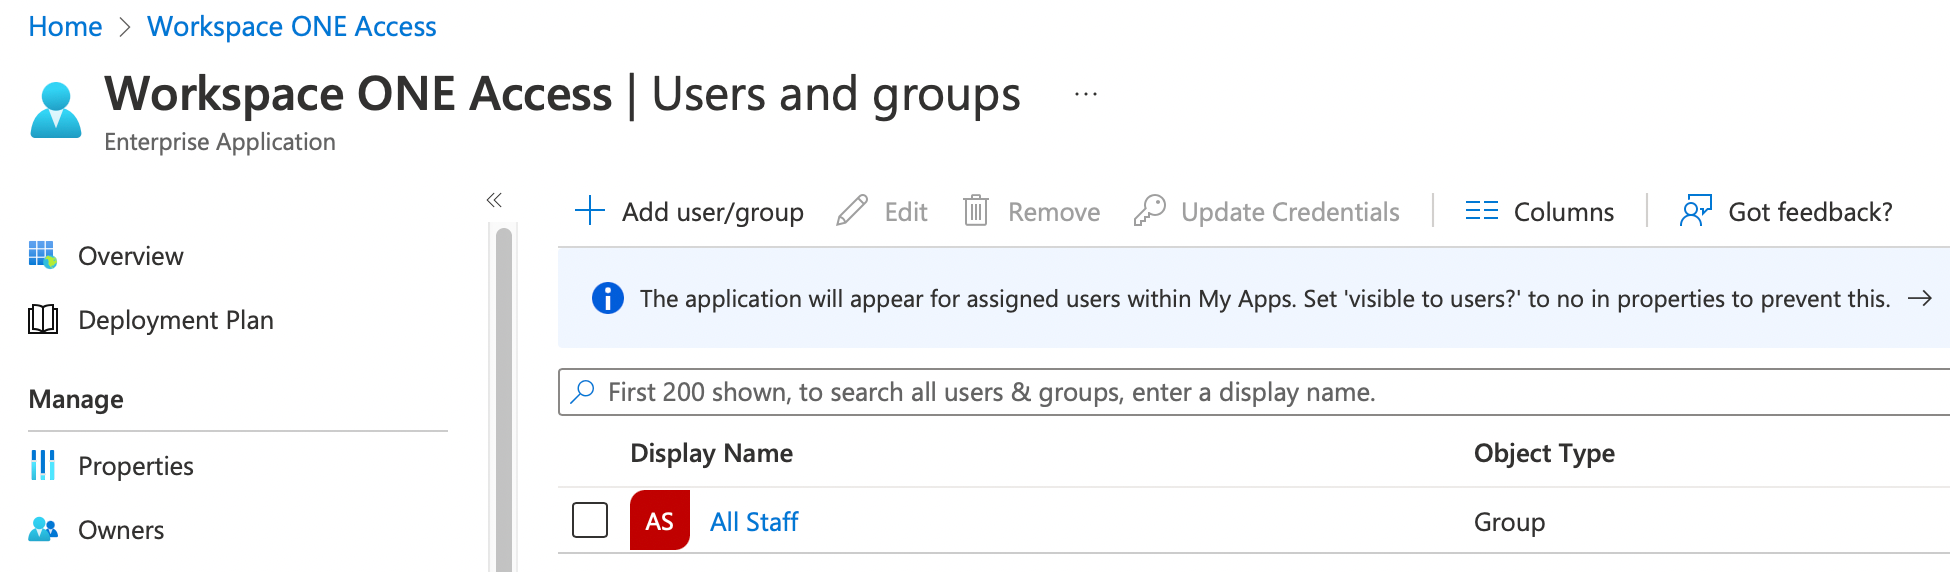
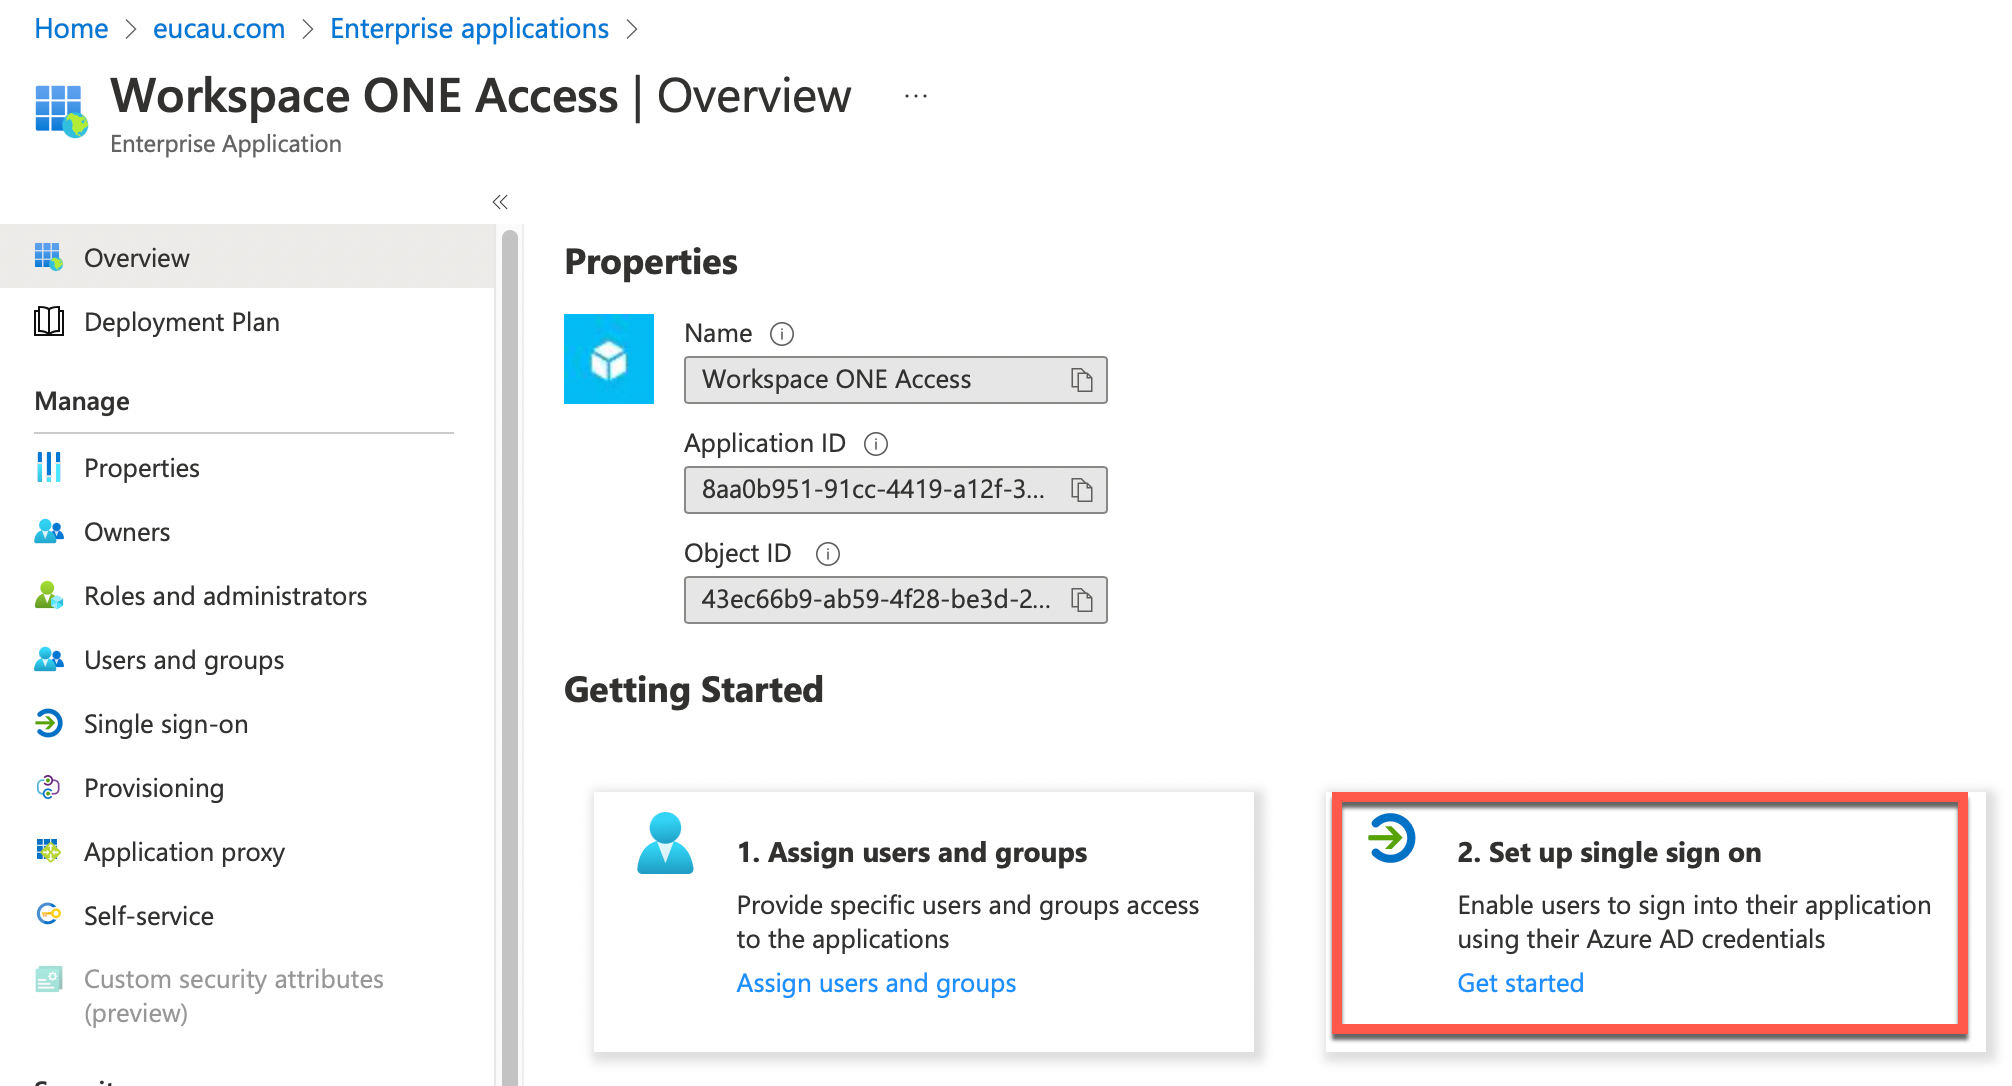
- Next select the option 1. Assign users and groups

- In my case I selected a group I had already created called All Staff, which contains all users in my test lab. Click Assign. When your users/groups are added they will be shown as follows:
- Next select 2. Set up single sign on
- Select SAML as shown

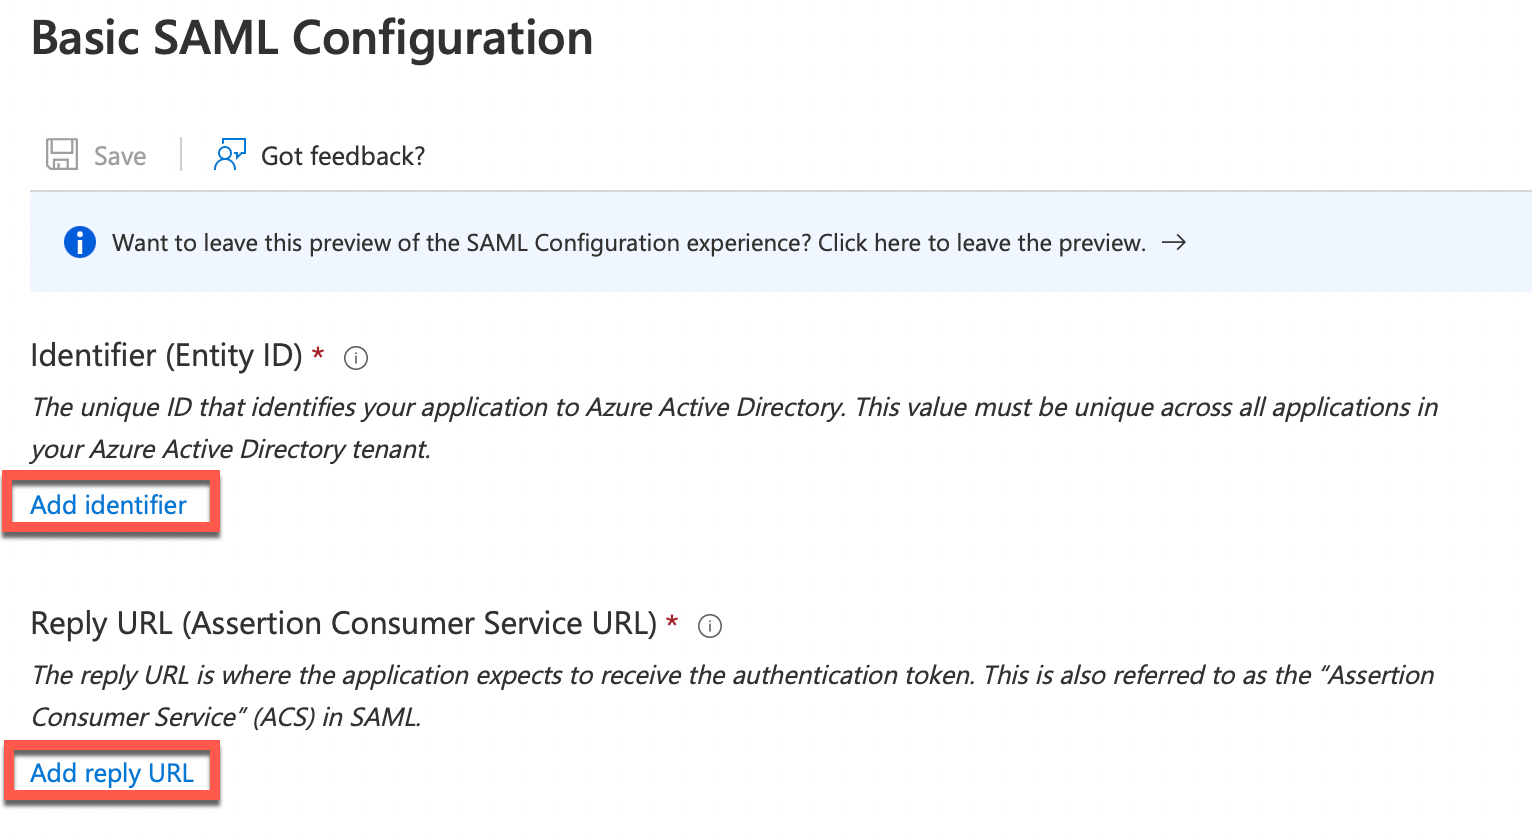
- Click on Edit

- We’re going to need two items of information for the Basic SAML Configuration. One is the Identifier (Entity ID), the other is the Reply URL as shown:
- We’ll obtain this information by opening another tab of your web browser (I liked to use Firefox as it renders the information more easily than Safari etc). Browse to https://{your-access-tenant-name}/SAAS/API/1.0/GET/metadata/sp.xml. Replace {your-access-tenant-name} with the DNS name of your Access tenant.
Below is an example from my lab Access tenant:


In summary your URLs would be something like the following:
Identifier (Entity ID): https://{your-access-tenant-name}/SAAS/API/1.0/GET/metadata/sp.xml
Reply URL: https://{your-access-tenant-name}/SAAS/auth/saml/response
- Enter this information into the Azure SAML fields as follows:
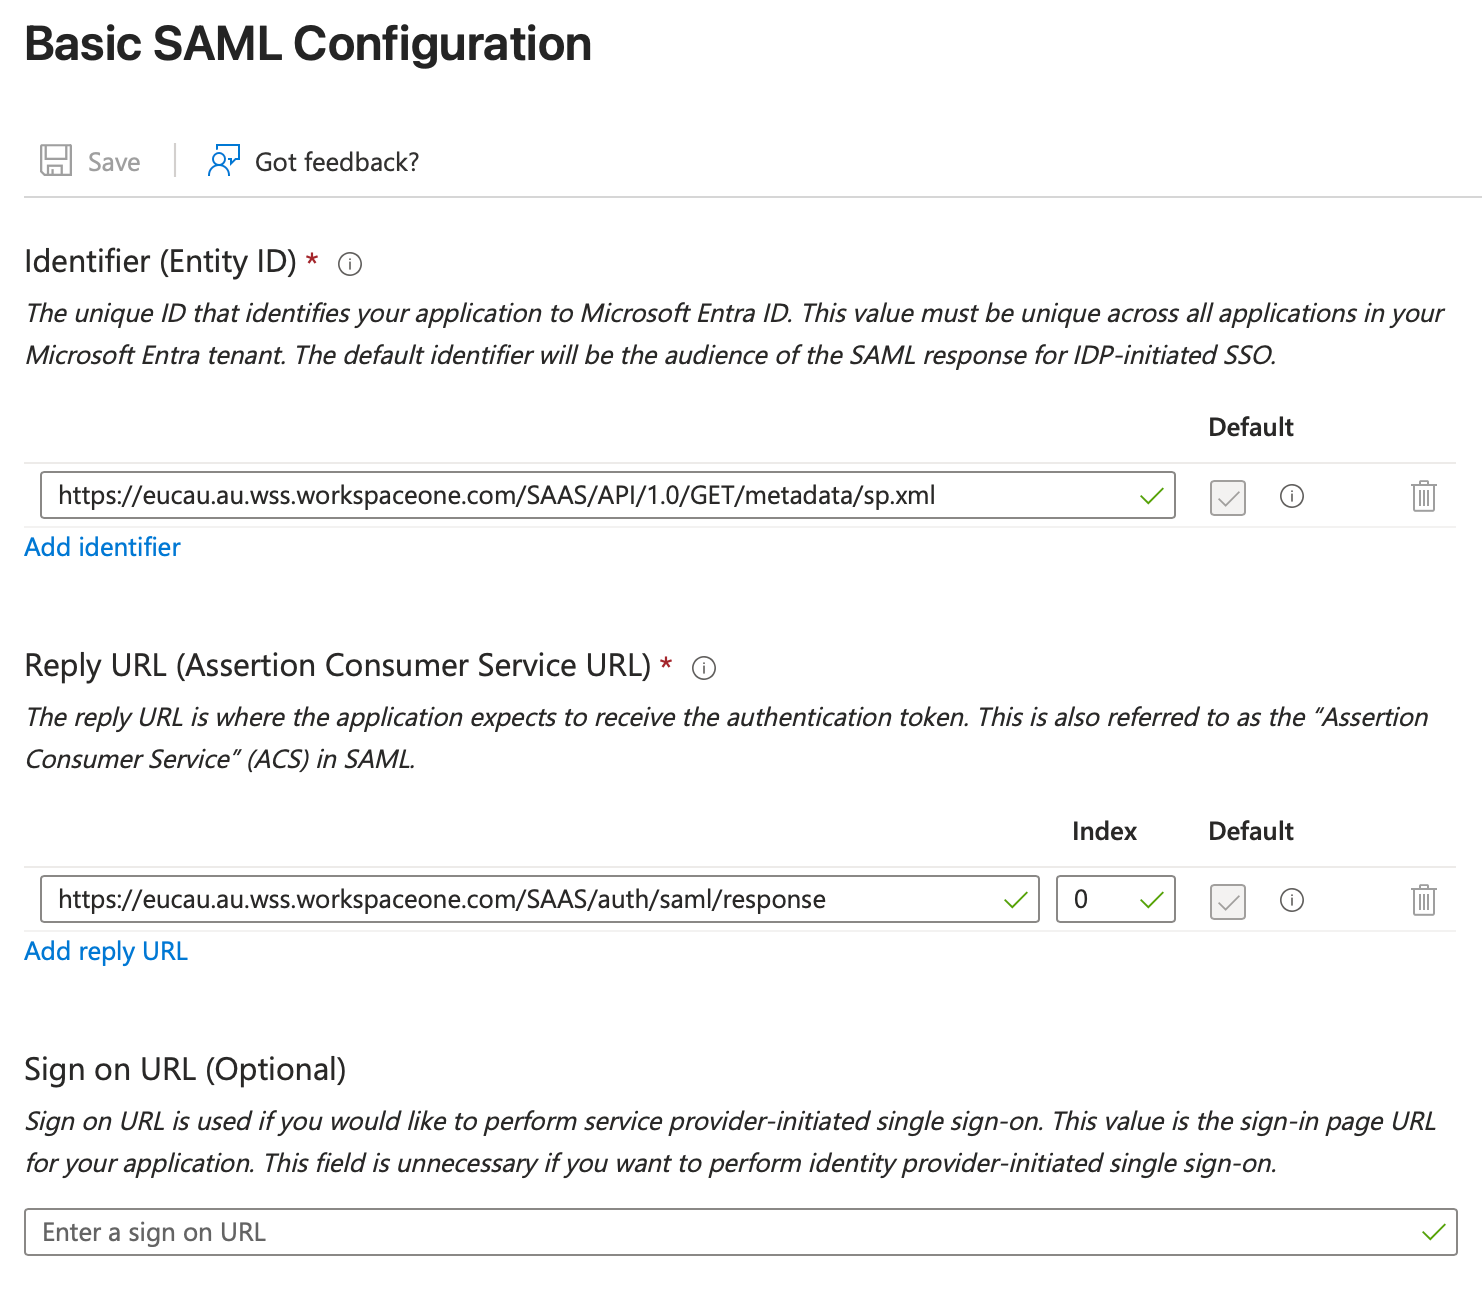
- Click Save
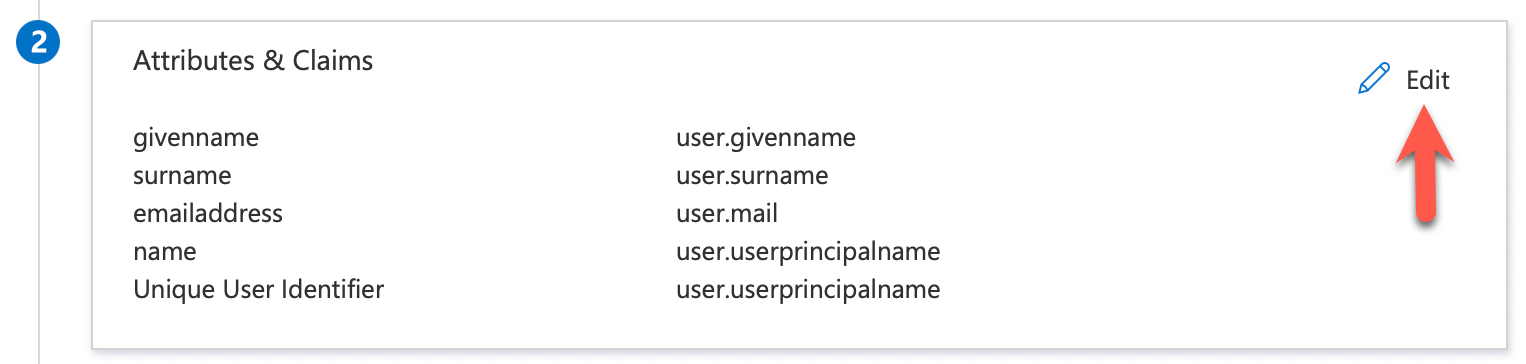
- Now select Attributes and Claims and click Edit
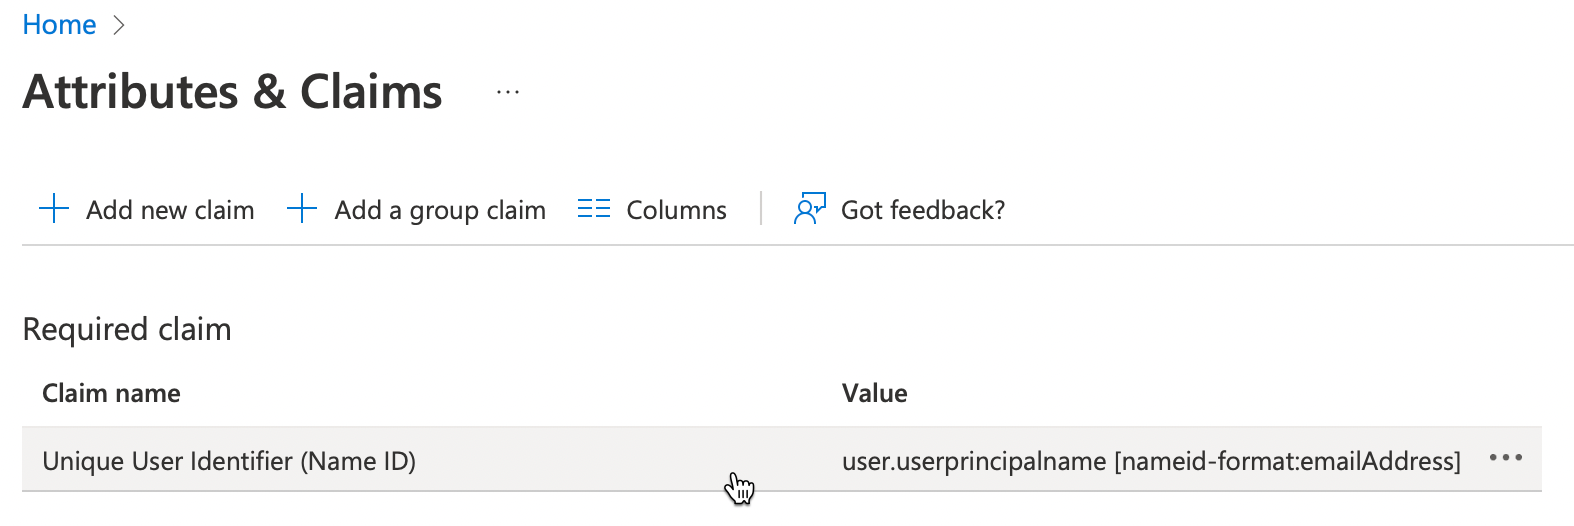
14. Click on Unique User Identifier (Name ID)
15. Expand claim conditions as follows, then under user type select Any and then select your Azure AD group.
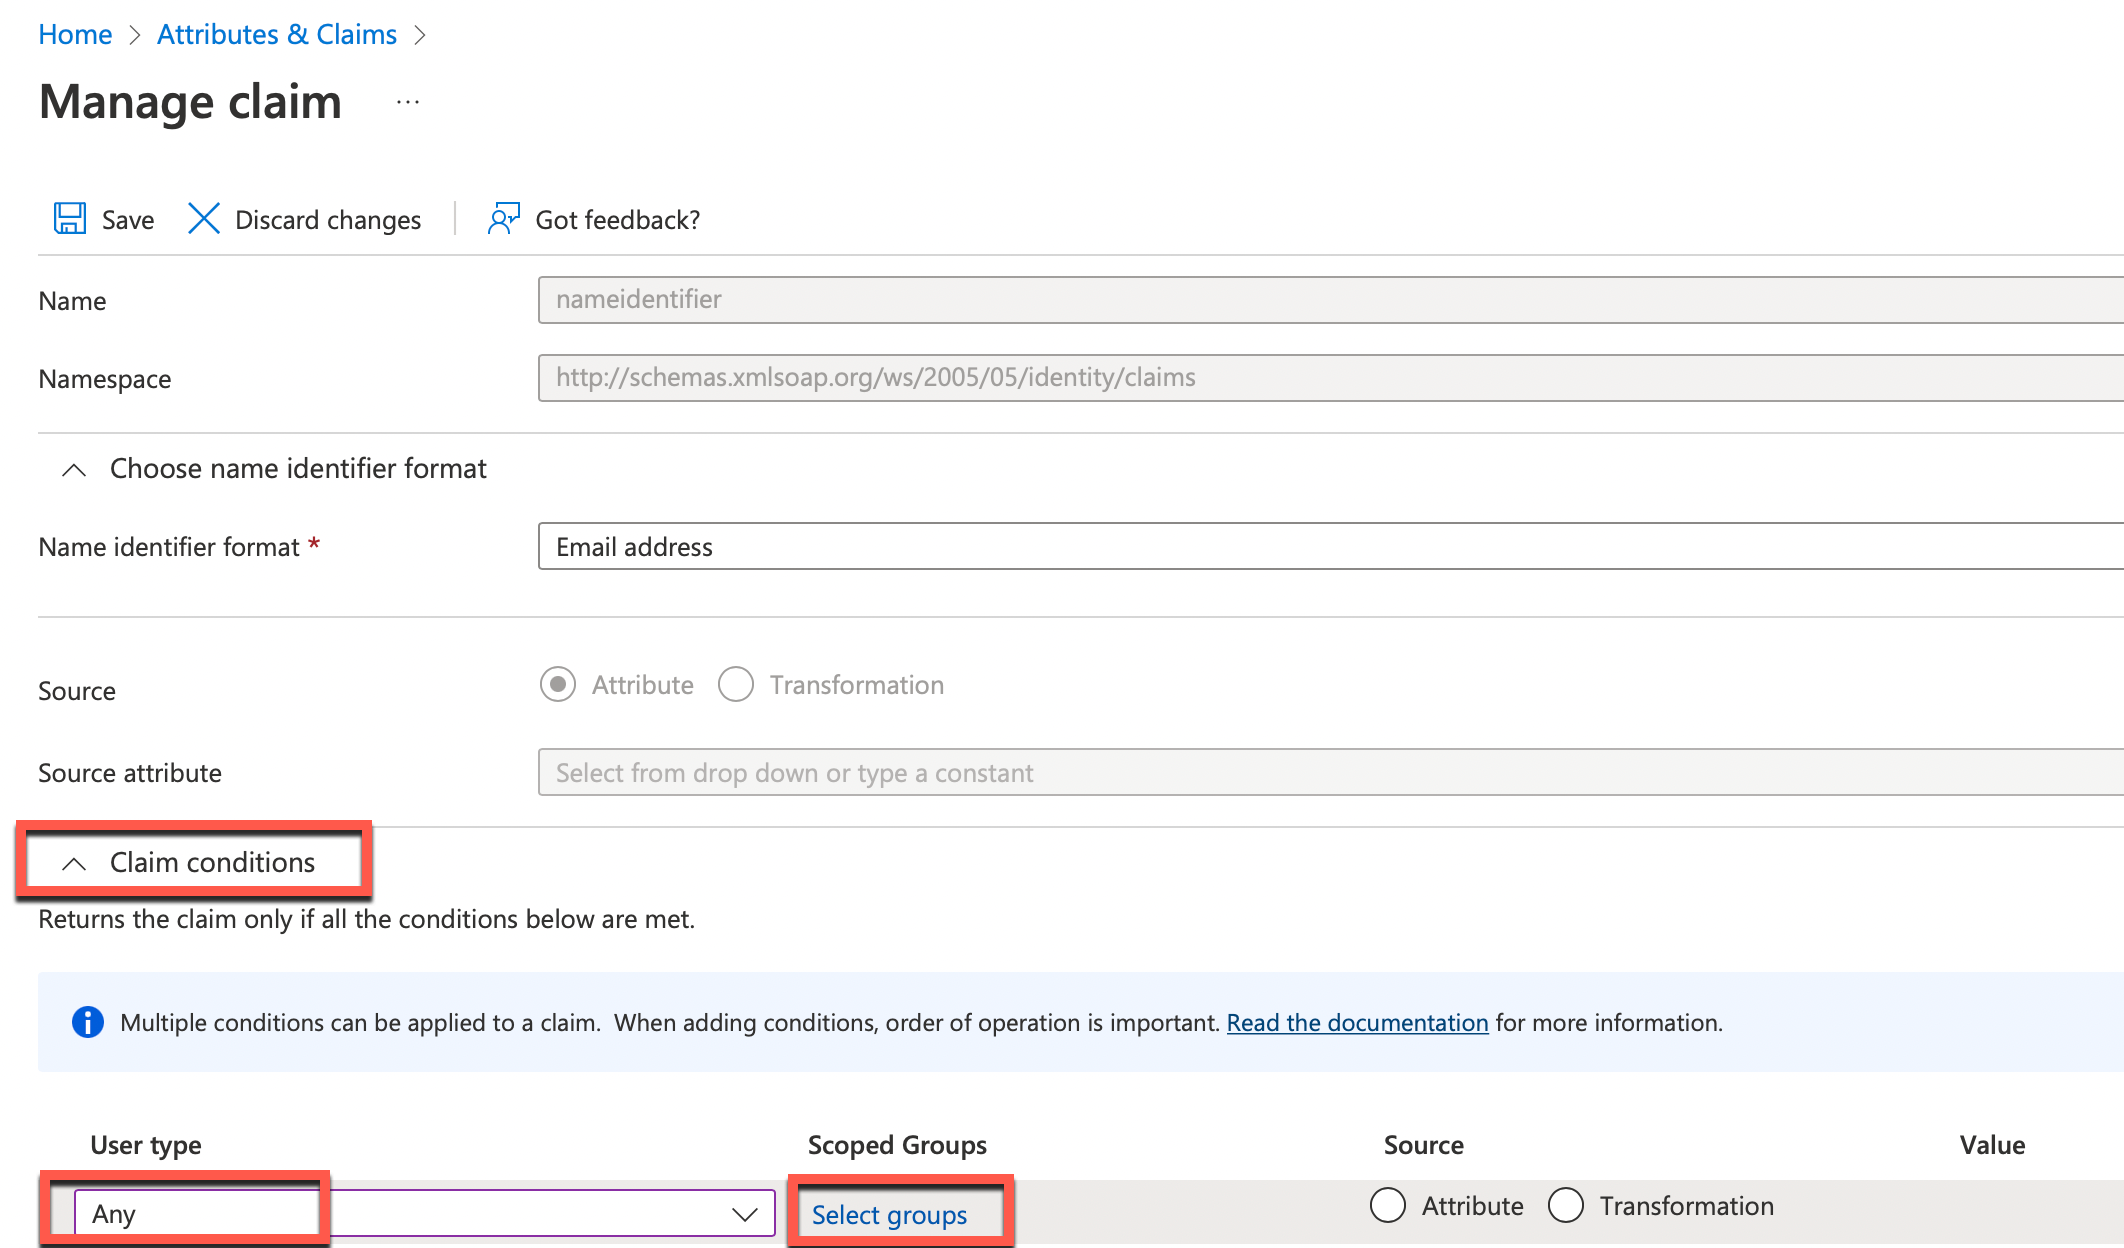
In my lab I selected All Staff. So choose your appropriate group. Next select Attribute and for the value select user.mail. My lab settings are shown below:

Click Save when completed
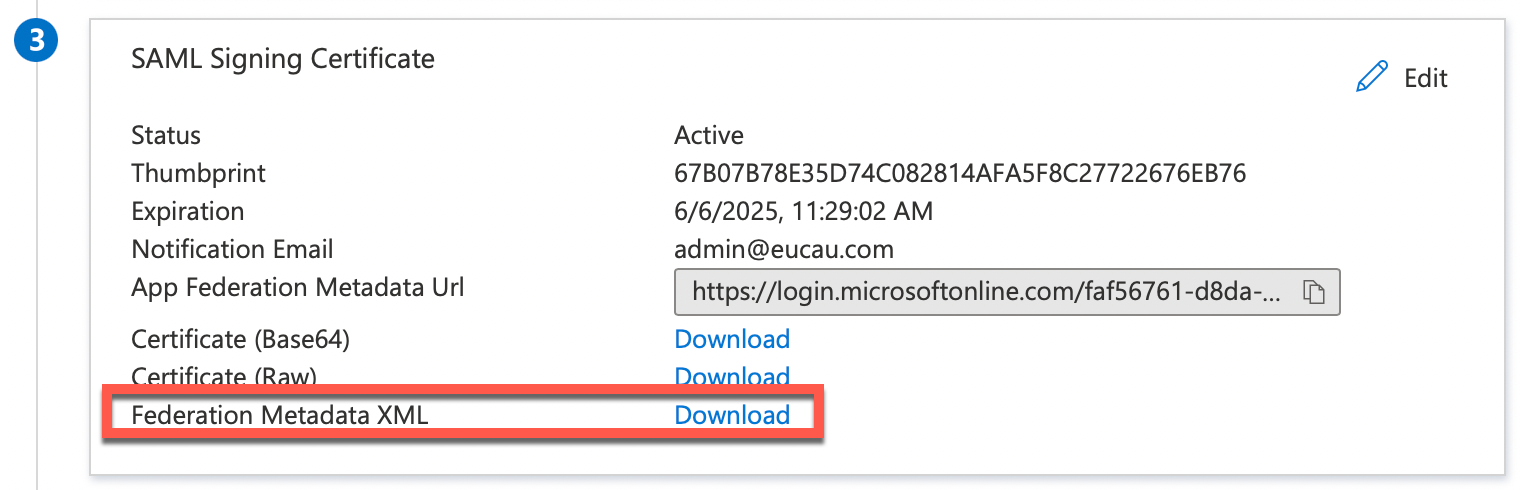
16. Next select Download next to Federation Metadata XML and save this file.
17. Login to the Workspace ONE Access administrator console. Select Integrations – Identity Providers – Add Identity Provider and select Create SAML IDP.
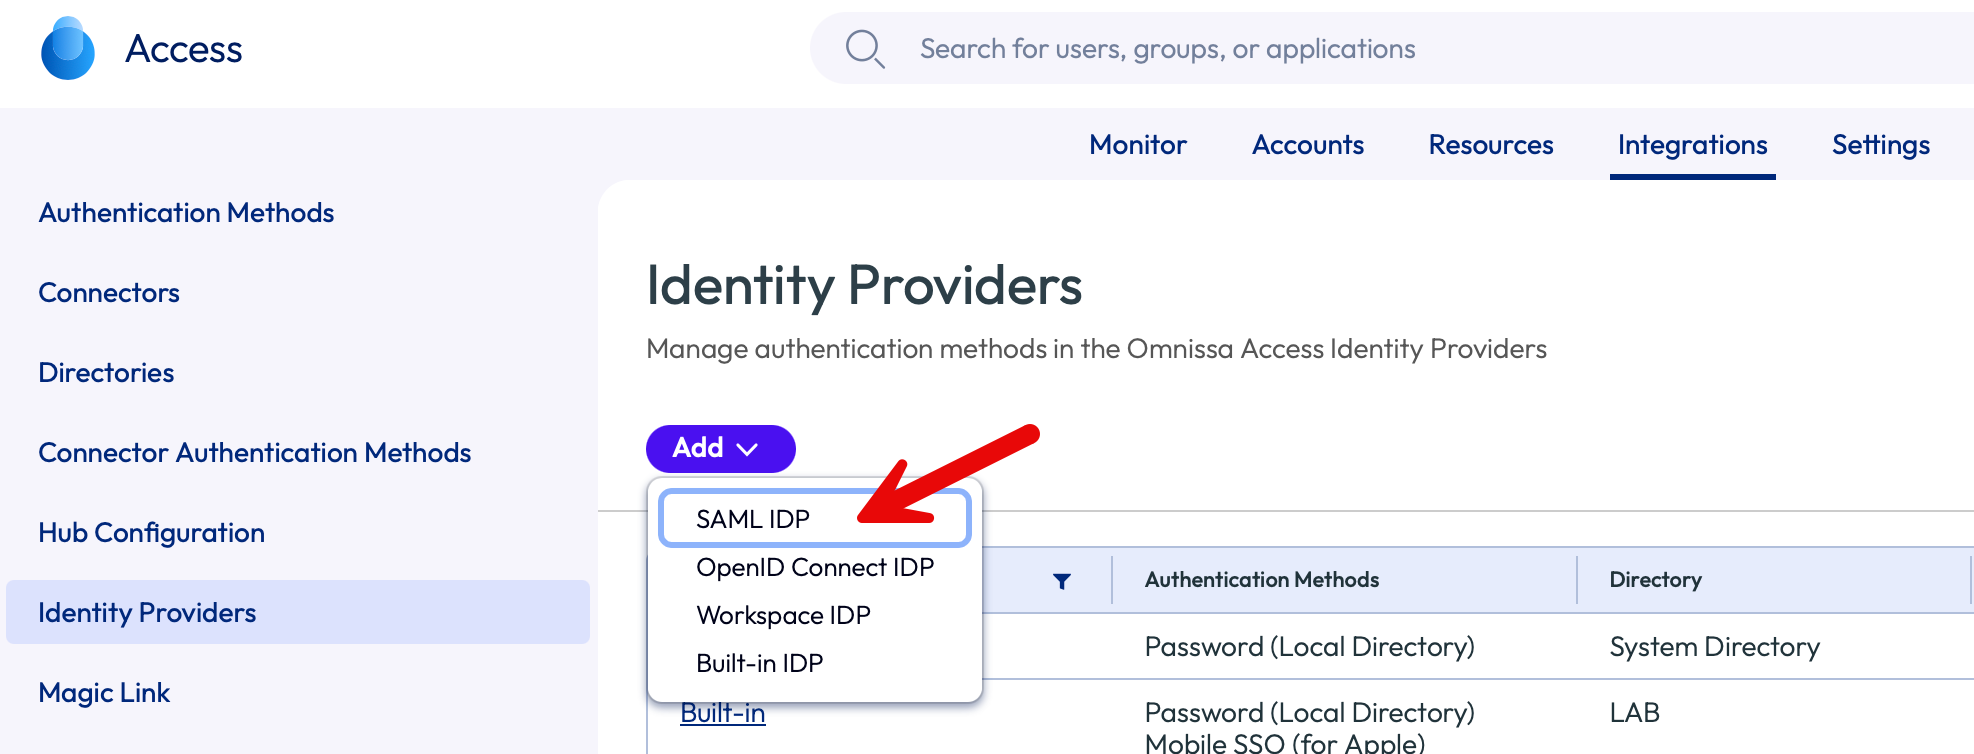
18. Enter the name of your choice to Identity Provider which you are going to create. For example Entra AD. Select the Identity Provider Type of Microsoft Entra ID.
Open the Enterprise Application Metadata XML file (downloaded in step 16 above) in text editor and paste all the contents into SAML Metadata field as shown:
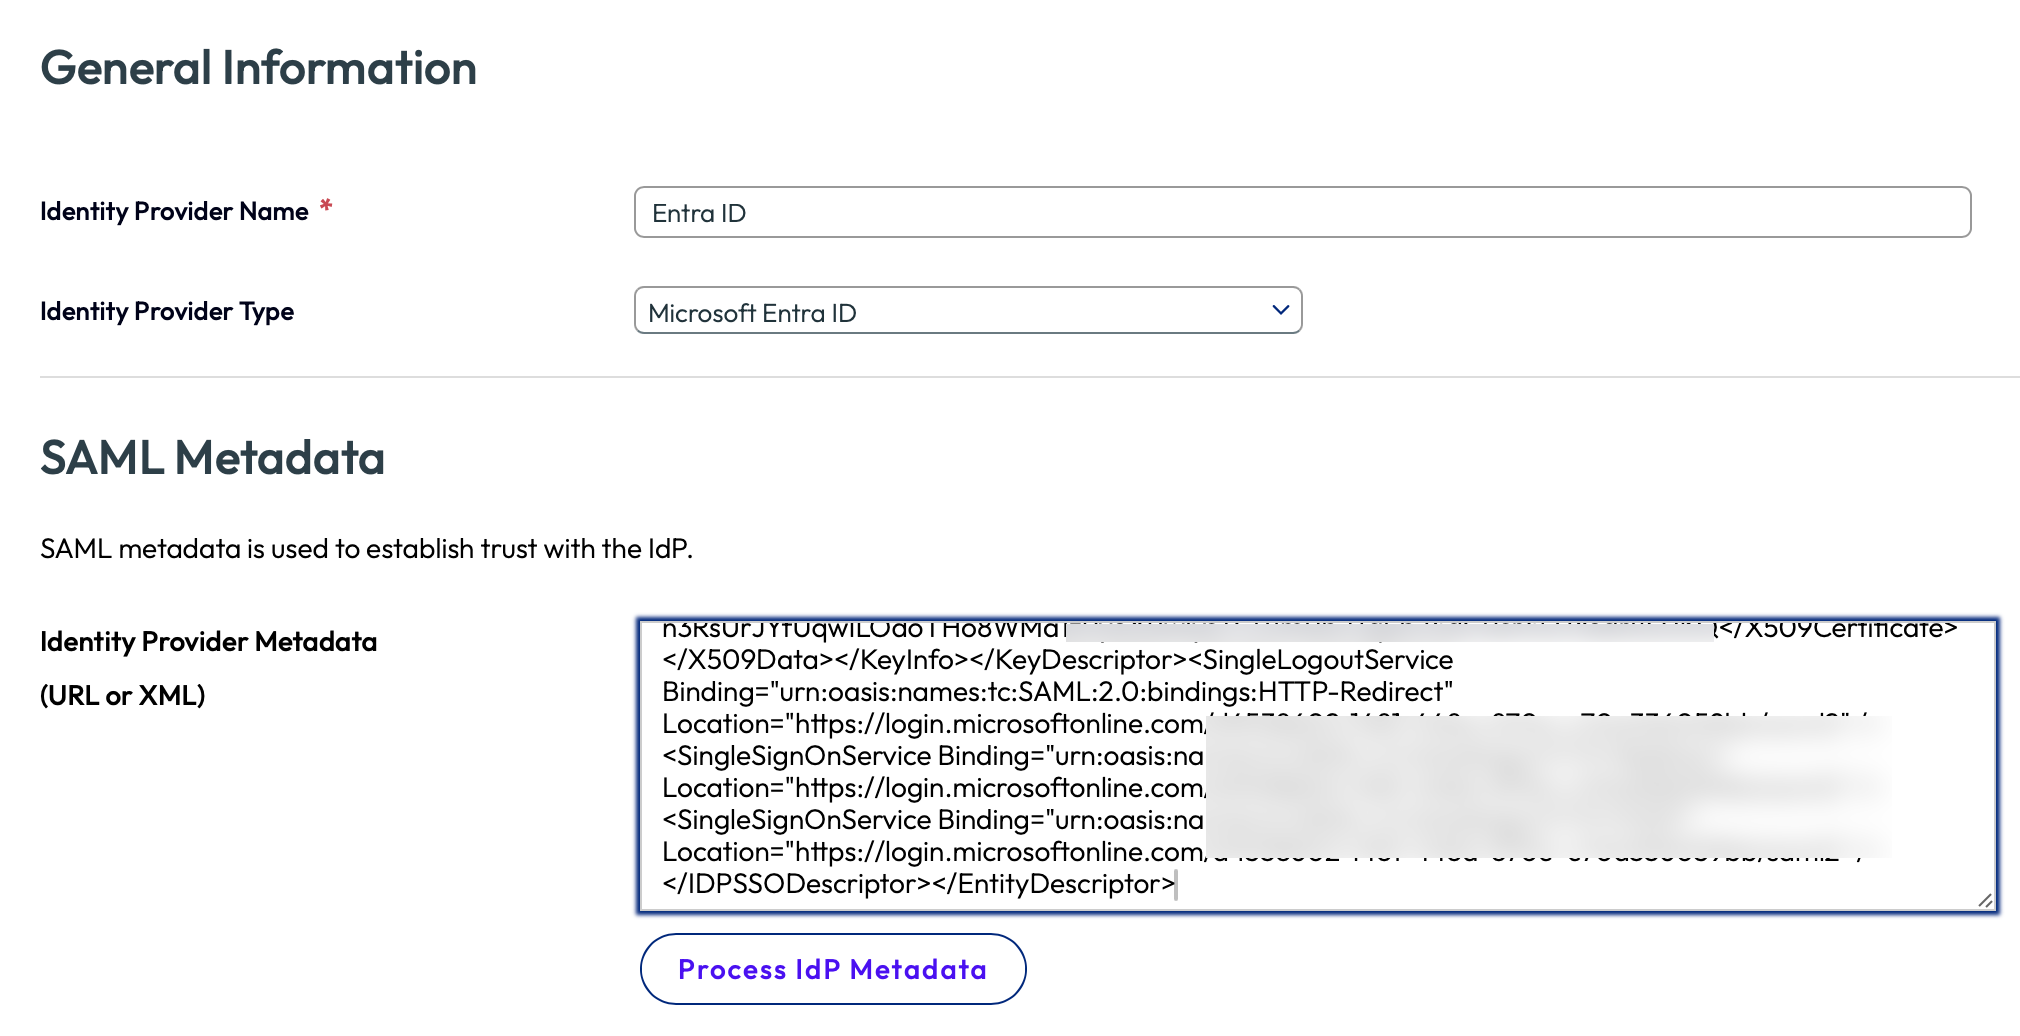
19. Click on the Process IdP Metadata button. You should see this message:

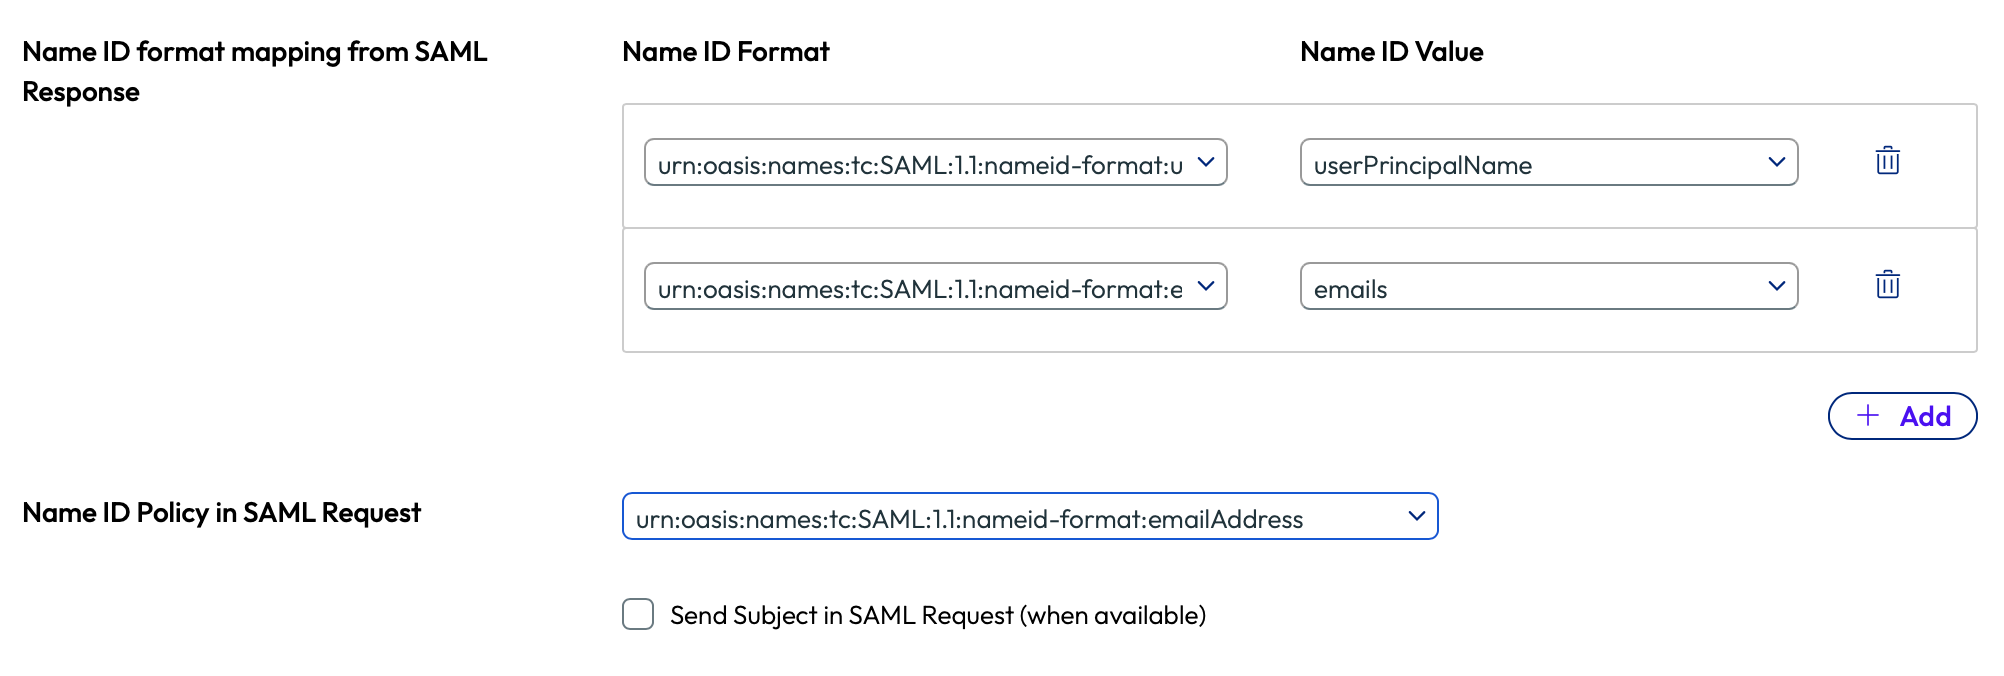
20. Match the Name ID Format as follows:
urn:oasis:names:tc:SAML:1.1:nameid-format:unspecified to userPrincipalName
also urn:oasis:names:tc:SAML:1.1:nameid-format:emailAddress to emails
Finally, set the Name ID Policy in SAML Request to: urn:oasis:names:tc:SAML:1.1:nameid-format:emailAddress as shown below:
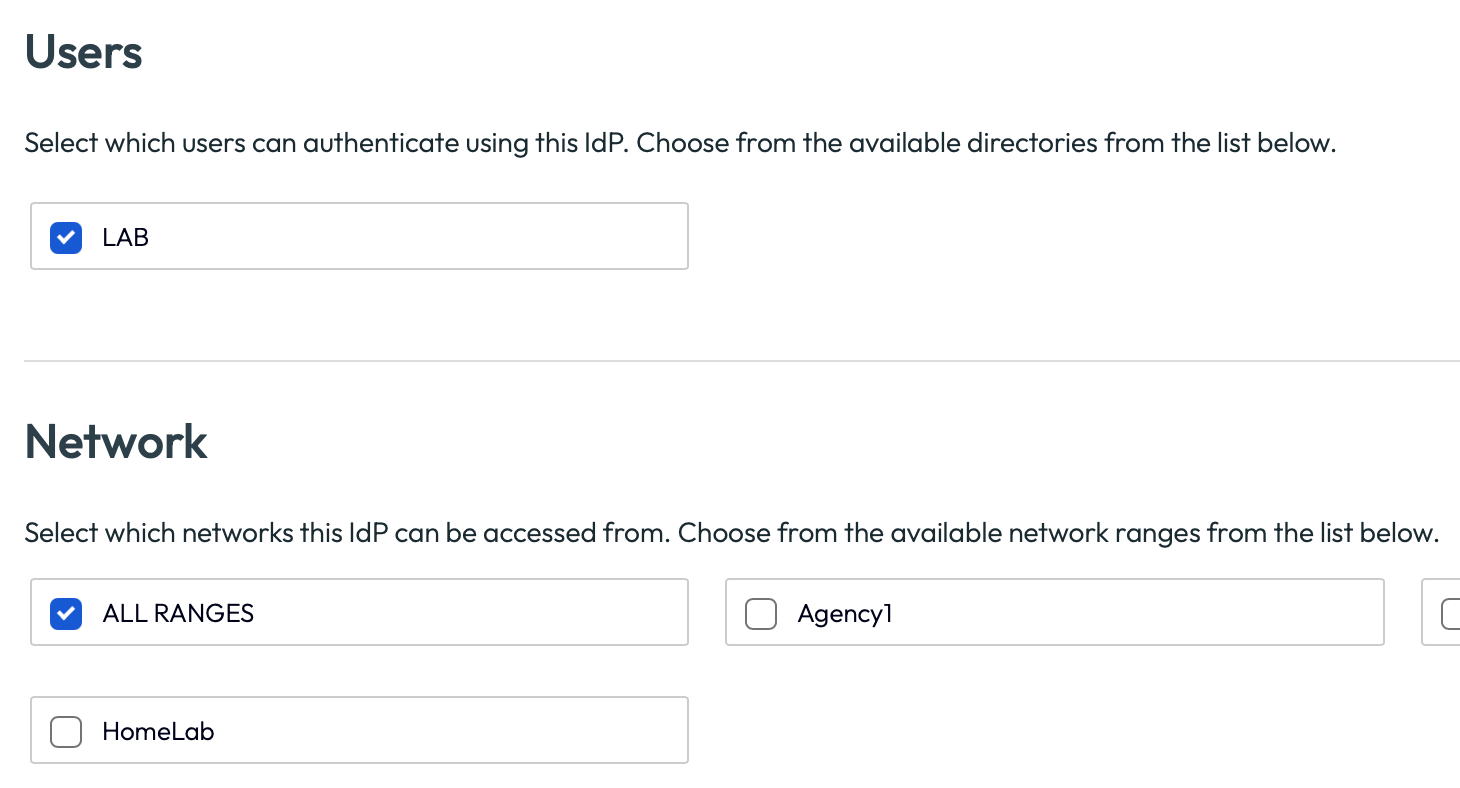
19. Select the directory that you have already added to your Workspace ONE Access tenant. In my lab it’s called LAB. Also select the network as ALL RANGES
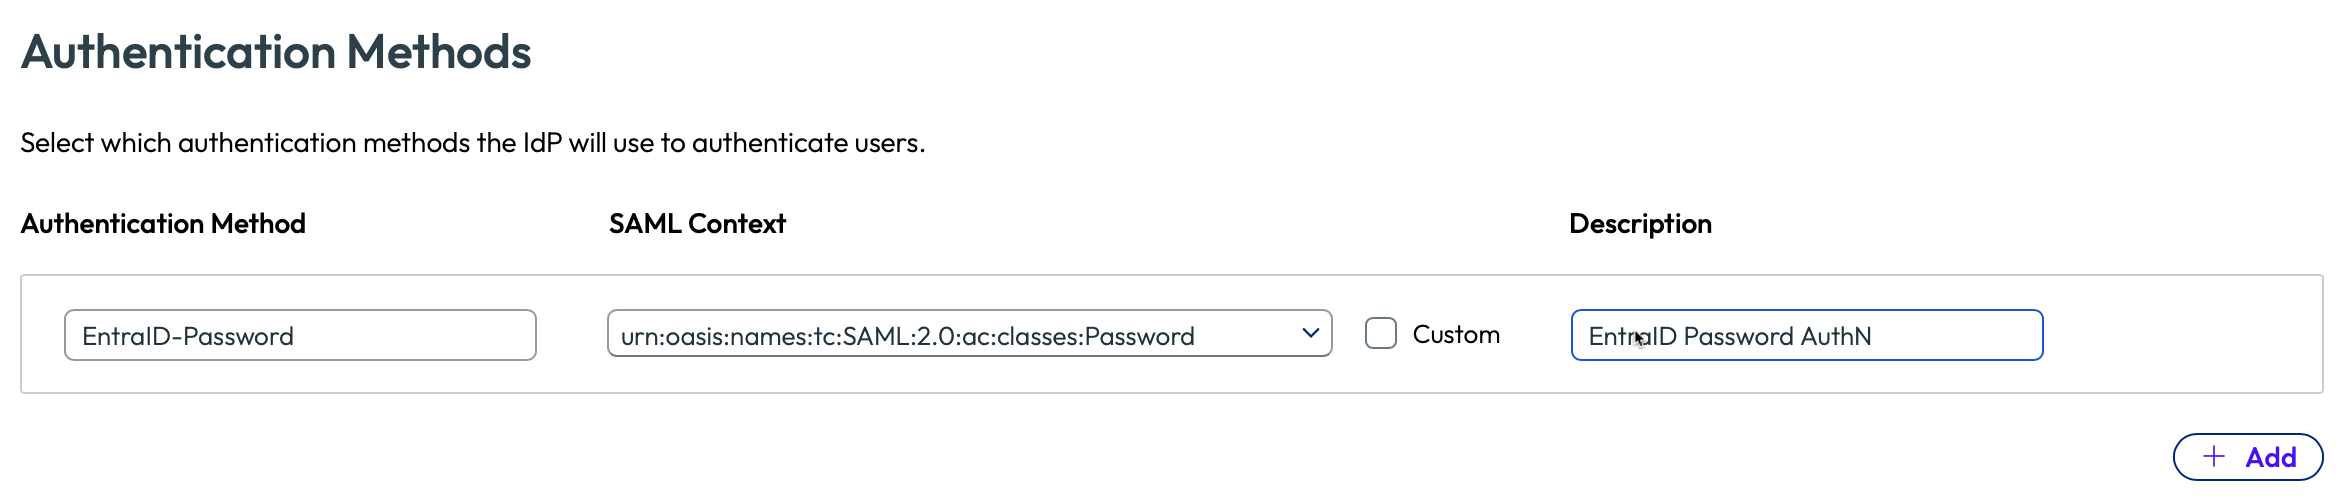
20. Create two authentication methods as follows:
AzureAD-Password urn:oasis:names:tc:SAML:2.0:ac:classes:Password
21. Scroll to the bottom of the window and click Save.
22. Confirm the IDP has been successfully created as follows:
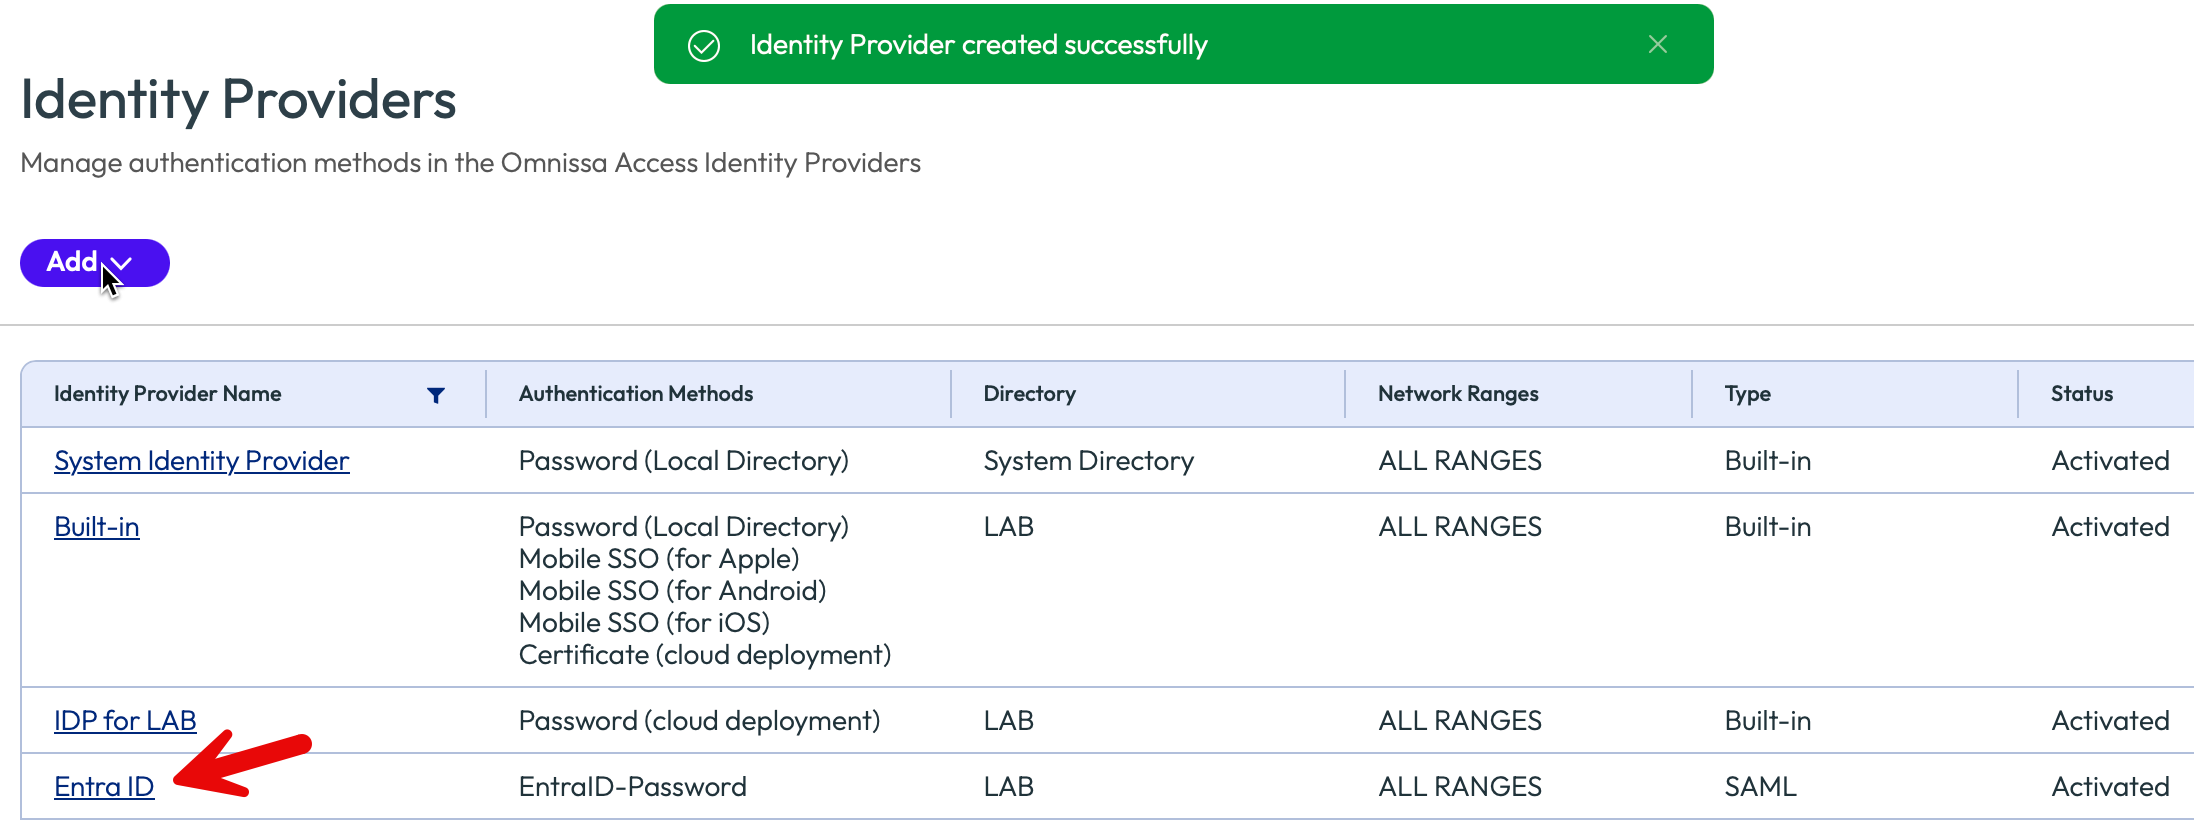
If Applicable: If you’re in the process of changing from the old Access URL format such as xxx.vmwareidentity.com to xxx.cn.workspaceone.com, make sure you also enable the checkbox Use New URL as shown:

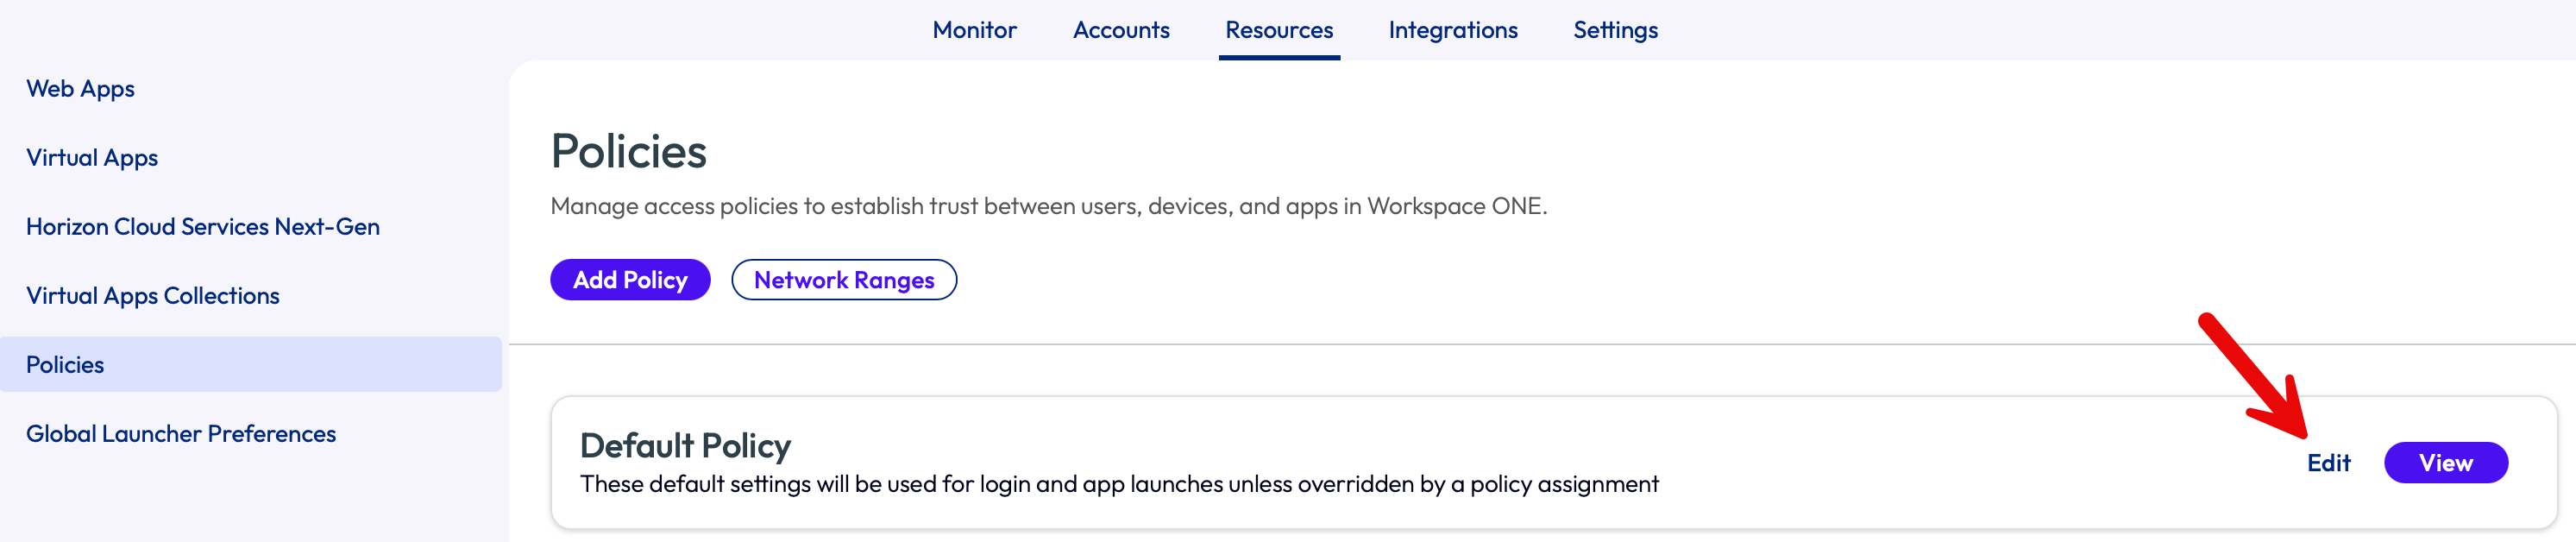
23. Next we’ll update the existing policy to select Azure AD as the authentication method for your users. Select Resources – Policies then click Edit
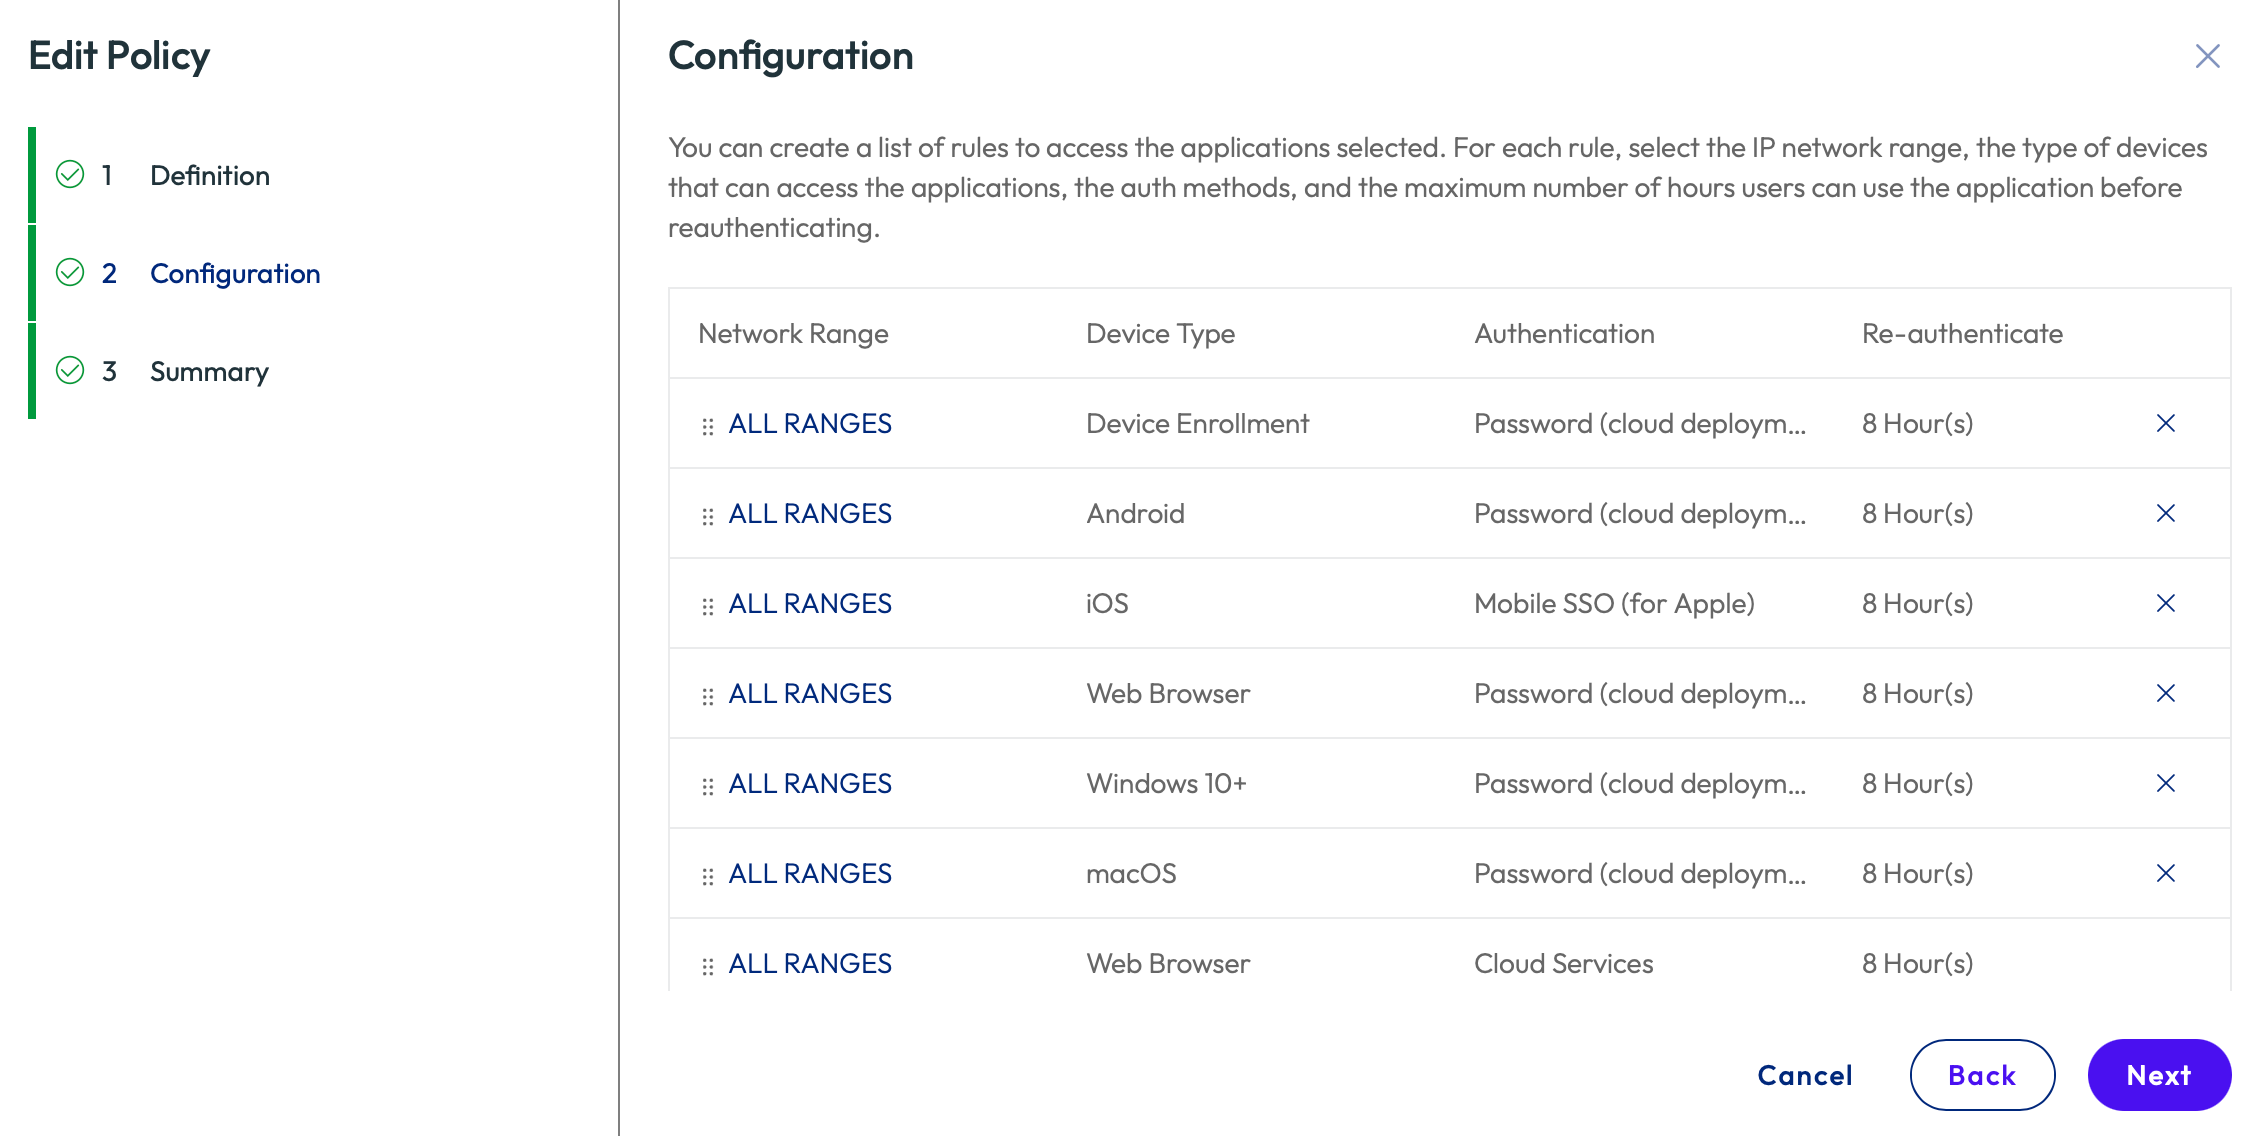
24. In my lab I wanted to test with a web browser. So first ensure Web Browser is listed appropriately ordered as below. As policies are processed from top down, it must be appropriate ordered ahead of other Device Types such as macOS, if I was testing from a Mac.
Within the default policy click Next. Select All Ranges next to the Web Browser policy type.
25. Change the policy to AzureAD-Password as the primary authentication, with an optional fall back method.
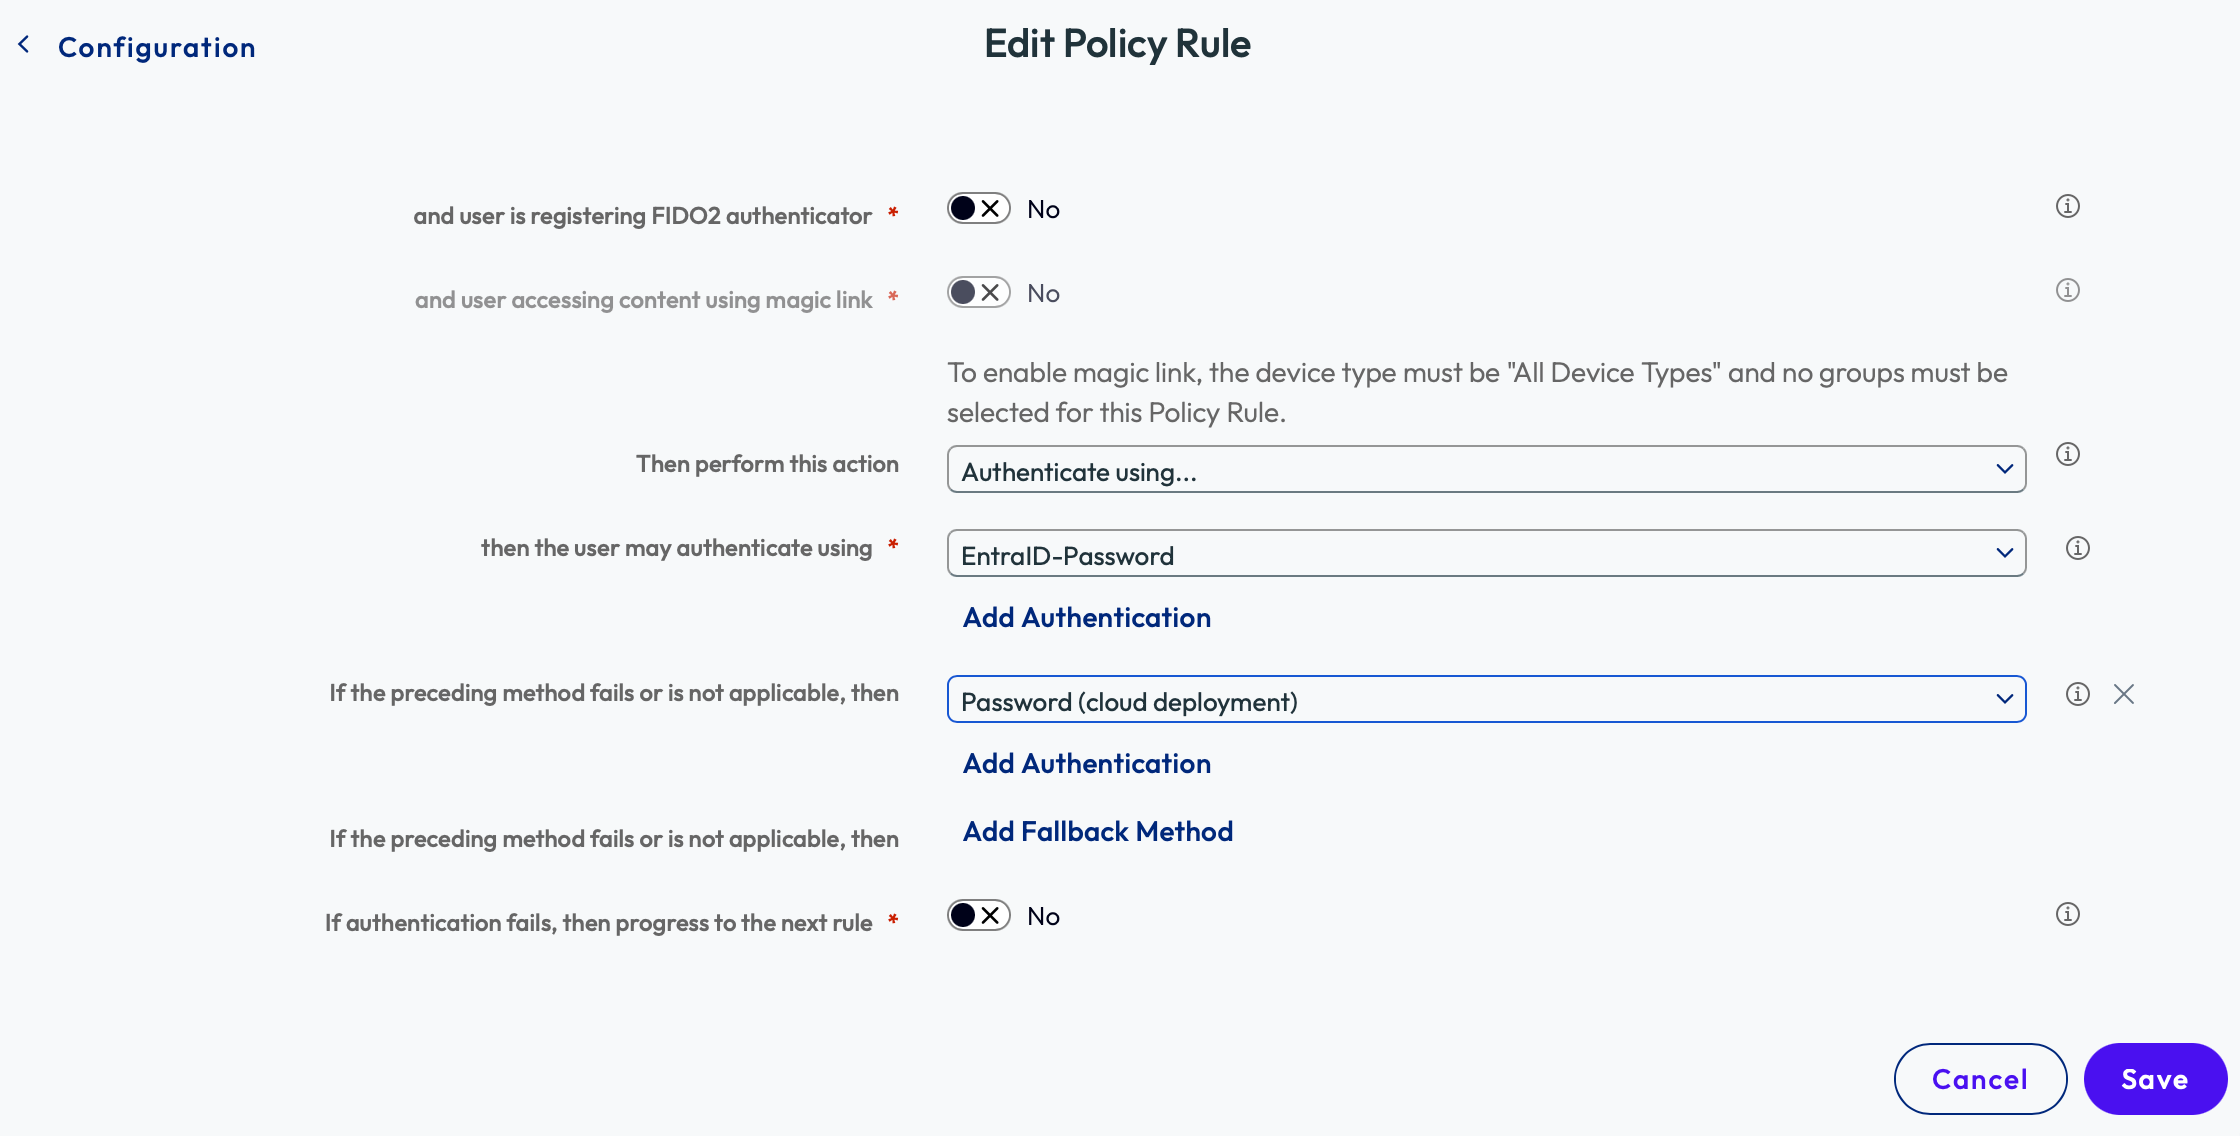
26. Click Save – Next – Save. This will save this updated policy.
27. To test your configuration, open a new web browser (or incognito page) and browse to your Workspace ONE Access tenant. You should be then redirected to Azure AD. Once you’ve authenticated successfully, you’ll be redirected back to your Access application portal.
A very short video showing the experience is shown below is detailed here
That’s it! You’ve now integrated Workspace ONE Access with Entra ID. This integration can be used by Workspace ONE UEM or Horizon.
Updates
- 8th March 2025 – Revalidated process and updated screen captures with refreshed Omnissa Access UI.
- 28th November 2025 – Updated article with new Access URLs and Migration option.

Do we have an article on adding AAD groups in Access please.
No, however please look at this article on setting up VMware Identity Manager but use Azure AD instead and follow the official documentation as required and video by Sacha – https://darrylmiles.blog/2023/11/01/integrating-vmware-identity-services-with-okta/
Note: VIM is currently only available for new UEM tenants.
Great. Thank you.
Do you know if you can sync SSO apps into the hub from Azure AD like you can with OKTA
No plans at the moment, sorry!
Hi, we’re facing AADSTS75011 : Authentication method ‘X509, Multifactor, X509Device’ by which the user authenticated with the service doesn’t match requested authentication method ‘Password’ Issue. Where to add custom attribute “ForceAuthn” ?
The user authenticated to Azure AD using one method (e.g., certificate-based authentication like X509 or multi-factor authentication), but the application or service being accessed (Workspace ONE Access in this case) explicitly requested a different method (e.g., Password). Azure AD requires that the authentication method used by the user matches the one requested by the service.
Check the Sign-in Logs in the Azure AD portal to confirm how the user is authenticating and what method is being requested by Workspace ONE Access.
Ensure the desired authentication method is configured and enabled for the user/application.
If you still have issues, try asking on our community website – https://community.omnissa.com/forums/forum/10-workspace-one-access/
Just a note: It seems like there’s a typo on Step 20.
I believe it should say that you’ll also set the “Name ID Policy in SAML Request to: urn:oasis:names:tc:SAML:1.1:nameid-format:emailAddress
As opposed to “Finally urn:oasis:names:tc:SAML:1.1:nameid-format:emailAddress to emails” which is a repeat of the previous sentence.
Thanks for the guide! This is very helpful
Great feedback, updated. Thanks!