
If you’re using the existing Mobile SSO for iOS devices in your Workspace ONE environment, you’re likely aware that setting it up can be complex and requires multiple payloads to function correctly. Workspace ONE UEM, together with Workspace ONE Access, now supports SSO Extensions for iOS, with macOS support planned for a future release.
The purpose of this blog article is to document the steps to activate this capability. Whilst this article was in the process of being written, I subsequently came across these other excellent resources:
- Bringing Omnissa iOS Mobile SSO to the next Level by Patrick Zoeller
- Migrating from Mobile SSO (for iOS) to the New Mobile SSO (for Apple) Extension (official documentation)
Setting up Mobile SSO (for Apple)
The new Mobile SSO (for Apple) Extension replaces the previous Mobile SSO (for iOS) authentication method and is available with Workspace ONE Access SaaS only.
This authentication method is the recommended approach for iOS devices, replacing previous Mobile SSO (iOS) using Kerberos.
Enable the Workspace ONE UEM Certificate Authority
One option is to use a Microsoft Certificate Authority, or alternatively us the built in Workspace ONE UEM Certificate Authority.
Configure Mobile SSO (for Apple) Authentication Method
1. Select Groups And Settings – All Settings – System – Enterprise Integration – Workspace ONE Access – Configuration. Click on the Enable button.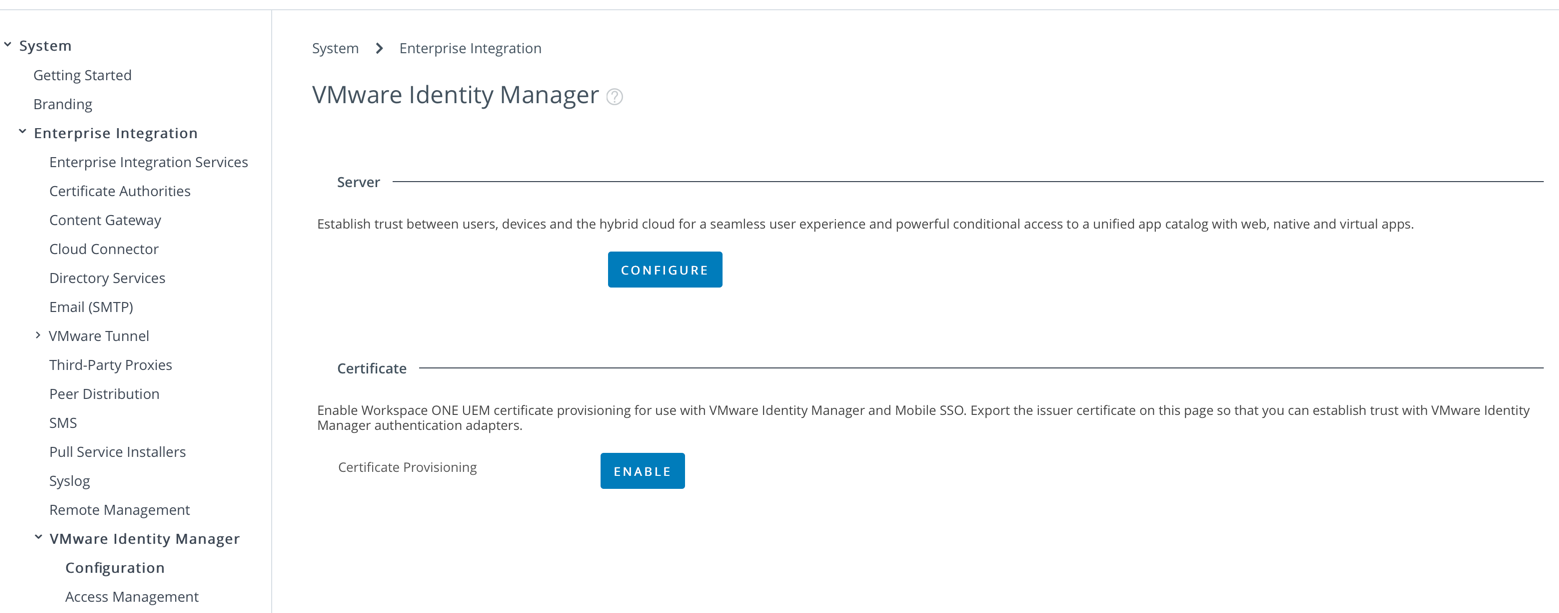 You’ll then be shown that the certificate provisioning is enable as shown:

2. Select Export to export the Issue Certificate and save this to your computer. We’ll use this later for iOS, Android, Windows 10 and macOS.
3. Open the Workspace ONE Access console and select Integrations – Authentication Methods. Select for Mobile SSO (for Apple).
4. Click Configure
5. First for Enable Certificate Adapter, toggle the option to Yes. Click Select File.. and upload the Workspace ONE UEM Internal CA you downloaded from Step 1. Finally change the User Identifier Search Order to email | subject | upon

6. Before you click Save, if you scroll to the bottom of the screen you’ll notice you can select the Authentication Type on the device. You can toggle this to one of three options:
- none: SSO will not ask for any additional factors
- biometric: will ask for TouchID/Face ID
- biometric-passcode: will allow Touch ID/Face ID or Passcode
Start with none. Click Save.
7. Select Save
8. Navigate to Identity & Access Management – Manage – Identity Providers. Select the Built-In Identity Provider. Browse to Authentication Methods and select Mobile SSO (for Apple) as shown in the following example:

9. Select Save
10. Navigate to Identity & Access Management – Policies and modify the default access policy to include Mobile SSO (for Apple) as shown below. Save this new Policy Rule.

11. Click Save
Note: Ensure you’ve setup the ability to manage Apple devices by creating an APNS certificate as per this guide.
Create an Apple iOS Profile to deploy Identity Provider Settings
1. Within the Workspace ONE Access administration console, navigate to Devices – Profiles & Resources – Profiles. Select Add – Add Profile – iOS.
2. Select Device Profile
3. Enter a name for your iOS profile such as iOS Mobile SSO. Browse for SCEP and SSO Extension and Add both of these options.

4. For SCEP set the following options:

5. For SSO Extension, select WS1 Access and enter the DNS hostname of your Access tenant (mine is shown in the example below)

Unlike the Sign SignOn profile, if you leave the Bundle ID blank, it will apply to all applications.

6. Click Next, then assign this profile to your appropriate smart group before clicking Save & Publish

Verifying iOS SSO
With the settings applied to an iOS device, you can see these settings under Settings – General – VPN & Device Management – Device Manager as shown below.


You should then be able to login to Workspace ONE (via the application) or Safari on your iOS, then select your applicable SaaS application and successfully sign-in without being prompted for a password ! SSO with mobile applications will also now work too.
For interest, now change the Mobile SSO (for Apple) Device Auth Type from none to biometric as shown (make sure you click Save).

When you now try to launch the same SSO applications (such as Salesforce) you’ll be prompted to also use TouchID/FaceID as shown:
My colleague Patrick Zoeller has recorded three YouTube videos showing the user experience:
That’s it, let me know how you go! To stay connected to our other customers, partners and Apple SMEs, check out our iOS communities discussion group.

Allowed bundle IDs is not supported by Apple and hence won’t be honoured. We need to use denied bundle IDs. Any and all app will be able to do SSO. I worked around this by using generic as extension key which allows to enter denied bundle IDs.