
My brother (who is a chef) tells me I can’t cook. I assemble food. So I’ve really enjoyed Jamie Oliver’s 15 minute meals and trying new ideas at home. So in the spirit of cooking a meal in 15 minutes, I thought I’d document how easy it is to install the latest release of IBM BigFix in less than 15 minutes.
Let’s turn up those hot plates to full and start cooking…
- First start by downloading the server software from here. If your trying out the software (30 days/30 devices) download the evaluation version, otherwise you’ll want the non-evaluation version (IBM will have supplied you access to the license key center where you can download a license file)
- Run the BigFix-BES-9.0.586.0.exe installer
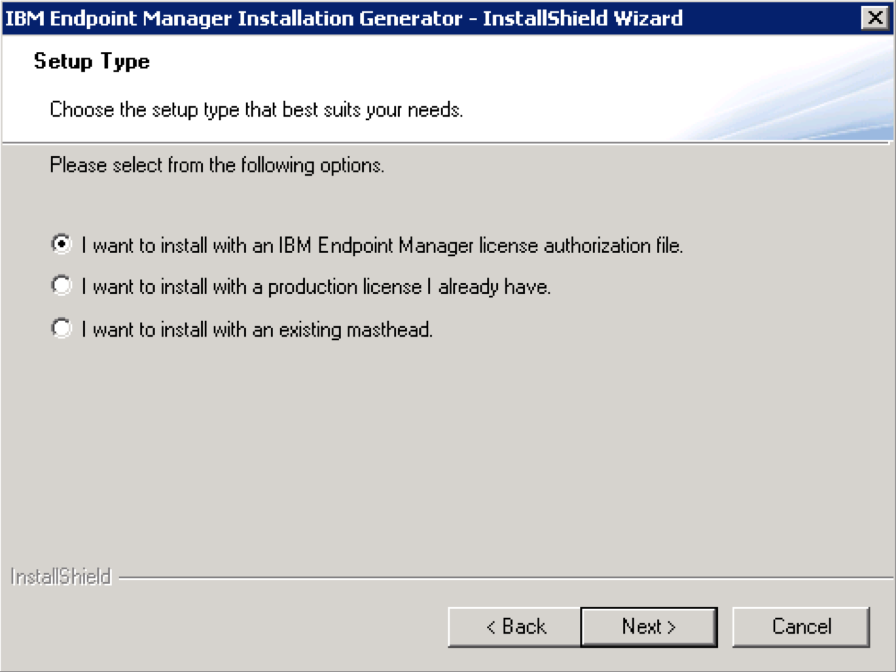
- Select Next and then either Evaluation or Production and then Next
- Accept the license agreement and click Next
- As I had used a production licenses I chose the top option here

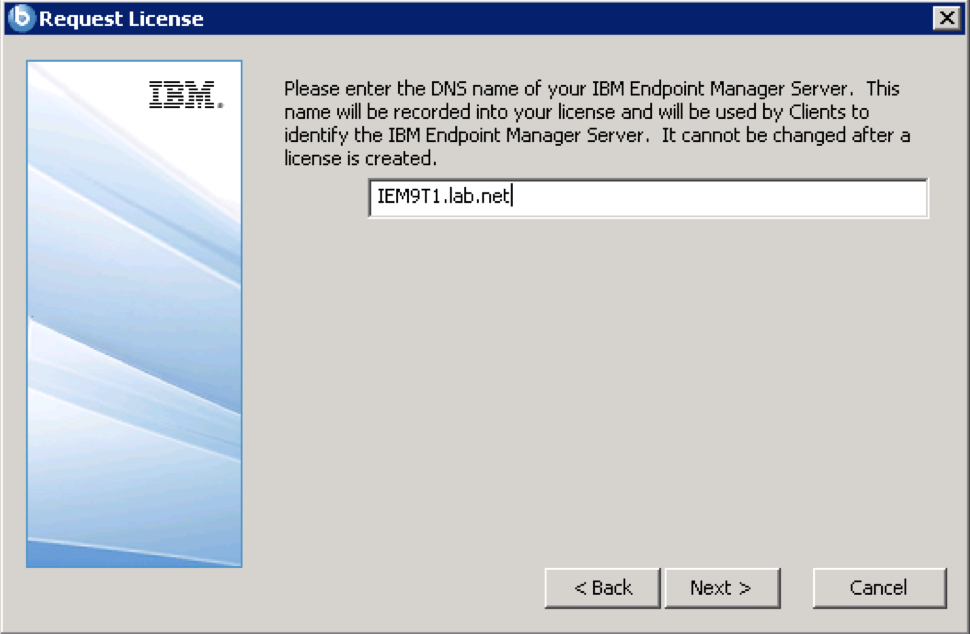
- Enter an appropriate DNS name for your BigFix server. You cannot change this later, so consider having a DNS alias if required that can be mapped to a server in your organisation. If you’re setting up BigFix on the Internet for a cloud service, consider using services like no-ip.com or elastic ip with AWS.

- I then selected the license file I had downloaded and clicked Next
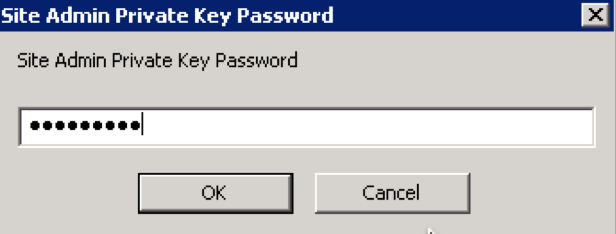
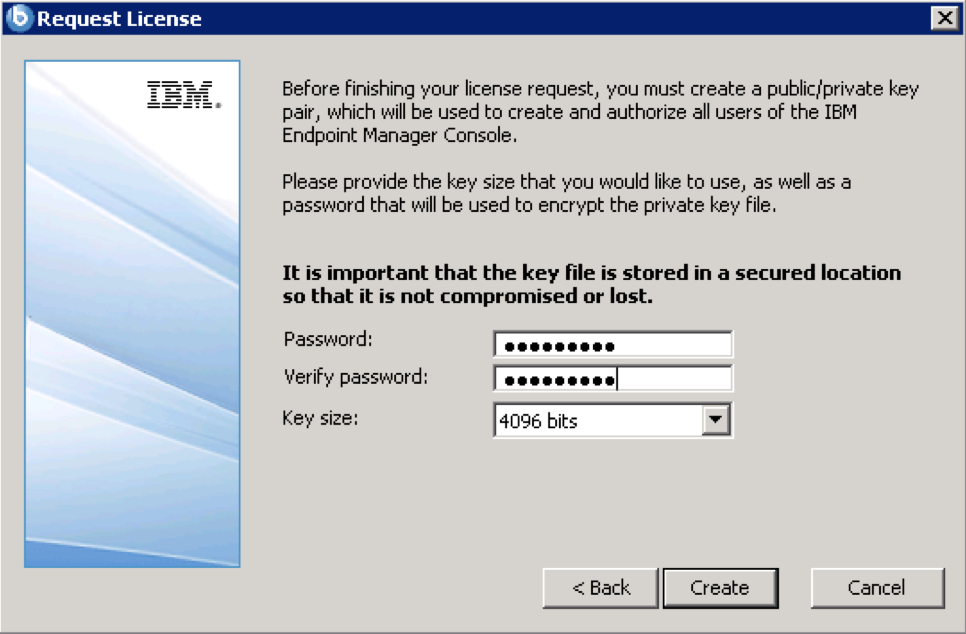
- Enter a unique password for your BigFix’s private key. Don’t forget this password !

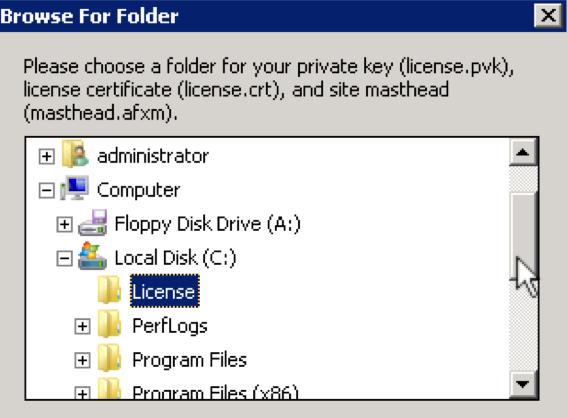
- Save location of the private key. I usually create a License folder on the server and save it there. For production environments this may be in a secure key location.

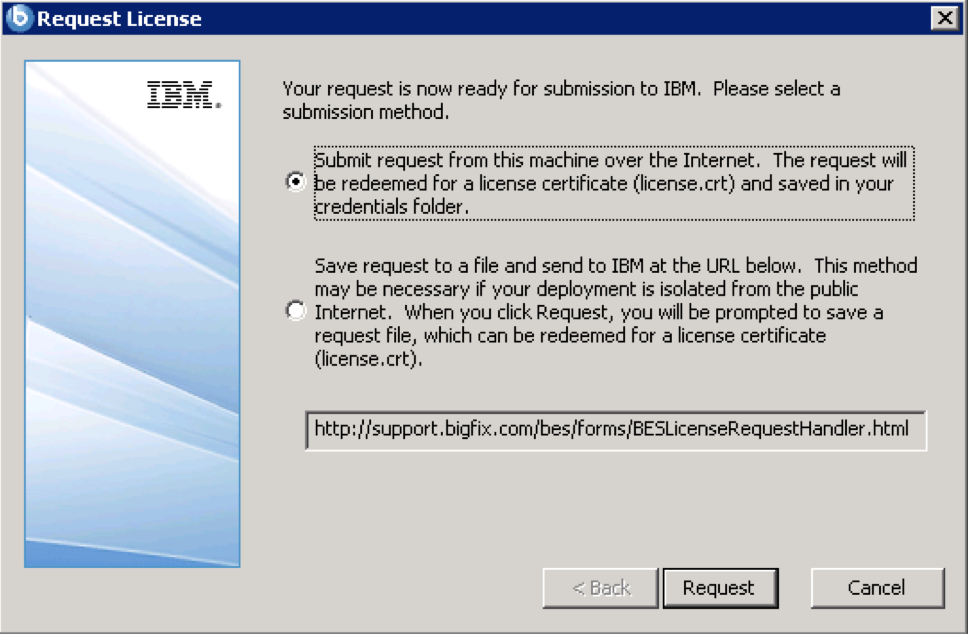
- You will now submit your BigFix server information to IBM. If you can browse the Internet with Internet Explorer you should be ok, however in some cases you might need to perform this via a two step process (the second option)

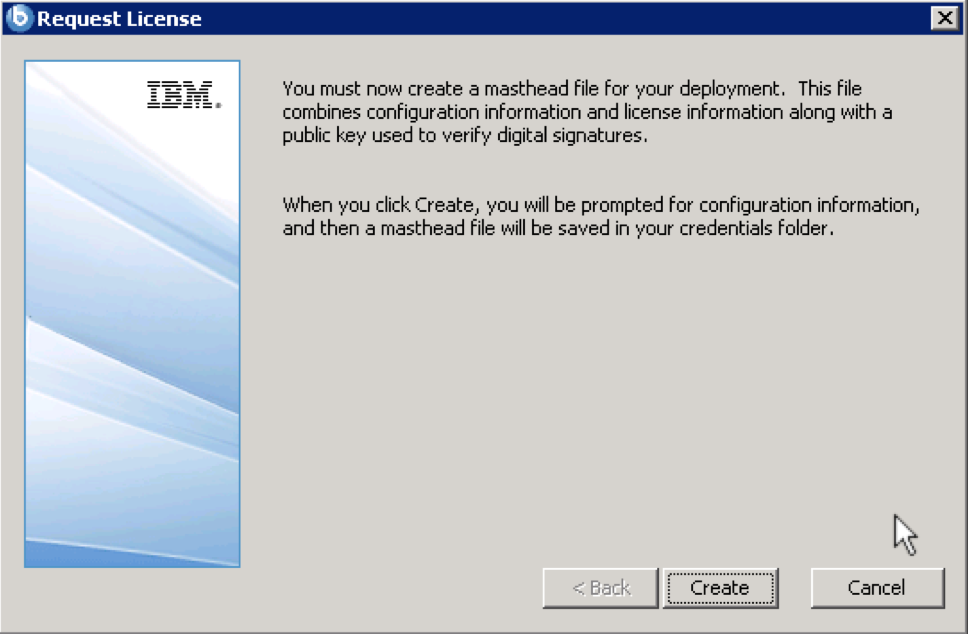
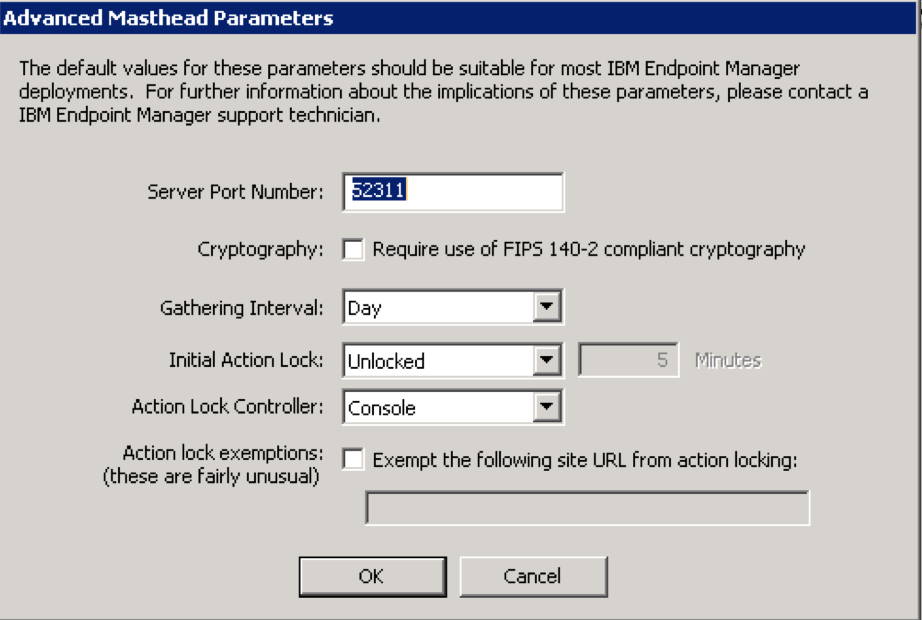
- Now create a masthead file for your environment. This file is used for clients to locate and securely communicate to your BigFix server


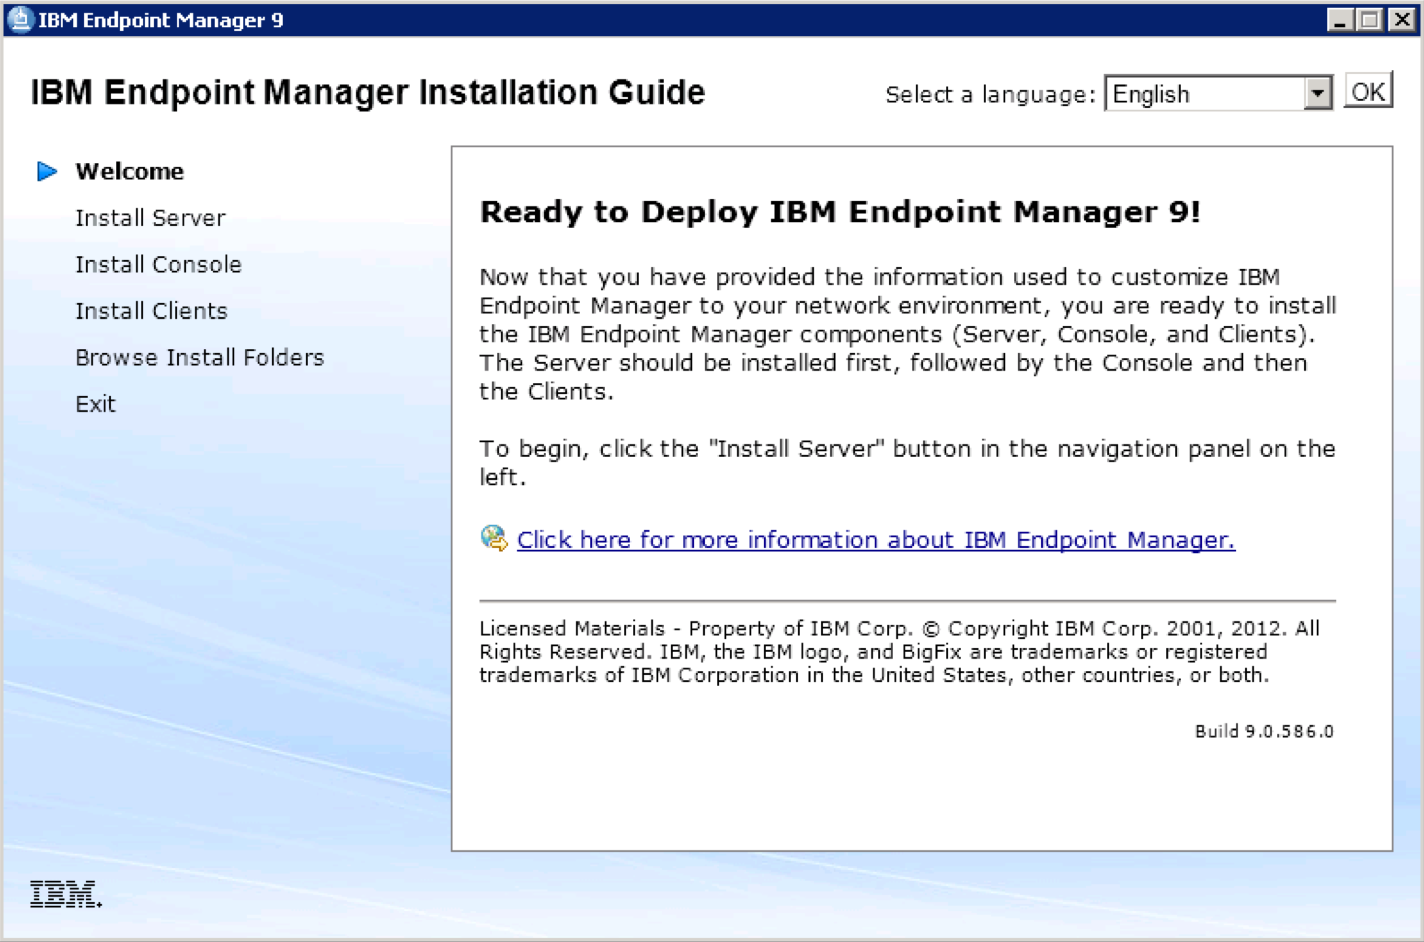
- Choose the location for where BigFix will save the Installers directory. This is the location where the Server, Console and Clients will be installed from below. You can accept the default directory, or maybe select a larger D: drive if appropriate. Then click Finish when complete
 Time so far, 7 minutes….
 - You’ll be prompted with the following window where you’ll then install the Server, Console and a Client on the server.

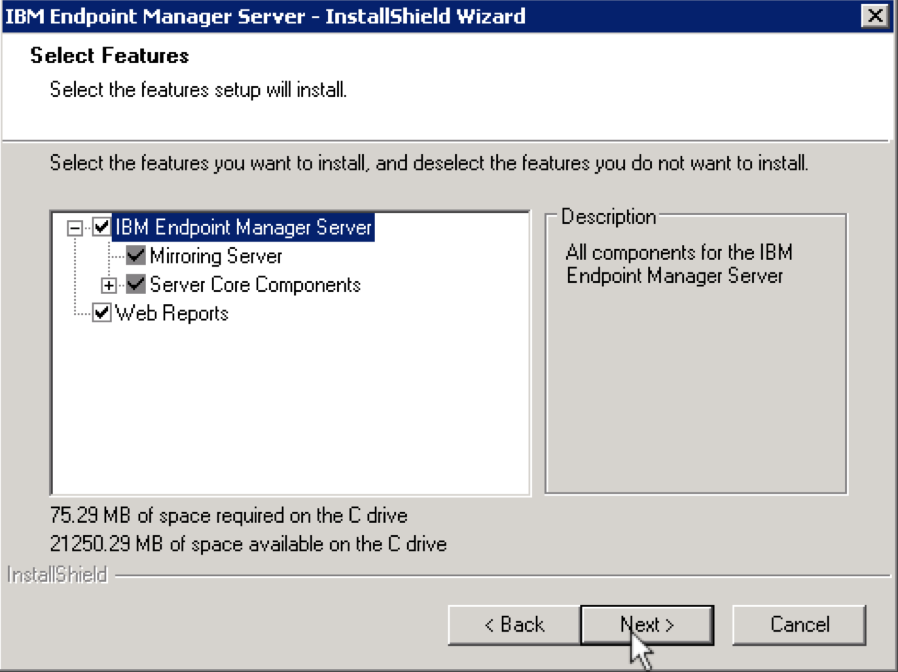
- Select Install Server and then select Install the Server on this computer
- Select Next and the following items you can leave as default and click Next

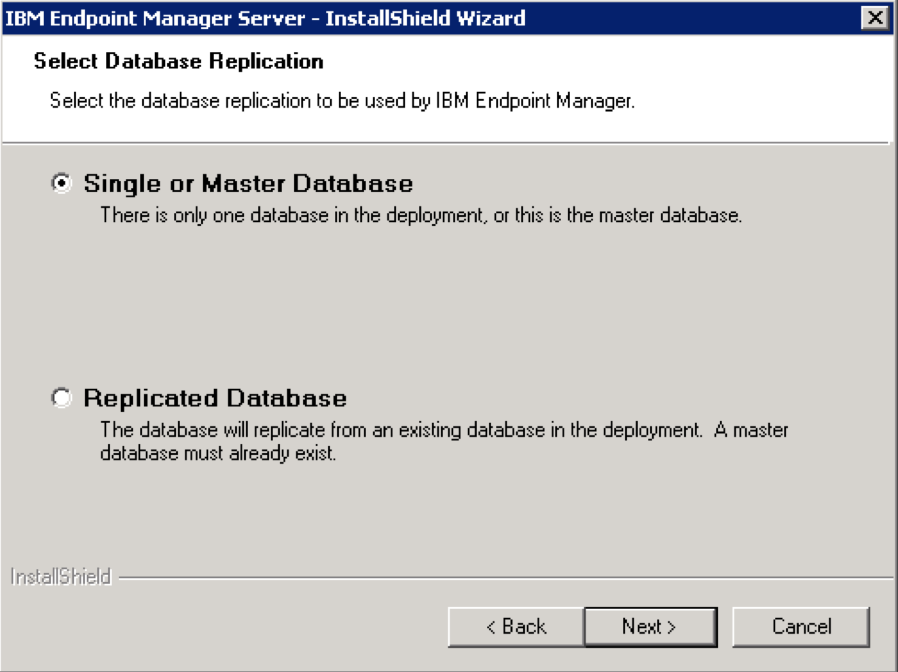
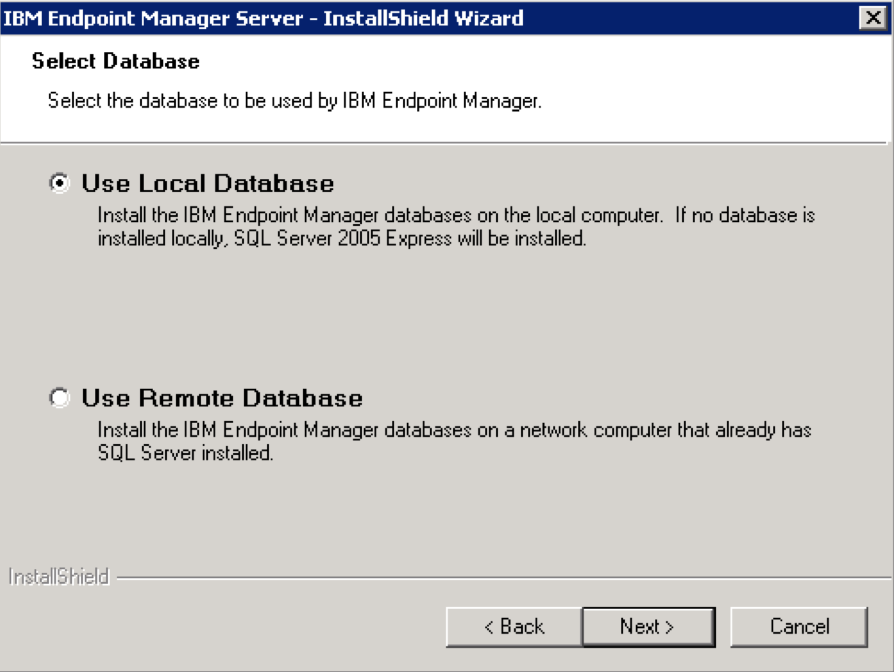
- Select Single or Master Database (larger environments can have a replicated database option)

- Select Use Local Database. If you have SQL already installed, it will use it to host the BigFix databases. Otherwise it will use SQL Server 2005 Express (test environments). You can also use a remote SQL server however ensure it’s connected to the BigFix server via a high speed connection.

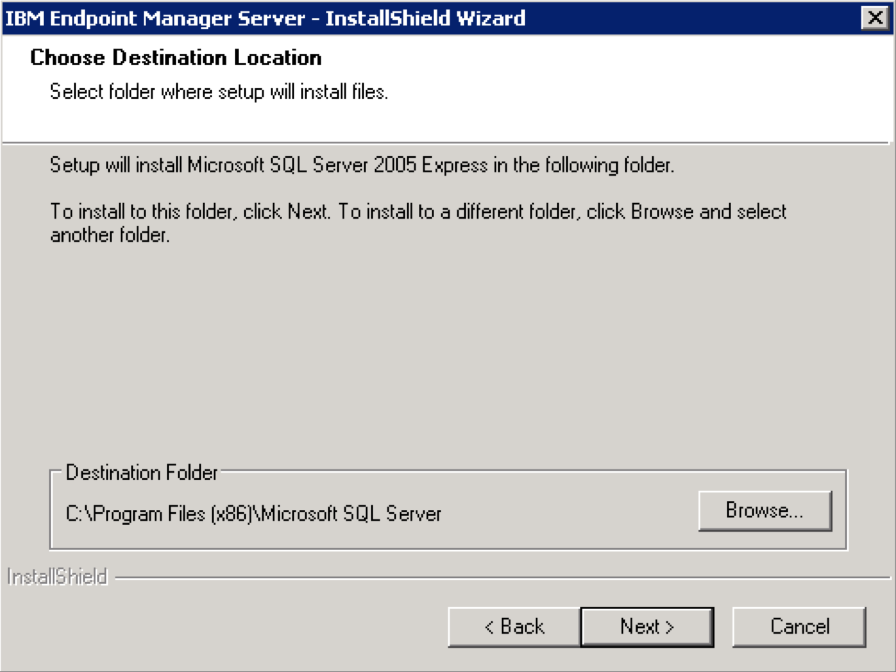
- Chose the location of SQL 2005 Express if applicable

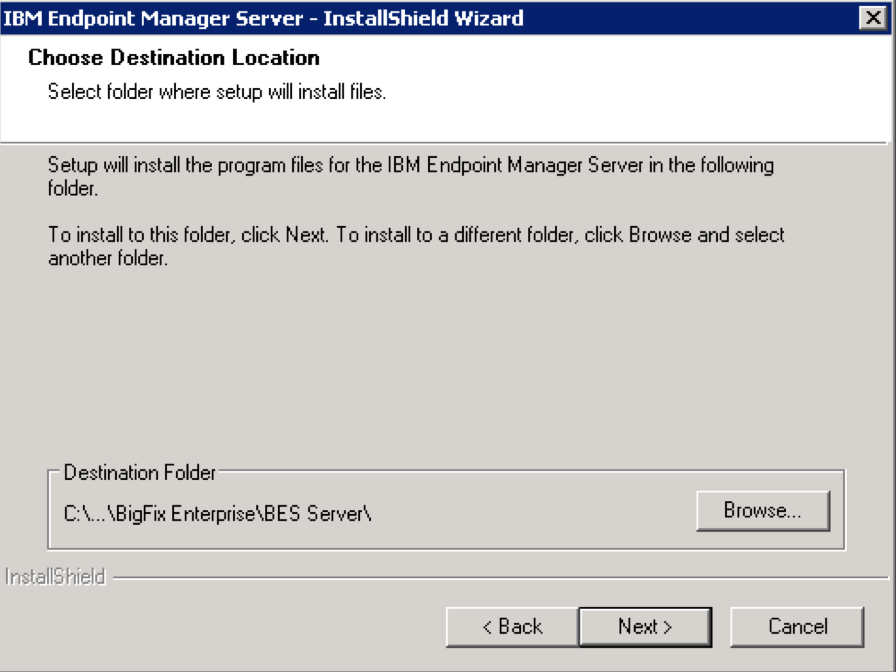
- Chose the location of the BigFix server and click Next

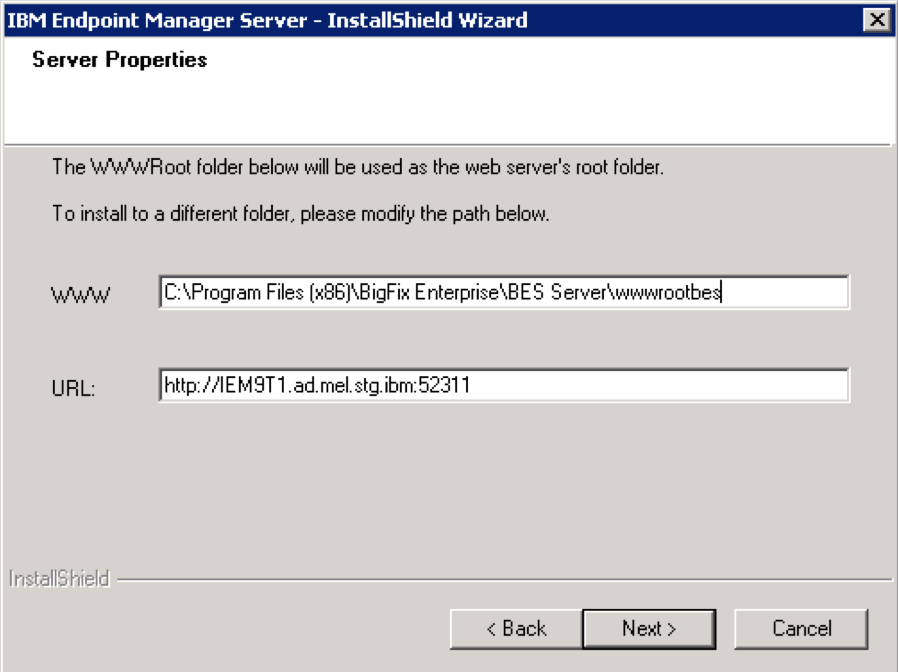
- Select Next to accept the BigFix web server location and URL (used by the clients to communicate to the server on port 52311)

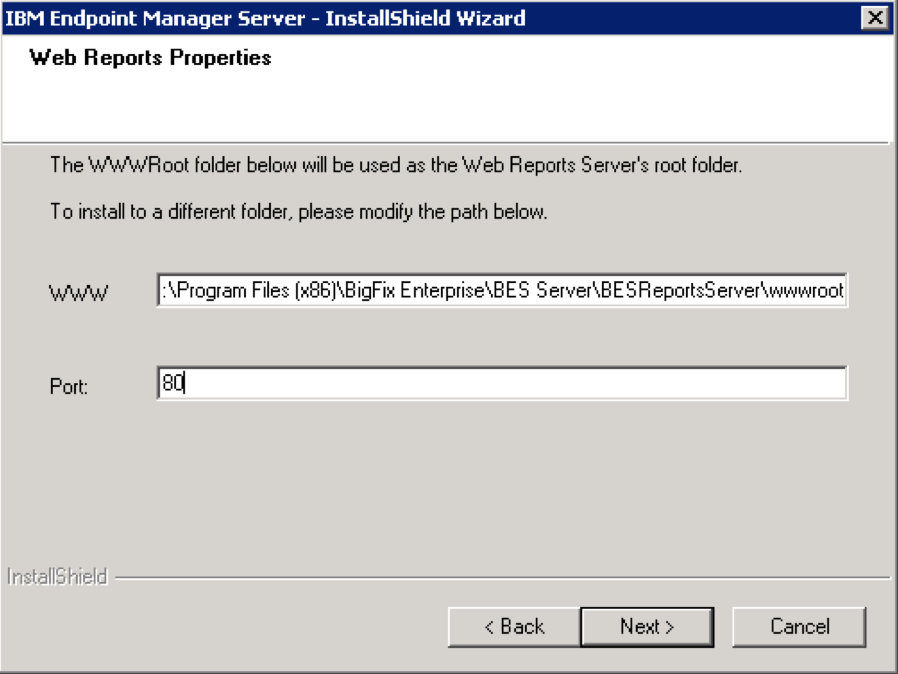
- Select Next to accept the default Web Reports settings. Note that port 80 is being used, so if you install other services like SUA on this server in the future, chose another web server port.

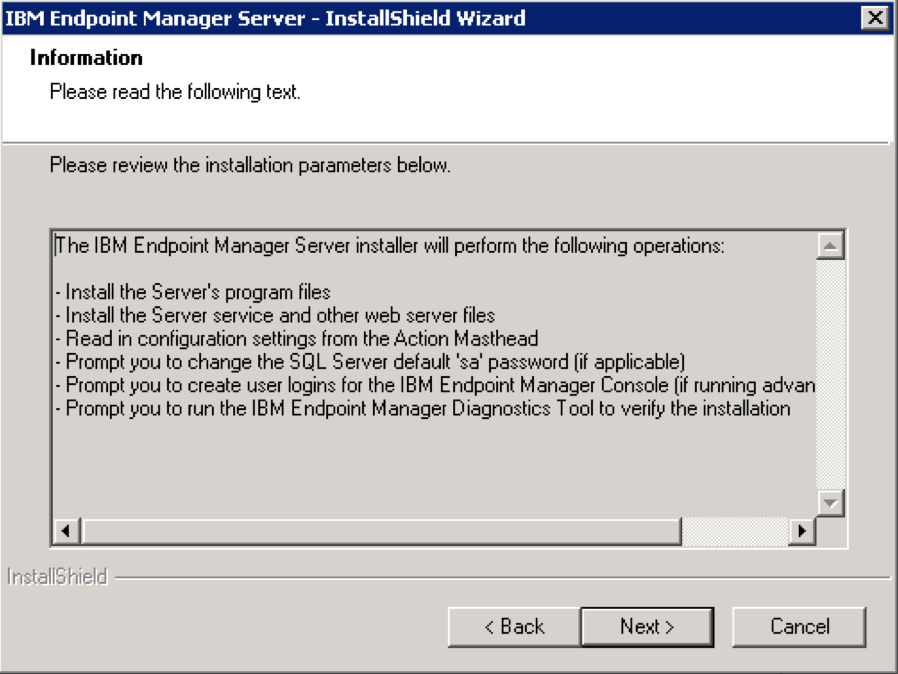
- The server is about to be installed, click Next. BigFix will now install the server.

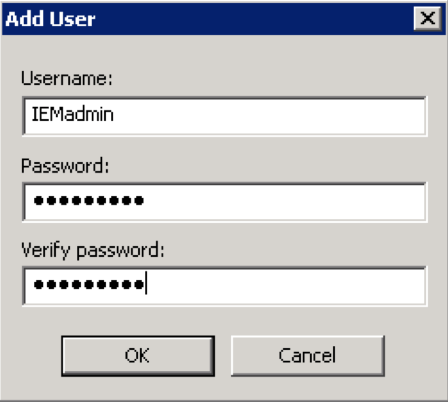
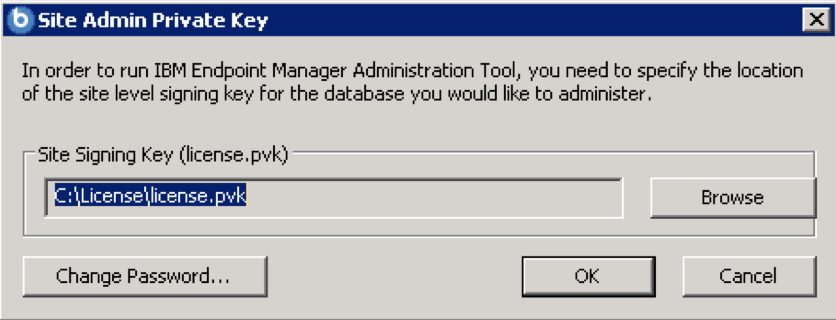
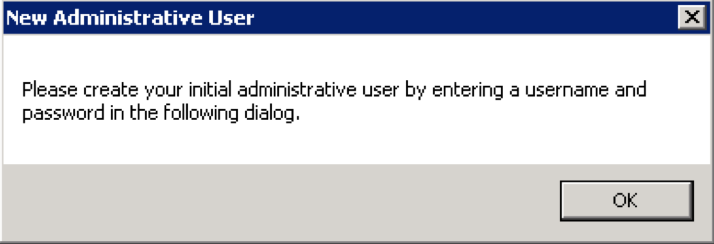
- Select your private key and now enter in the default BigFix administrator account. I like to use BFadmin or IEMadmin so it’s a different name to Windows Administrator.


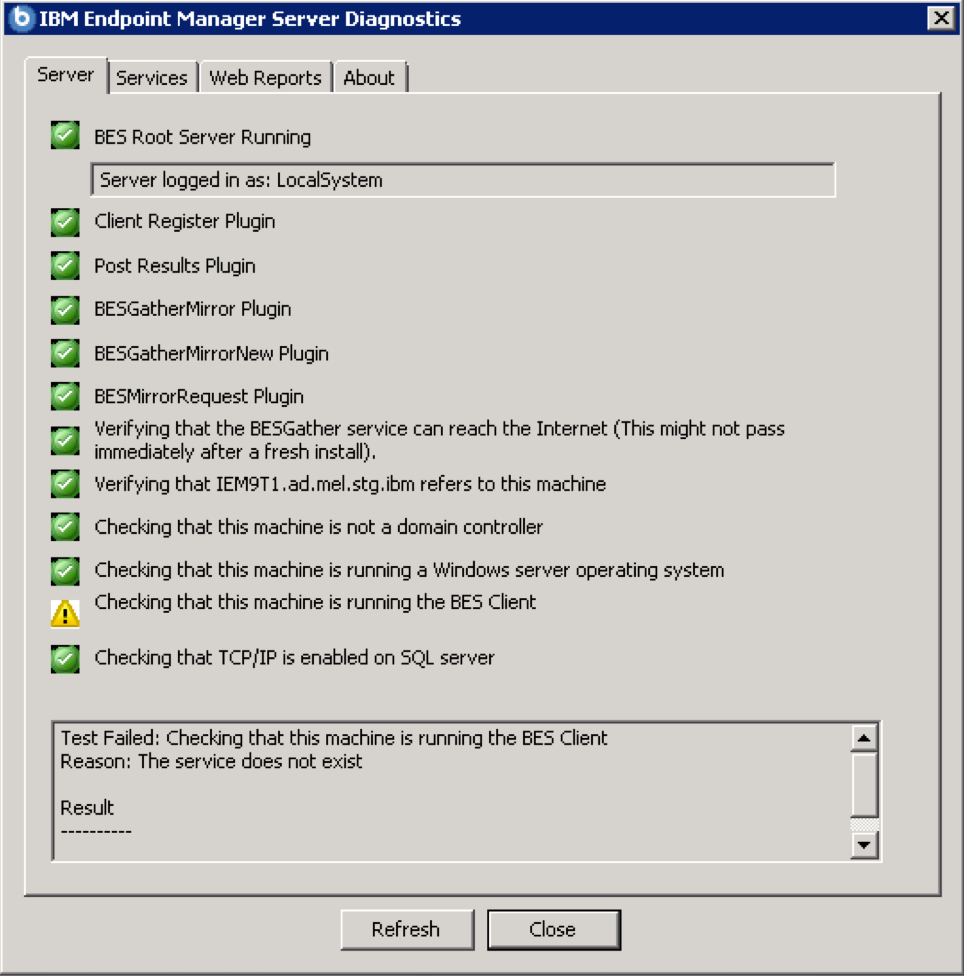
- You can now run the diagnostics tool to ensure BigFix is setup ok. The client isn’t installed yet, so that will be done shortly.
 Time so far, 11 minutes….
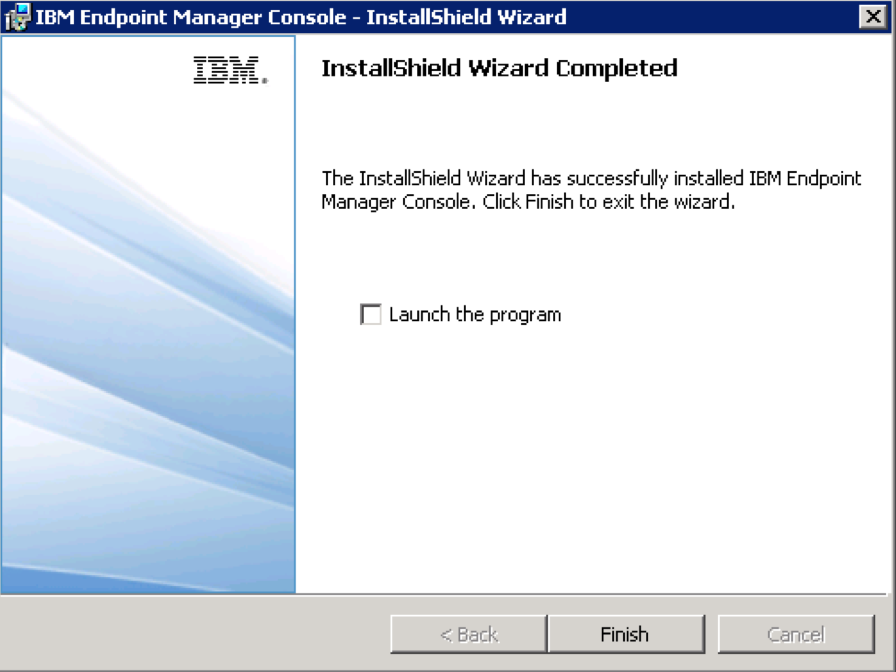
 - Install Install Console and then Install the Console on this Computer
- Select Next, and Install. I usually don’t run the console just yet until the local client is installed (next steps)
 Time so far, 12 minutes….
 - Select Install Clients. Select Install the Client on this Computer
- Select Next, Next and Install and Finish when complete

Hows that timer going? 13 minutes. Done!
You can now start the console and start using the product.
Oh, I really like the Flying Steak Sandwich

In 5) you need to select 2nd option when you have License/Key
And of course you need to Enable TCP/IP on SQL Server. By default it is disabled. Please check: https://www.habaneroconsulting.com/stories/insights/2015/tcpip-is-disabled-by-default-in-microsoft-sql-server-2014