
VMware Horizon is a modern platform for secure delivery of virtual desktops and apps across the hybrid cloud. You can deploy Windows and Linux desktops using Horizon from either on-premises and from other cloud services such as VMware Cloud on AWS, Azure VMware Solution (AVS) and Google Cloud VMware Solution (GCVE).
The purpose of this article is to get you up and running quickly with Horizon 8.
I leveraged a fantastic guide written by Carl Webster titled Learning the Basics of VMware Horizon 7.12 Series. Carl’s guide is very detailed and should be your main step by step guide. I’ve simply summarised they key points with Horizon 8, change a few steps for my lab such as installing the DEM agent and updated a few screen captures as some installation steps have changed with Horizon 8.
Please Note:
Since writing this blog article VMware has published the official (and excellent) Evaluation Guide for VMware Horizon. It was updated in June 2023. Check it out!
Horizon 8 Introductory Demonstration
Before you get started, I’d recommend watching the following video: VMware Horizon 8: Introductory Demo for IT Admins (~10 mins)
Minimum Horizon Requirements
The minimum hardware/software for Horizon 8, Unified Access Gateways, App Volumes which are detailed in this article are detailed as follows:
- Horizon 8: Windows Server virtual machine with a minimum of 4 vCPU and at least 10GB of RAM. See here
- Unified Access Gateway: Integrated virtual appliance with a minimum of 2 vCPU and 4GB of RAM. See here
- App Volumes: Windows Server virtual machine with a minimum of 4 vCPU, 4GB of RAM and 1GB of storage. An SQL server is required (from 2014 Enterprise SP3 or higher). See here
- Dynamic Environment Manager: A Windows Server for appropriate file shares. See here
Download the Horizon Software
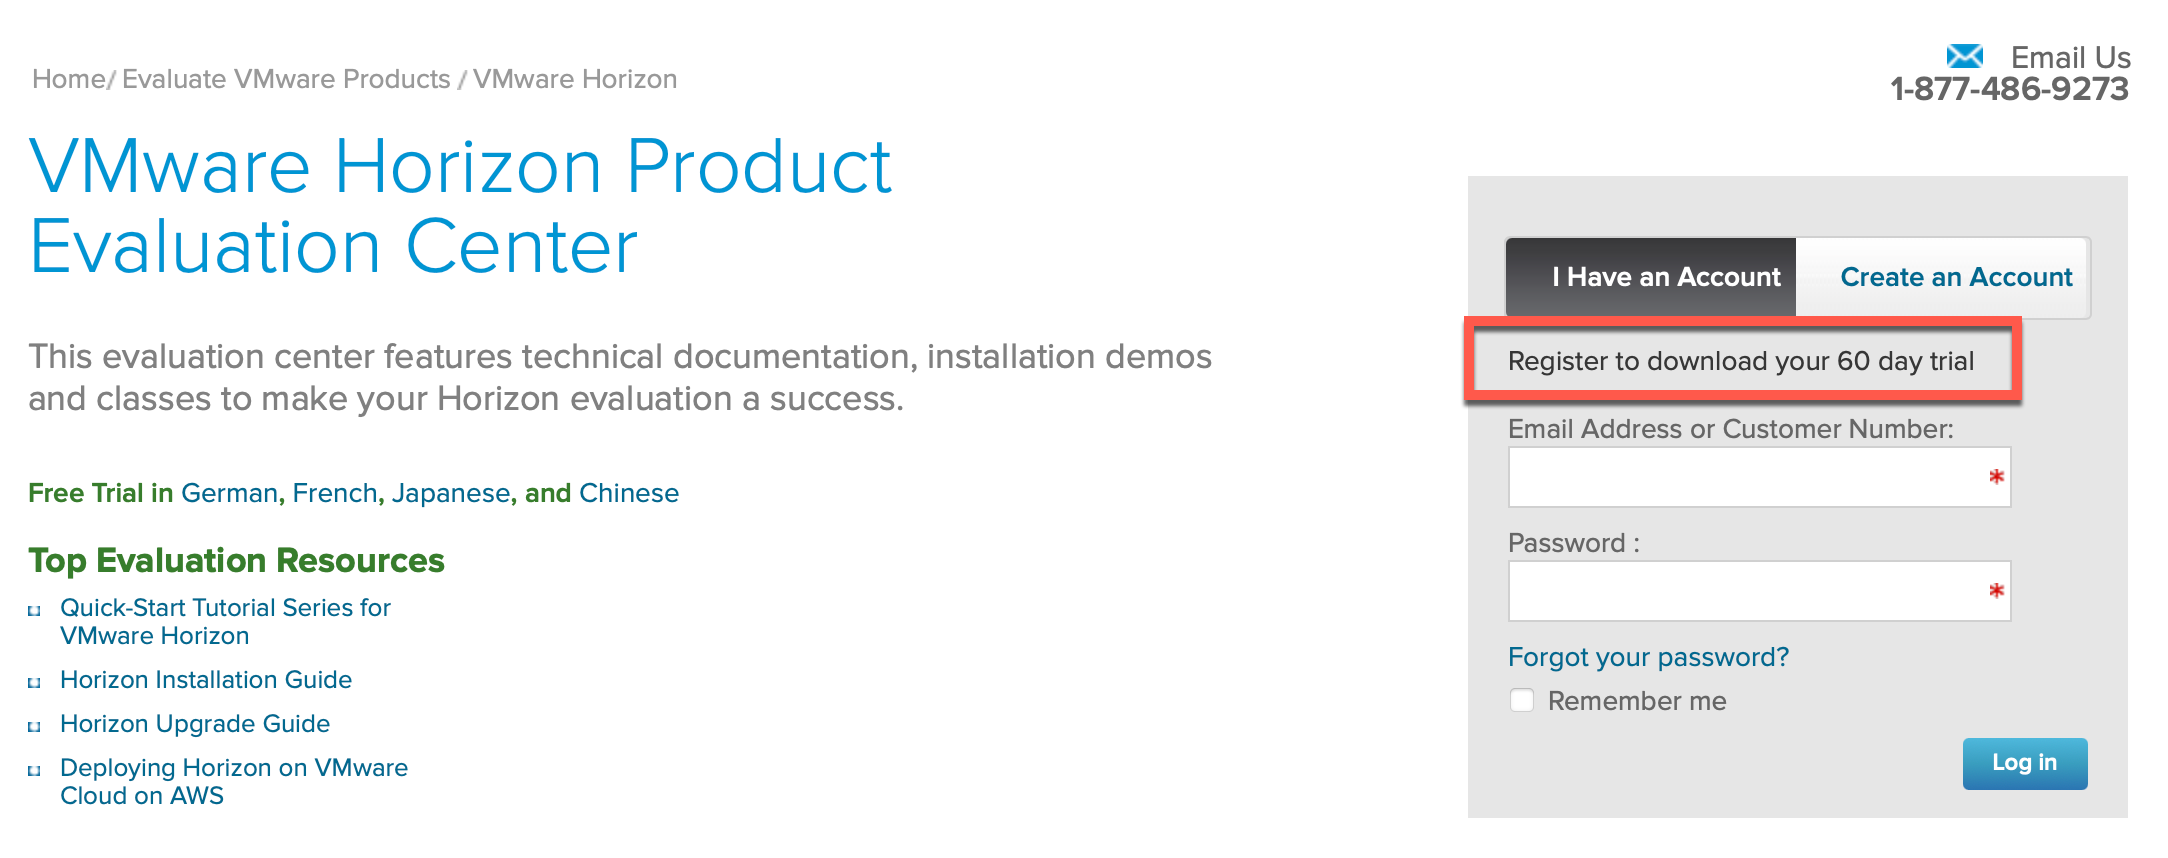
Start by downloading a free trial of Horizon 8 by logging into my.vmware.com and requesting a trial of Horizon 8. Here is a direct link. At the time of writing, you could obtain a free 60 day trial license.
For the purposes of my lab I had setup the following:
- vSphere/vSphere 6.7 – this was already operational in my home lab on an Intel NUC
- Windows 2016 Domain Controller/DNS – already operational
- Horizon Components:
- Horizon Connection Server running on Windows 2016 – The Horizon Connection server software will be installed on this server
- Dynamic Environment Manager (or DEM) – Simplifies end-user profile management
- App Volumes – Realtime application delivery platform for Windows applications
- Horizon Agent – You must install Horizon Agent on virtual machines that are managed by vCenter Server so that Connection Server can communicate with them.
- Horizon Client – VMware Horizon Clients for Windows, Mac, iOS, Linux, Chrome and Android allow you to connect to your VMware Horizon virtual desktop from your device of choice giving you on-the-go access from any location. Available here.
- Unified Access Gateway (or UAG) – Provides secure edge services and access to defined resources that reside in the internal network. This allows authorized, external users to access internally located resources such as Horizon in a secure manner.
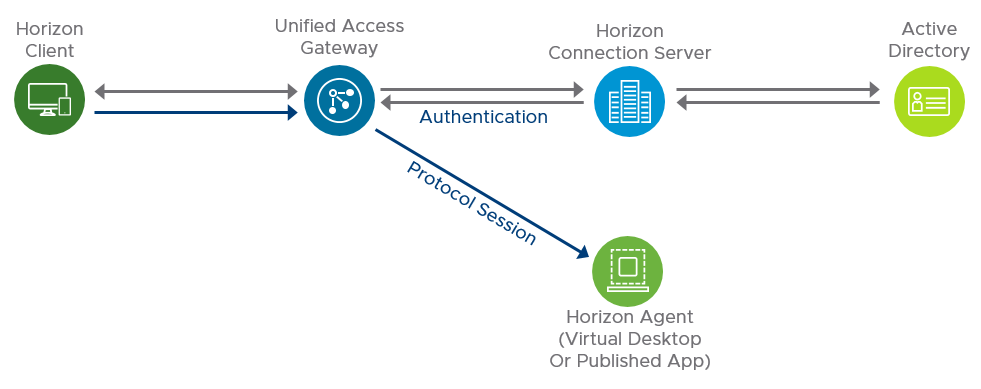
How do these components hang together? The two diagrams from the Horizon 7 Reference Architecture on Techzone provide the clearest indication. The first diagram shows a user with their Horizon client accessing Horizon via a UAG. This is a typical architecture for a user accessing Horizon from the Internet, otherwise they would access the Connection server directly.
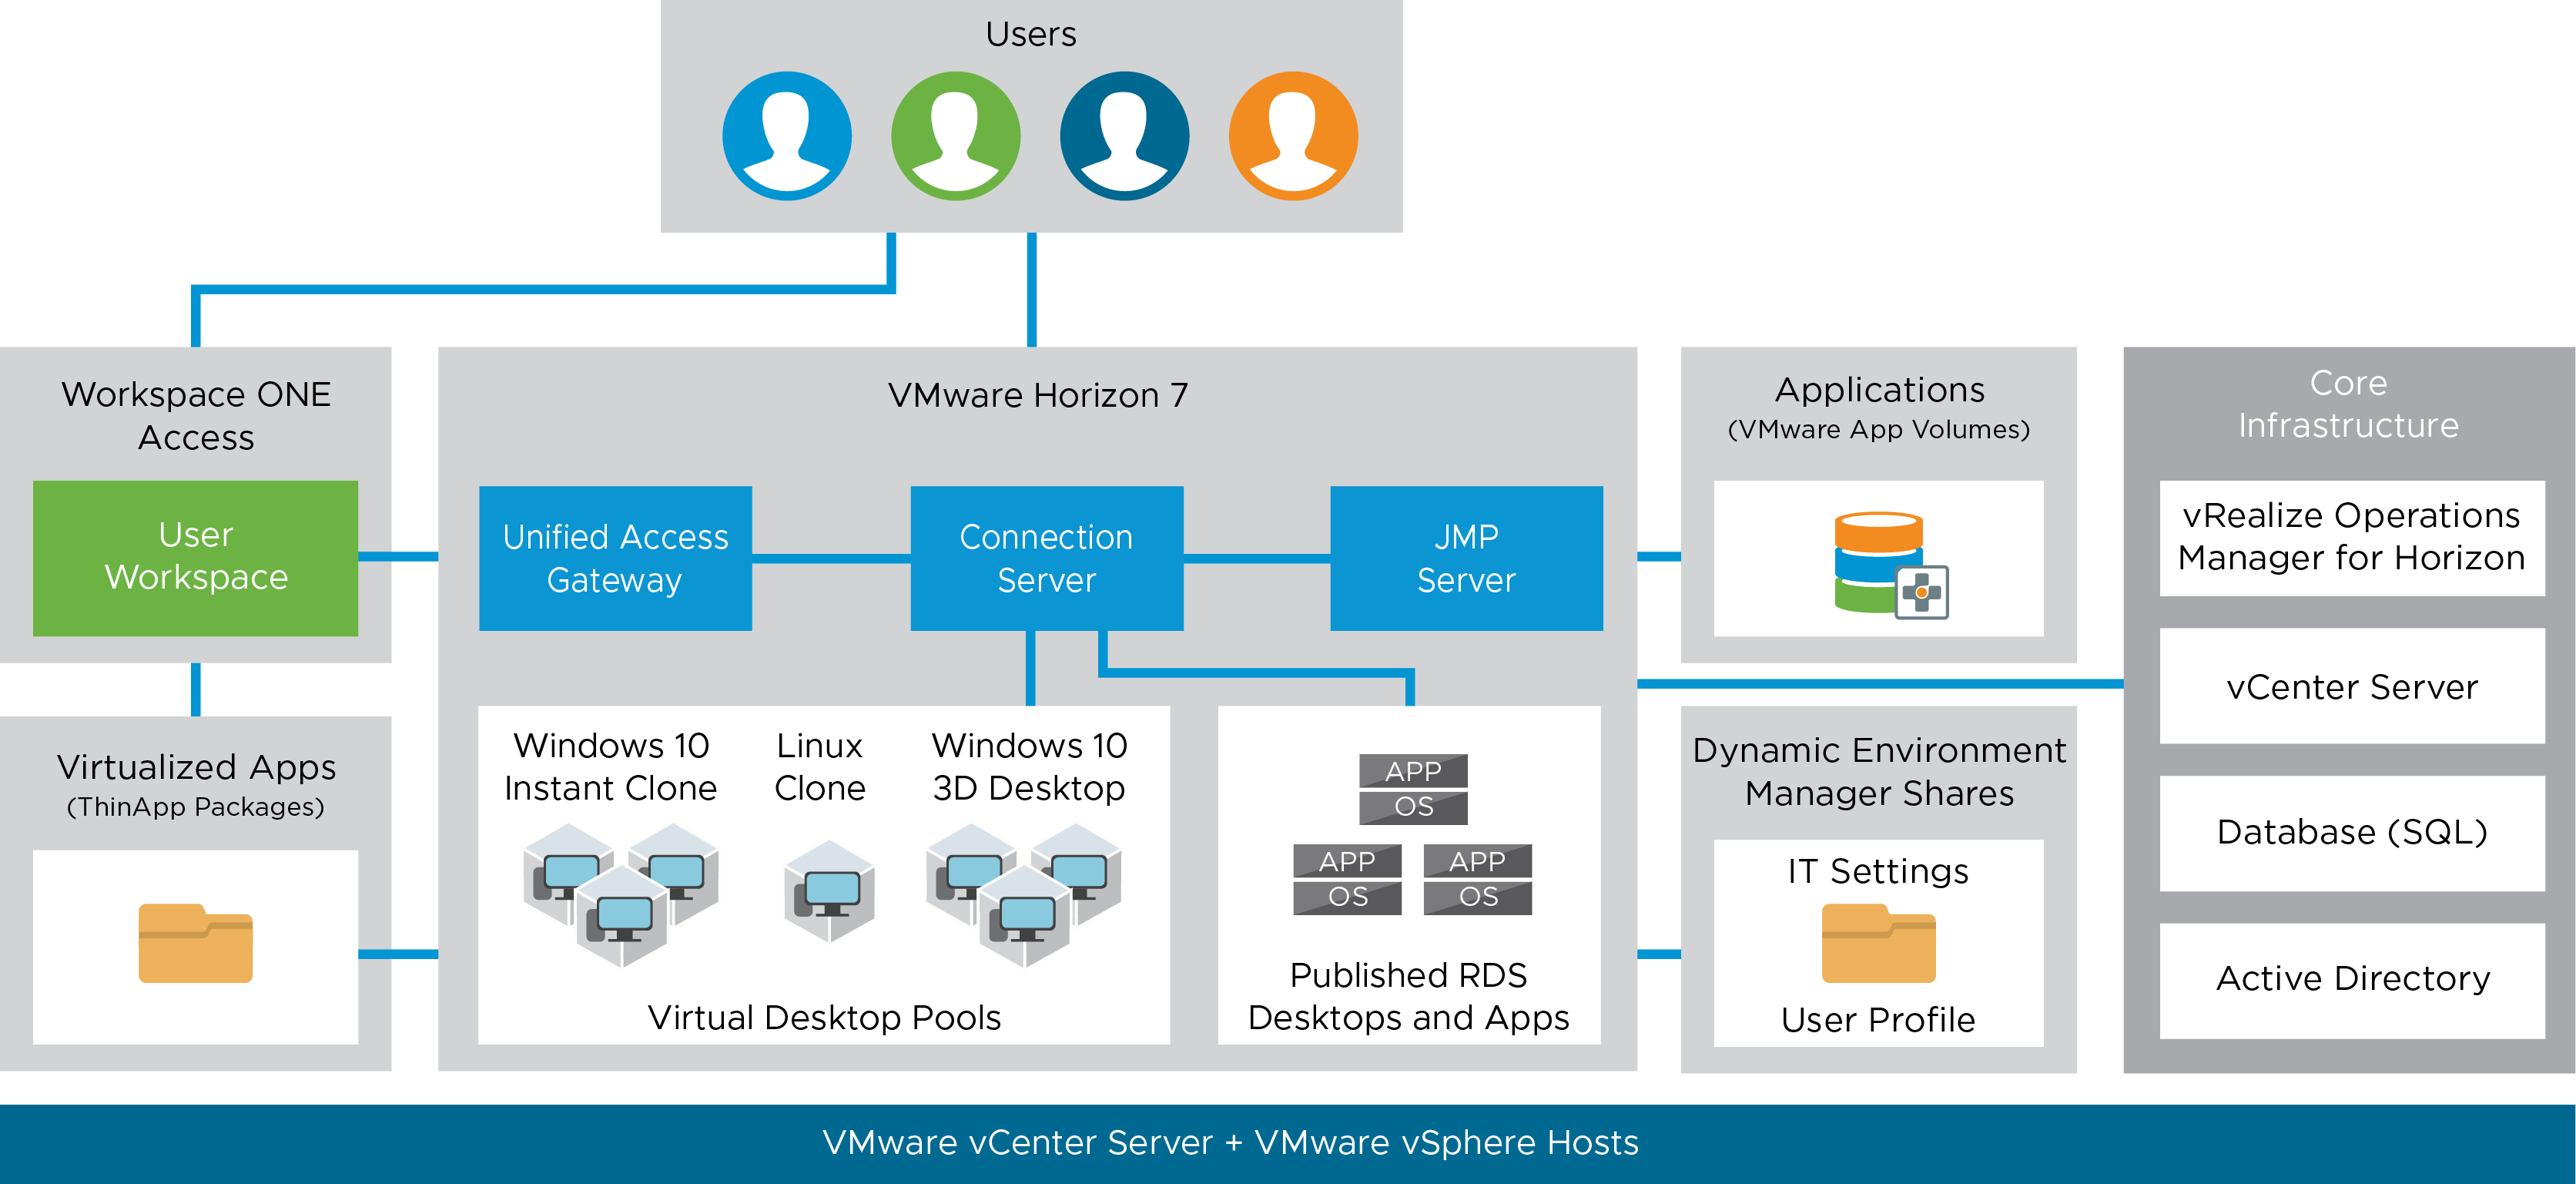
The following figure shows the high-level logical architecture of the Horizon components with other Enterprise Edition services shown for illustrative purposes. For example using the Workspace ONE Access (which might also provide access to SaaS based applications). The diagram also shows components such as Dynamic Environment Manager (DEM) and App Volumes.
Carl provides more detail on the various components of Horizon in his guide here. Below is a screen capture of the software I had downloaded for my setup of Horizon.

Minimum Hardware Requirements
The official hardware requirements for a Horizon Connection server are detailed here. You’ll need a server for SQL for alerts, plus another server for App Volumes and some resources for a Unified Access Gateway (UAG) appliance.
I was able to run a small test environment (including a few Windows 10 desktops) on a single Intel NUC with 32GB RAM and Intel i7 processor. Of course more resources will be required for larger proof of concept (PoC) environments.
The Horizon Installation Pre-req Checker
As announced here, to make sure everything is running seamlessly, the Horizon environment relies on various components and infrastructure working together. The Horizon Installation Pre-req Checker will ensure everything is ready before you install Horizon. You can download the Pre-req Checker from here.
Setting up your Horizon Connection Server
1. Run the installer for the Horizon Connection Server and click Next

2. Accept the licensing terms and click Next
3. Choose the destination folder and click Next
4. Select the defaults as shown and click Next

5. Enter a data recovery password and click Next
6. Configure the Windows Firewall automatically and click Next
7. Select Authorize the local Administrators group and click Next

8. Select Join the VMware Customer Experience Improvement Program if desired and click Next
9. Review the final deployment type such as General, AWS, Google etc and click Install
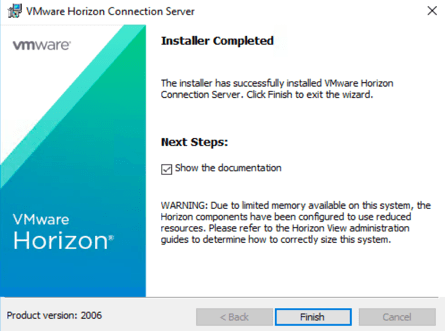
10. When the installation is completed click Finish
11. Launch the Administrator icon from the server or browse to https://yourconnectionserver/admin
12. Enter your Horizon Serial number as required (see example below)

13. In the left frame, under Settings, click Servers
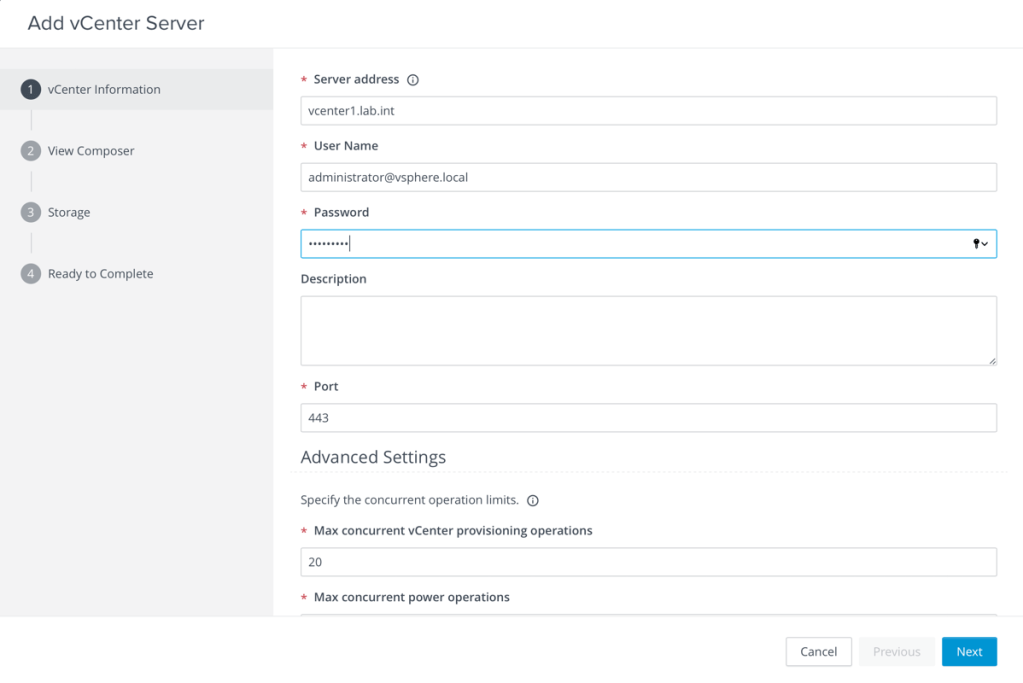
14. Under vCenter Servers click the Add button
15. Enter the required information and click Next
16. Accept any self signed certificates as shown and click View Certificate

17. Click Accept
18. Click Do Not use View Composer and click Next
19. Accept the Storage Settings defaults and click Next
20. Review the final settings and click Submit
21. Setup the Instant Clone Administrator by selecting Settings – Instant Clone Domain Accounts

22. Review the settings under Settings – Global Settings, General Settings as required
23. With Horizon 21.03 or later, you can install a (free) Postgres local database as the Horizon events database. To install Postgres, see this great blog article and edit the pg_hba.conf file. Next enter your database details by going to Settings, click Event Configuration as follows:

24. Browse to Monitor – Events and ensure a Horizon event is recorded as shown:

Setting up your Windows 10 Master Image
This section follows Carl’s blog, but updated for Horizon 8. I also install the Dynamic Environment Manager (DEM) agent as well.
- Create a Windows 10 virtual machine (I used 2004 release) with setting such as thin provisioned disk, adapter VMXNET3.
- Once the Windows 10 VM is installed, install the VMware Tools so the network card is operational.
- Turn off power management within the NIC. Also enable Receive side scaling
- Set the Win10’s computer name, in my case WIN102004
- I joined this VM to my Active Directory domain
- Install the Horizon Agent on the Windows 10 VM as shown:

8. Click Next
9. Access the license agreement and click Next
10. Click Next to accept IP v4
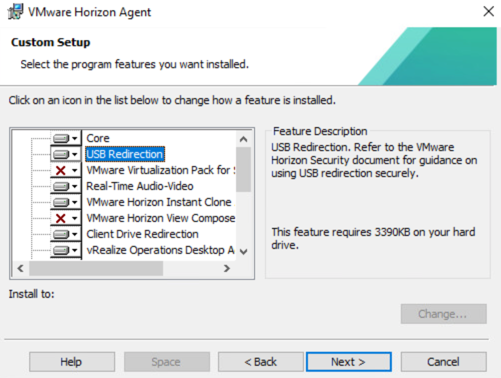
11. Ensure that Instant Clone is enabled. In my case I enabled USB Redirection. Review the other settings and click Next
12. Click Next

13. Click Install
14. Once the Agent is installed, click Finish
15. Restart the Windows 10 virtual machine.
16. Install the Dynamic Environment Manager agent as follows:

17. Click Next
18. Access the license agreement and click Next
19. Accept the default file location and click Next
20. Click Typical and click Next

21. Bypass the license key option and click Next
22. Click Install then click Finish when the DEM agent is finished installation
23. I waited until Windows 10 had finished downloading any updates and various processes had completed. ie. waiting for the CPU to reduce to less than 10%

24. Shutdown the Windows 10 virtual machine and disconnect the virtual CD/DVD drive as shown:

25. Take a snapshot as shown below:

Farm and Pool Creation
This section follows Carl’s blog, but updated for Horizon 8, but starting with section VDI Pool Creation.
1. Go to Inventory – Desktops

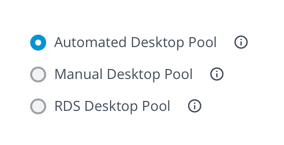
2. Select Add and then select Automated Desktop Pool. Click Next
3. Select Instant Clone and click Next

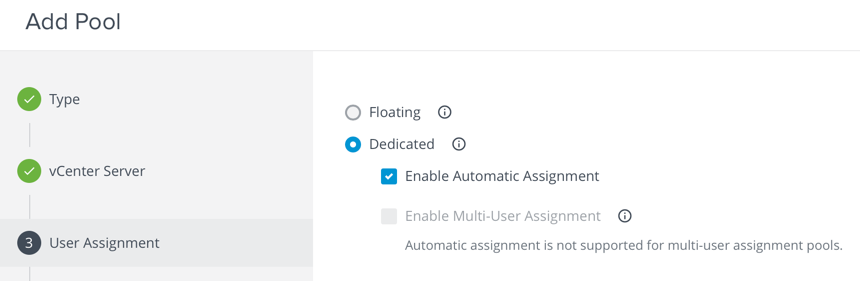
4. Select Dedicated User Assignment and click Next
5. Click Next as shown
6. Create a Desktop Pool ID as shown. Select Next

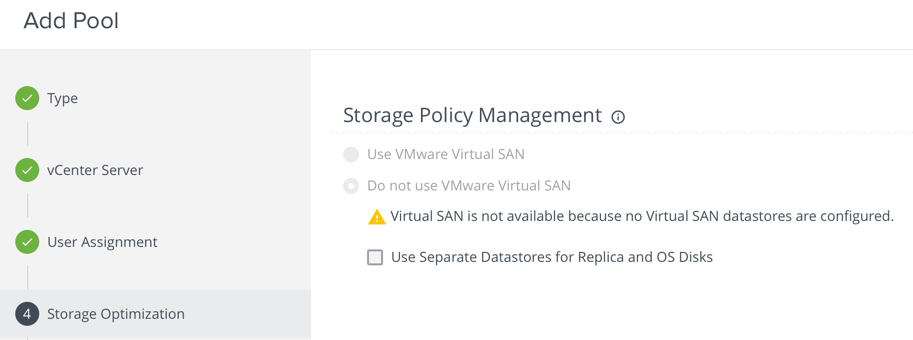
7. Set the Provisioning Settings. Example settings shown below. Click Next

8. Configure the vCenter Settings as per the following example. Click Next when completed.

Change the settings as required and click Next

Review the Desktop Pool Settings and click Next
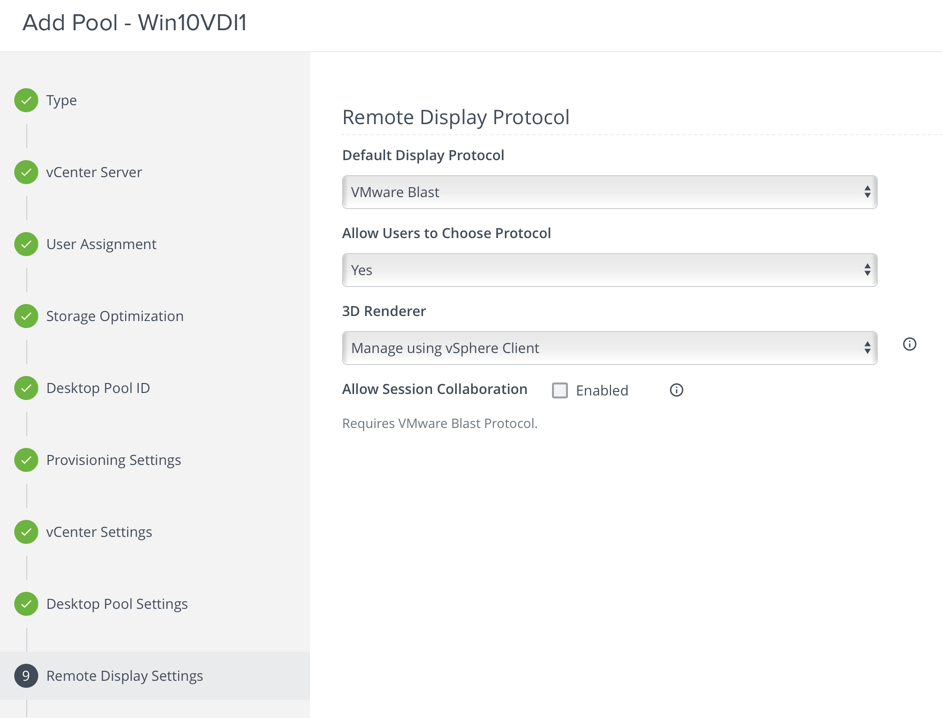
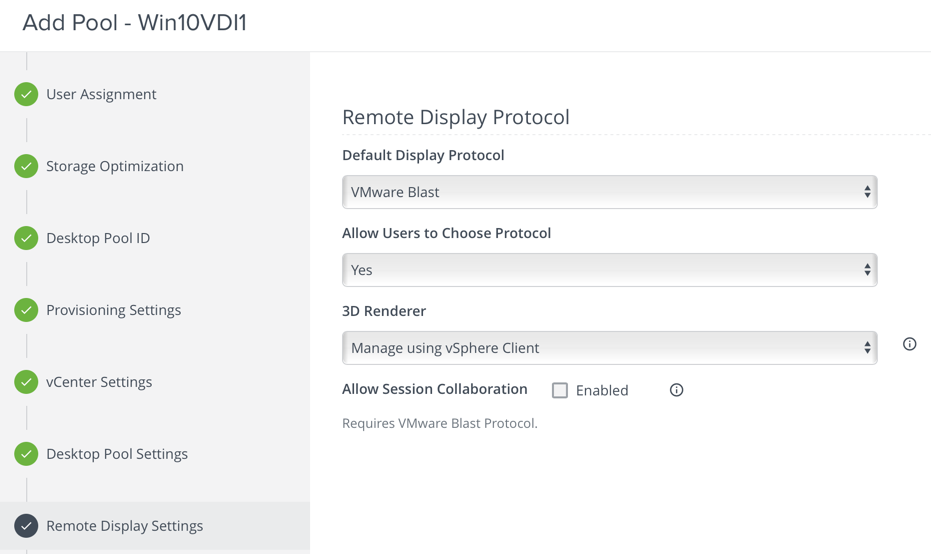
Review the Remote Display Settings and Click Next
Review the Guest Customization and click Next
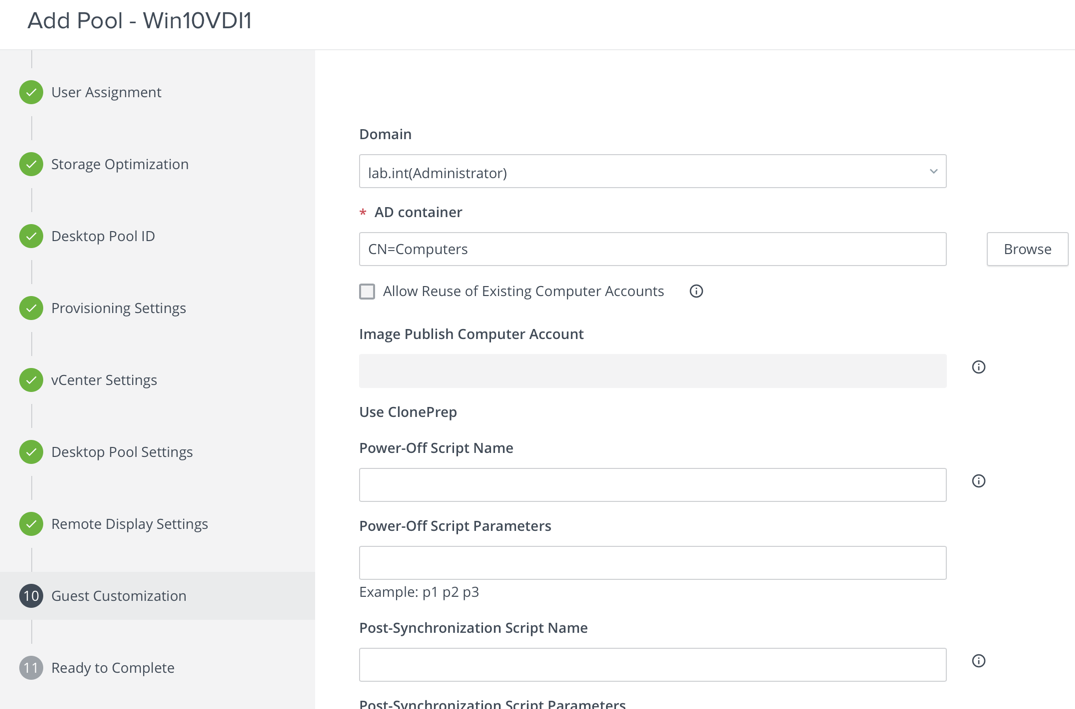
Note: I later changed the AD Container to an OU called Horizon for the VDI machines as shown:

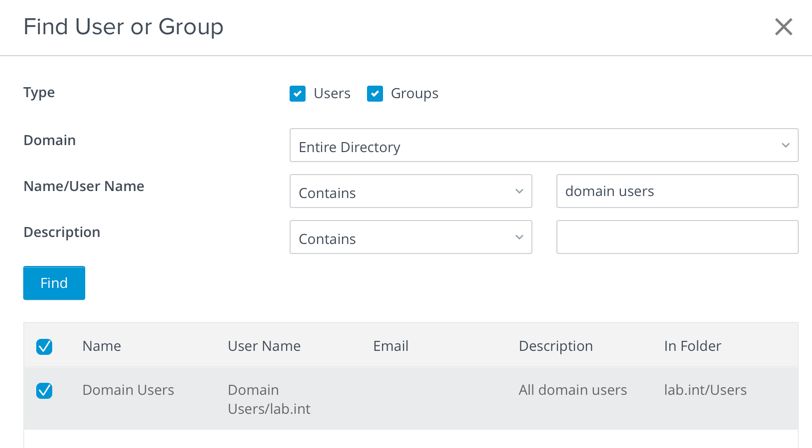
Select Entitle Users After Adding Pool and click Submit

Add the required Active Directory user group. In my case I selected Domain Users
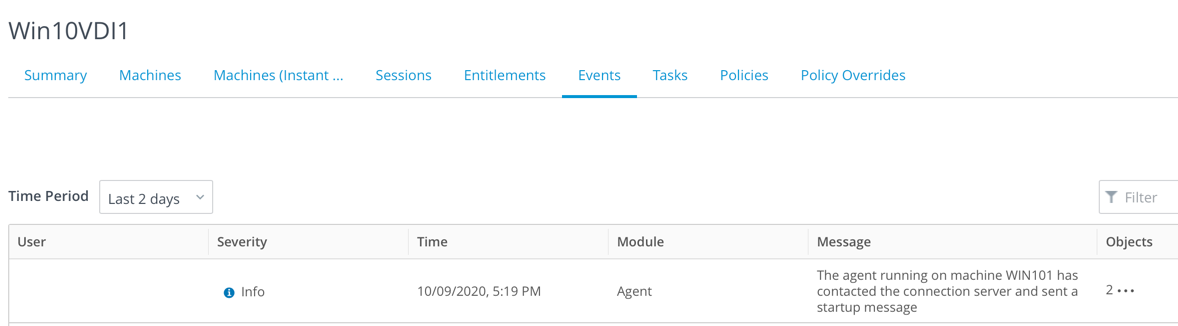
Now that the desktop pool is created and entitlements added, all the Parent VMs, regular VMs, and all folders are created. You can watch the activity in your vCenter server as shown.

Also the VDI pool showed the first virtual machine in the pool had started successfully:
For my lab, I had to wait about 15 minutes for all the various tasks to complete on my single Intel NUC !
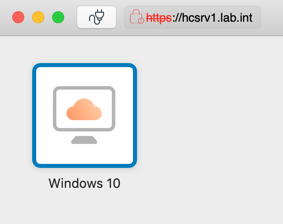
I then launched the Horizon Client on my Mac, logged in and was able to launch the Windows 10 desktop.
Dynamic Environment Manager (DEM)
I installed the VMware Dynamic Environment Manager (DEM) console on the Horizon Server and configured two file shares. I followed the excellent Quick-Start Tutorial for User Environment Manager to install/configure DEM. You can configure the DEM Group Policy objects in your Active Directory or local GPO template.
Carl also has two articles on setting up DEM too:
- Part 13 – Dynamic Environment Manager Prep Work
- Part 14 – Dynamic Environment Manager Installation and Configuration
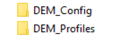
DEM_Config Share
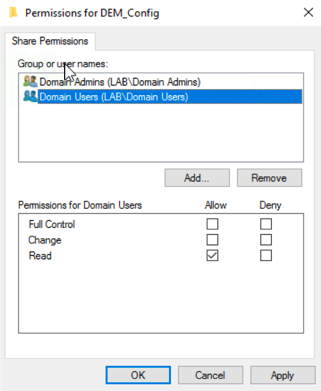
Create a folder called DEM_Config. Create a share for this folder under Advanced Sharing:
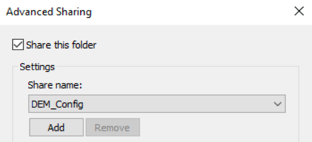
The following are screen captures from key items in setting up the file shares for DEM:

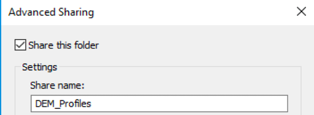
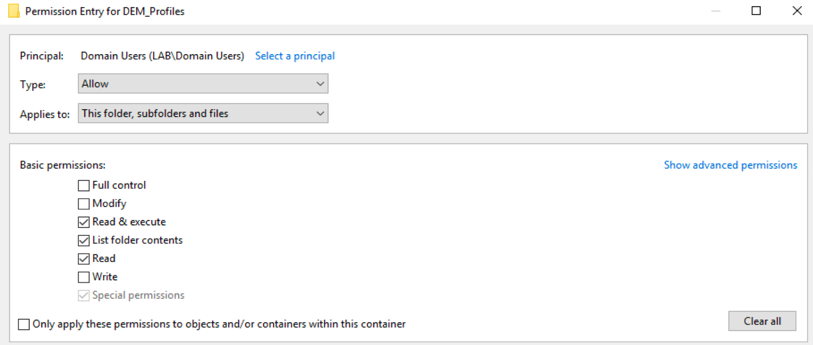
DEM_Profiles Share
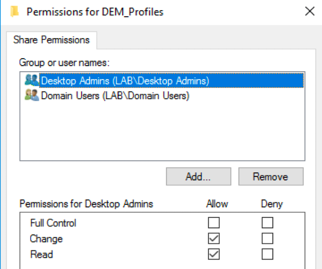
Next create another folder called DEM_Profiles. Create a share for this folder under Advanced Sharing:
Select the Read and Change check boxes for the Domain Users group.

Select the Read and Change check boxes for the Desktop Admins group
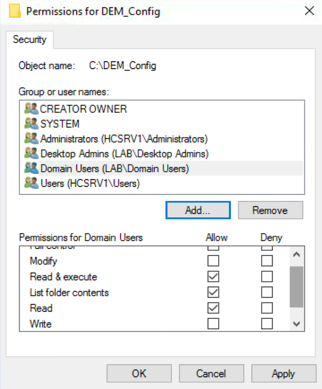
Below are some of the key NTFS permissions:


Dynamic Environment Manager (DEM) Console
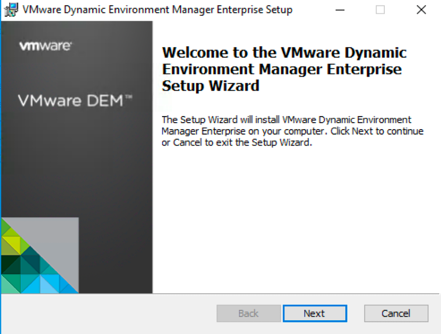
- Install the Dynamic Environment Manager (DEM) installation software and click Next.
2. Accept the licensing agreement and click Next
3. Accept the default software destination folder and click Next
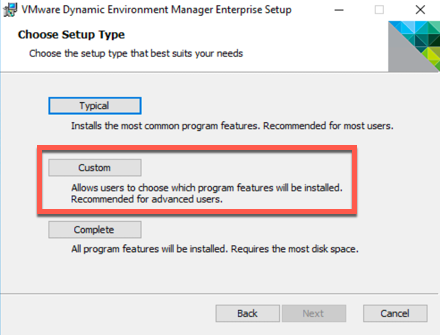
4. Select Custom
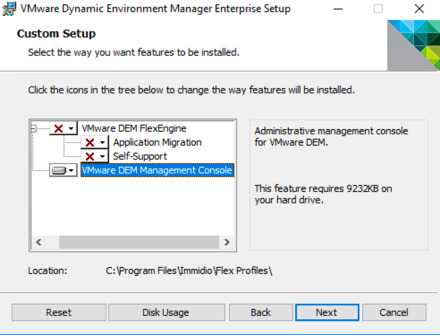
5. Deselect VMware DEM FlexEngine and select VMware DEM Mangement Console and click Next
6. Click Install and click Finish when the software is installed
7. Launch the DEM Management Console

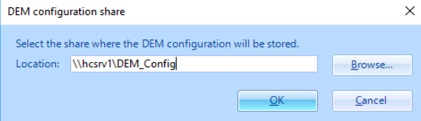
8. Select the location where the DEM Configuration will be installed. In my lab it was \\hcsrv1\DEM_Config as shown and click OK.
9. Click OK again. You should be prompted with the following DEM Console settings:

Active Directory Group Policy Object (GPO) settings for DEM
After installing User Environment Manager, you have a couple of options for configuration. You can use the VMware-provided administrative templates for Active Directory Group Policy Objects, or you can use the XML-based option called NoAD mode. This section assumes you have chosen to use AD GPOs.
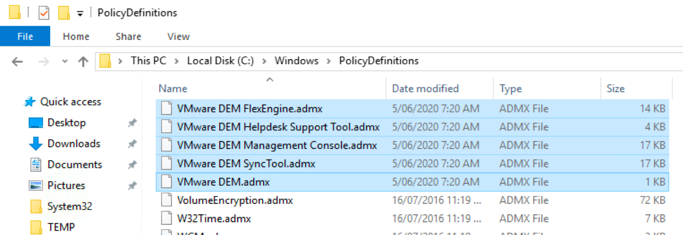
Copy the supplied ADMX templates (and language sub-folder) to your domain controller C:\Windows\PolicyDefinitions folder:
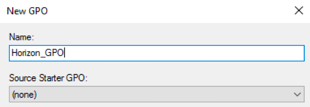
Create a GPO for the Horizon Windows 10 virtual desktops:

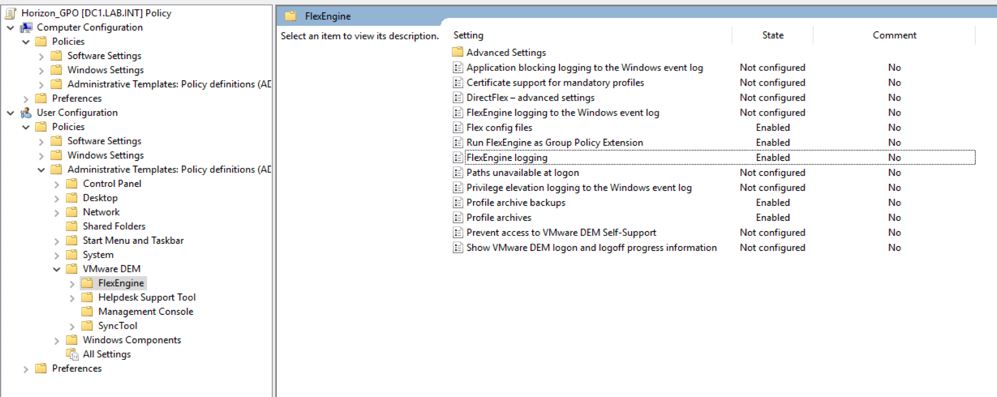
Create the GPO settings as per the VMware DEM guide. These are:
- Always wait for the network at computer startup and logon = Enabled
- Configure user Group Policy loopback processing mode = Enabled
- Configure the Flex Config Files Policy
- Set FlexEngine to Run as a Group Policy Extension = Enabled
- Configure the Profile Archives Policy
- Configure the Profile Archives Backup Policy
- Configure FlexEngine Logging
- Add a Windows Logoff Policy
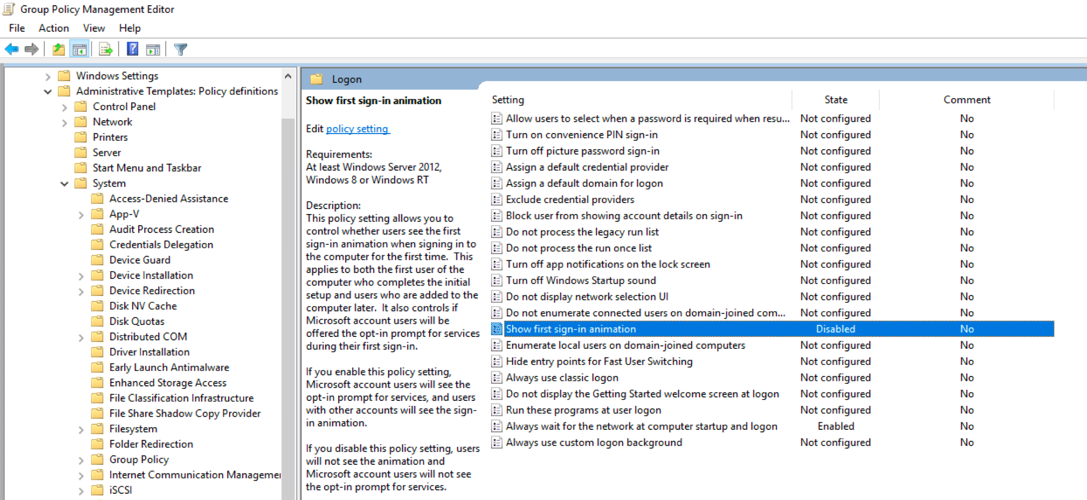
Whilst I was editing the GPO, I also disabled the Windows 10 first sign-in animation too.
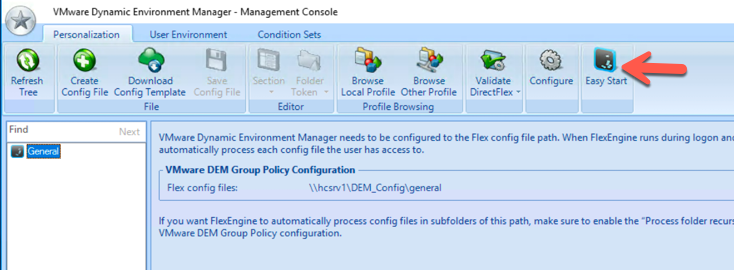
Enable the Easy Start Feature
By default, DEM does not manage any applications or environment settings after you install it. You must specify which applications and settings to manage. Although this approach takes a little more work up front, this solution prevents excessive profile growth and profile corruption, enables user settings to roam across Windows versions, and gives you granular control to manage as much or as little of the user experience as needed.
To help with getting started, the Easy Start button instantly adds many common Windows applications, including several versions of Microsoft Office, to the allowlist of applications managed by User Environment Manager. Many Windows environment settings are also added by Easy Start. You can then easily select an application or Windows setting to review and change the default settings.
Return to the DEM Admin Console and select Easy Start
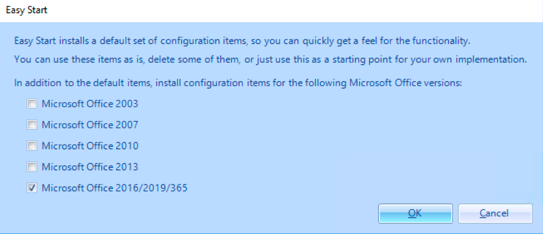
I selected Microsoft Office 2016/2019/365 and clicked OK
Click OK when the Easy Start process is completed:

To test that DEM is setup, I restarted my Windows 10 PC running on Horizon so that it would receive the latest GPO settings. Once I logged into my virtual machine, you can determine if DEM is running correctly if a number of DEM (Quick start) options are configured such as:

Updating the Horizon Desktop Pool
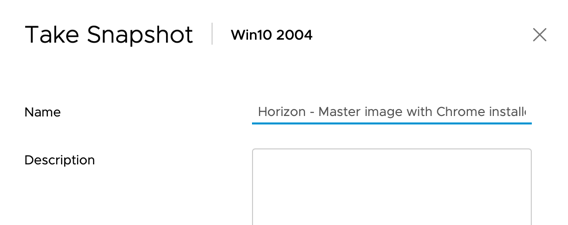
I next decided to install Google Chrome browser on the Master image (later I tested AppVolumes). I followed Carl Stanhood’s excellent article VMware Horizon 2006: Virtual Desktop Pools – Update a Pool which explains the process to do this.
I started my Windows 10 2004 Master image and installed Chrome. I then shutdown this VM and created a snapshot as shown:
I then selected the Windows 10 desktop pool, select Maintain – Schedule. The new snapshot was selected and then scheduled to be applied to the desktop pool.
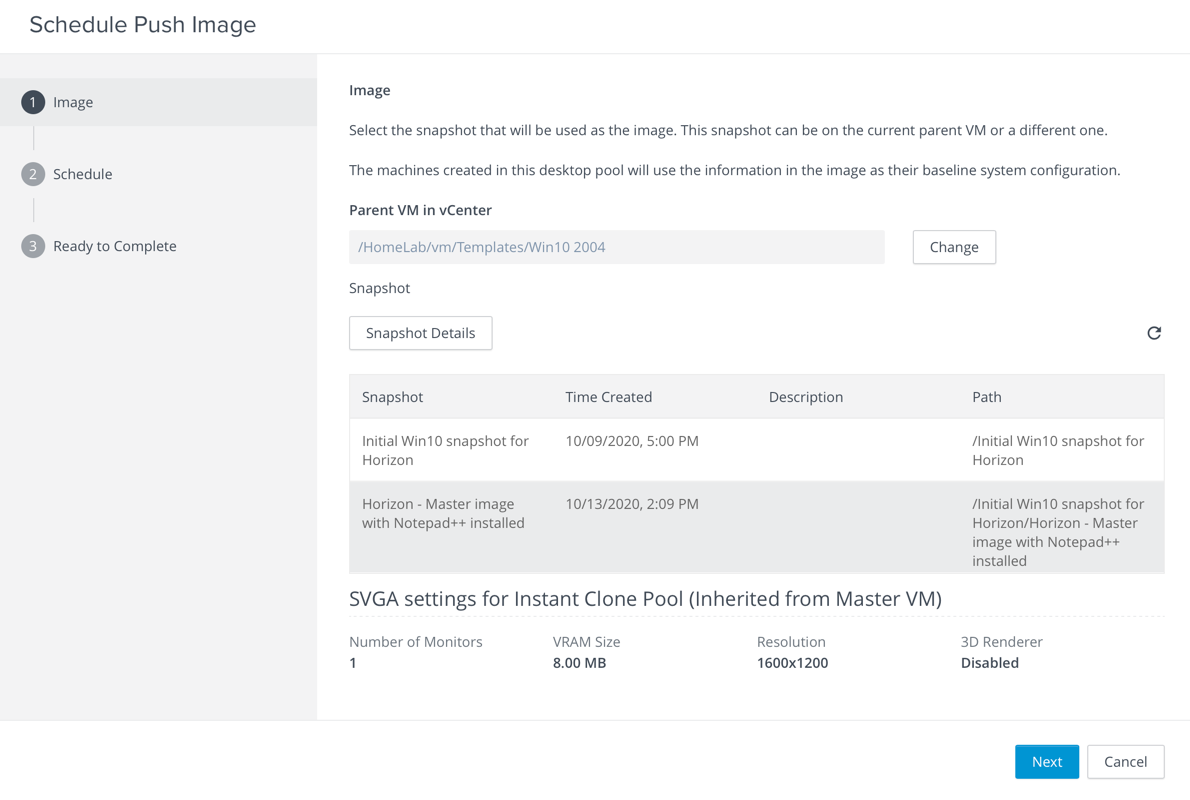
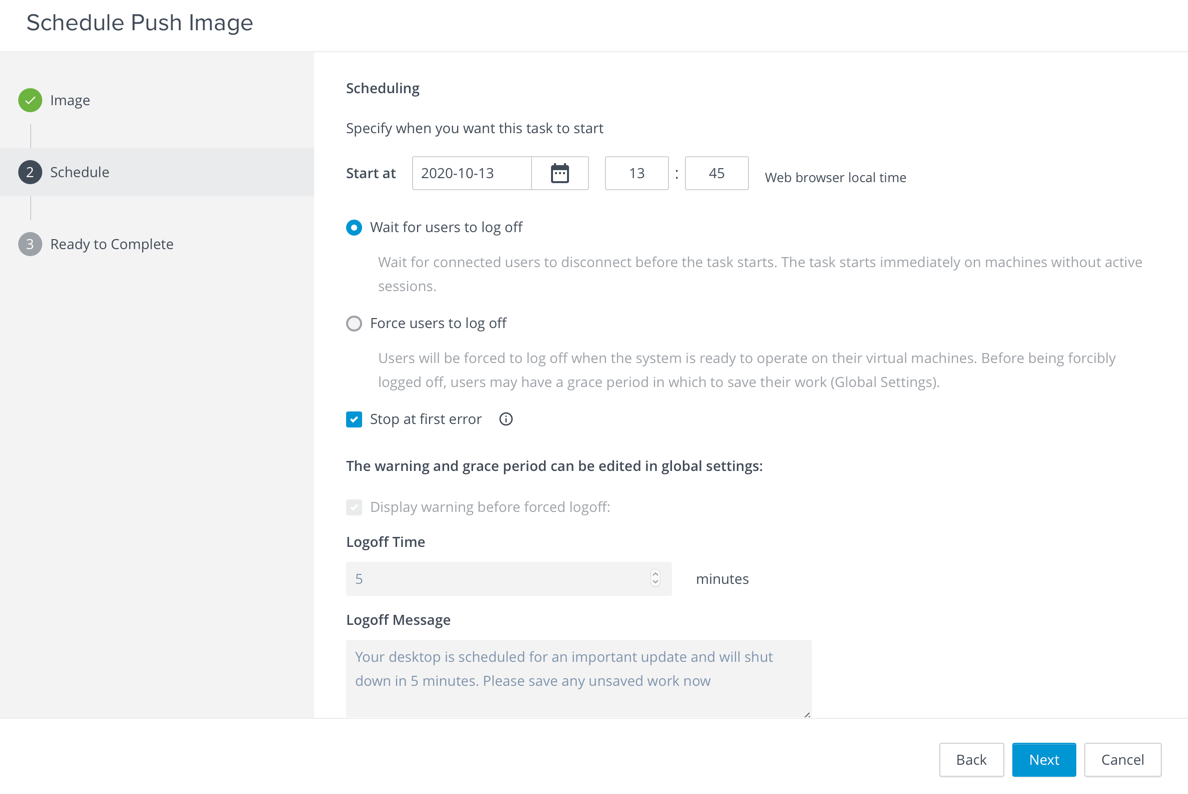
I waited for about 10 minutes for this updated image to be applied before logging into a Windows 10 desktop.
Dynamic Environment Manager Application Profiler
The VMware DEM Application Profiler is an extra software install that you install on a desktop or virtual machine where you have your user software installed. Once installed the application profiler can be used to quickly create the standard application settings that can be easily rolled out to your users.
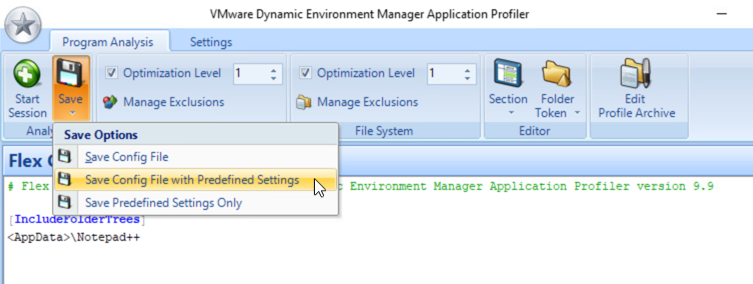
Installation instructions are provided in Carl Starhood’s blog here. vDelboy (Dale Carter, VMware) VMware User Environment Manager Application Profiler has an overview of using the Application Profiler with an application. In my lab I selected Notepad++.

I then changed Notepad++ default directory to C:\TEMP as shown. Using this video as an example.

I then selected Save – Save Config File with Predefined Settings
Copy the saved files to the \\UEMServer\UEMShare\general\applications.
- Configuration file
- Flag file
- Icon file
- Any ZIP config files
In my lab, you can see four Notepad++ files.

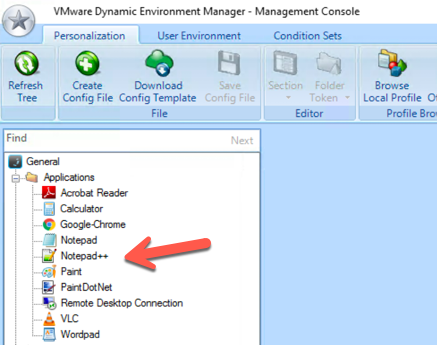
In the DEM console, click the Refresh Tree button.
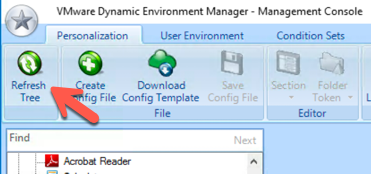
Notepad++ is then listed:

Now when I login to my instant clone Windows 10 desktop, the Notepad++ default directory is set to C:\TEMP. I was able to make further preference changes to Notepad++ and change it’s default directory again to C:\Windows\TEMP. Those settings are retained when I loggoff/login to Windows 10. Even though I’m receiving a brand new instant clone desktop!
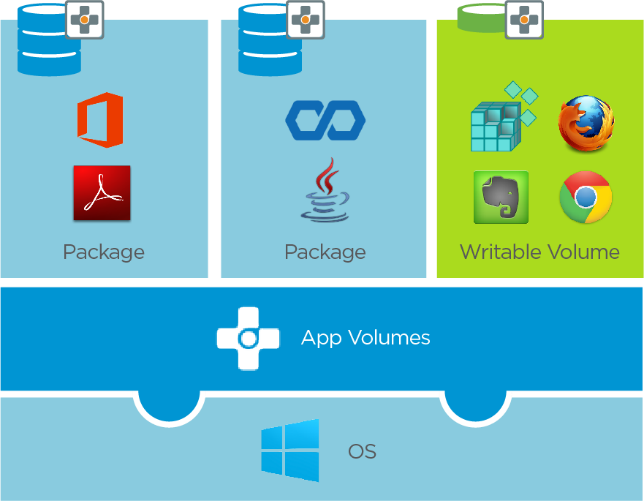
App Volumes 4.x
As mentioned previously, VMware App Volumes is a real-time application delivery system that enterprises can use to dynamically deliver and manage applications. Essentially you virtualise your applications making it easier to maintain them with your master Windows 10 image.
To get a further understanding on App Volumes, start with the VMware App Volumes 4: What’s New video. The App Volumes 4 interactive walkthrough is well worth reviewing on Techzone.
Furthermore, the new Evaluation Guide for VMware App Volumes 4 (released February 2023) provides additional detail to these instructions below. Check it out!
To install App Volumes, I followed the excellent App Volumes 4 Setup Guide by Patrick Messenger (VMware).
Once the App Volumes Manager is up and running, I installed the App Volumes Agent on my Windows 10 Profiling VM or “Packaging VM” (where I had the DEM Profiler application installed). This is detailed further in the Quick-Start Tutorial for VMware App Volumes 4 Simplified Application Management.

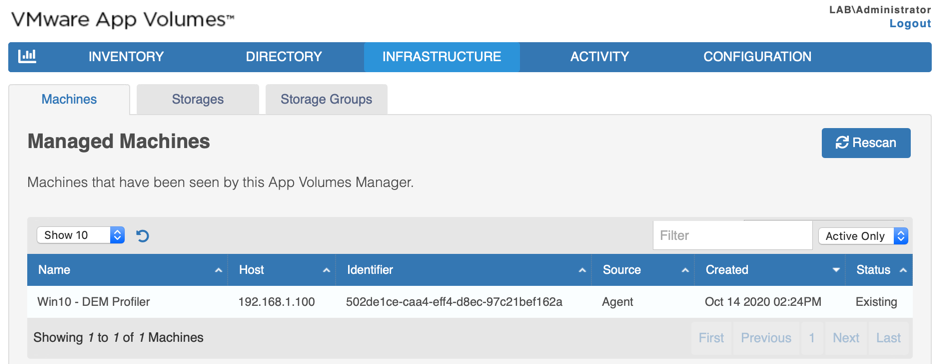
I restarted the Packaging VM and then took an VM snapshot. That way I can revert to this snapshot after packaging each application. The VM was registered to the App Volumes Manager as shown:
Next, install the App Volumes Agent on the Windows 10 Golden Manager (which will be used on your Endpoint VMs) as per the Quickstart Tutorial. Follow the steps in Section “Updating the Horizon Desktop Pool” above to apply this new image update to the Horizon environment.
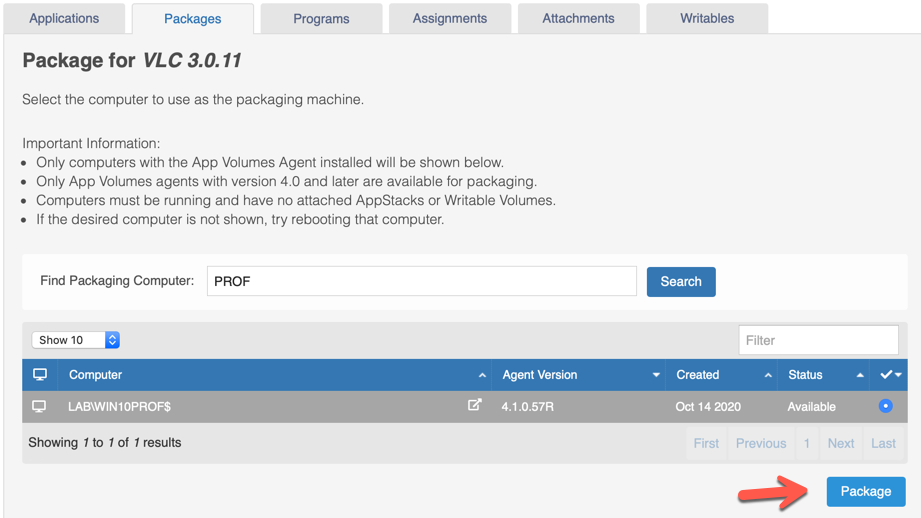
Following the next section of the Quickstart Guide, create an Application and then Package for your selected application. In my case, I used VLC.

I selected my running “Golden Master” (or Profiling VM) as follows:
On my master image you will see something similar to the following:
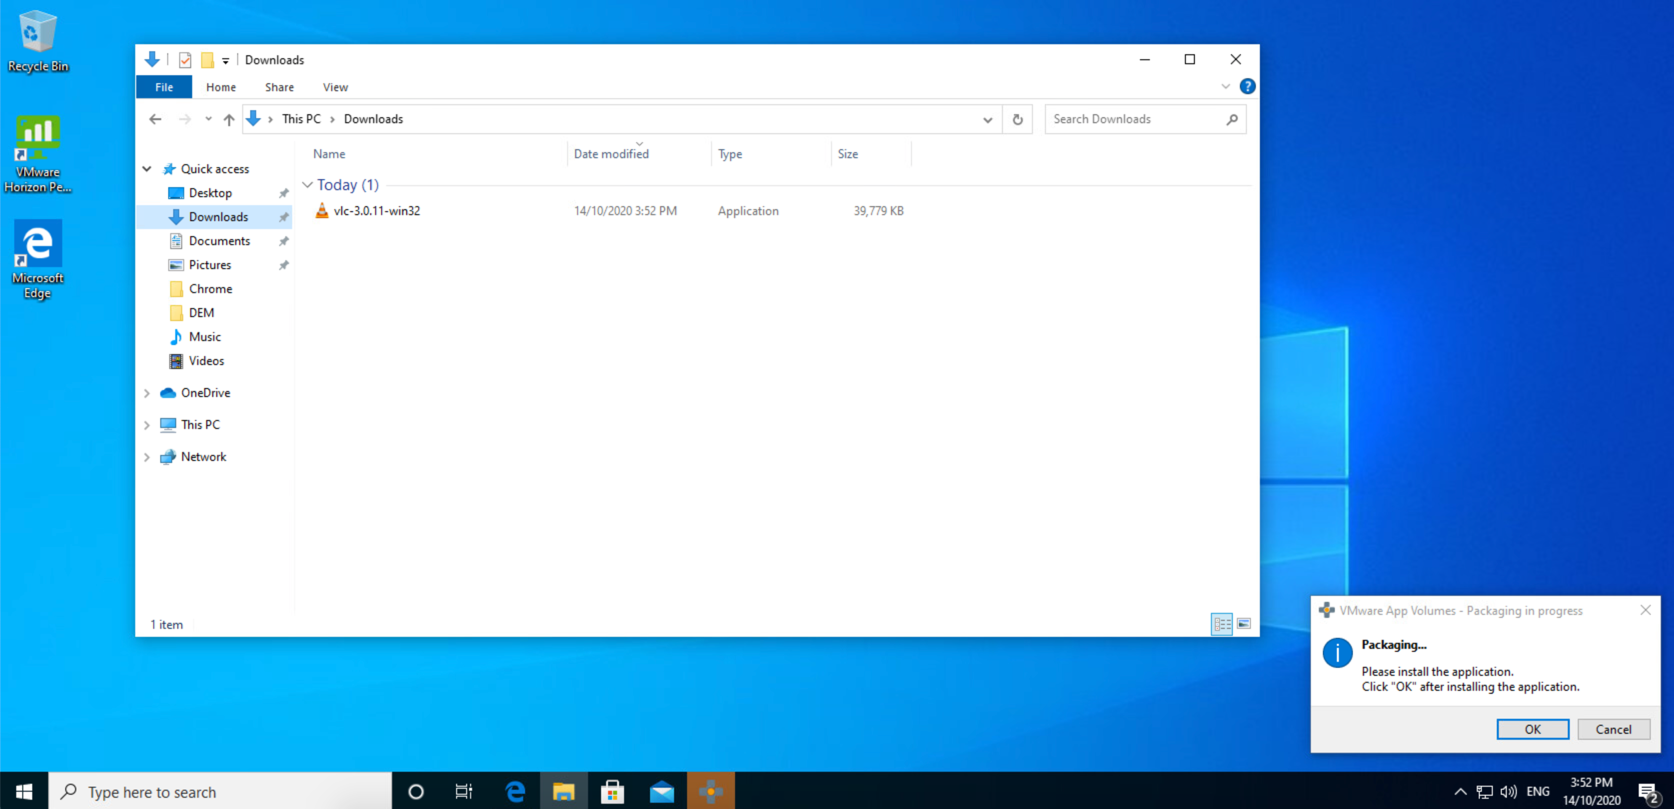
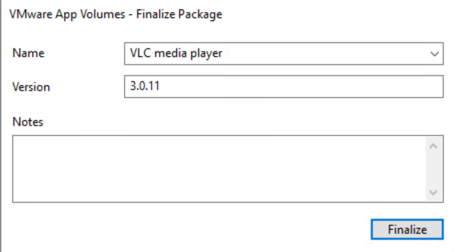
I then installed VLC (in my example). After you install the application, if you are prompted to reboot, do so, and only when installation is completely finished, click OK in the dialog box. In my case, VLC didn’t ask to restart Windows so I selected OK, then Yes to advise the profiling is complete. I then selected Finalize.
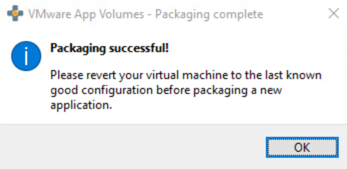
After the reboot is complete, log in to the packaging machine again, and click OK in the Packaging successful! dialog box.
Next assign the application to a group of users by clicking Assign.
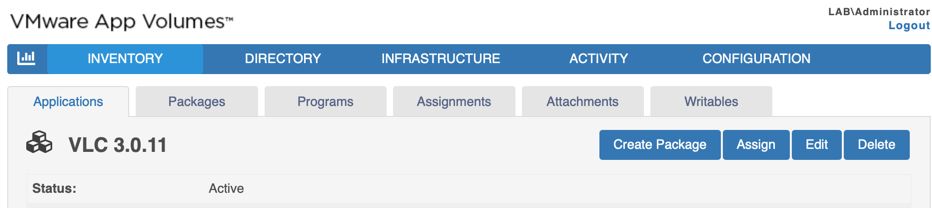
Search for at the appropriate Active Directory group, select that group and click Assign.
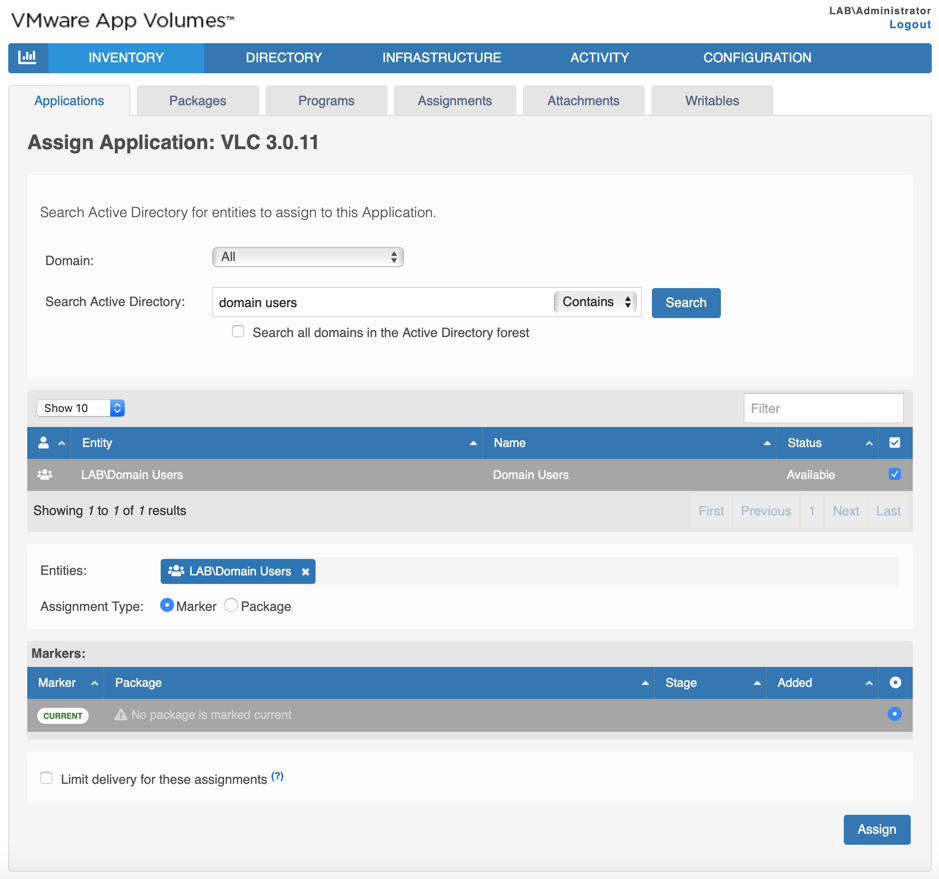
I then had to ensure I clicked Set CURRENT for the application as shown:

When you login into your virtual desktop, VLC was attached to this desktop as shown:

Unified Access Gateway (UAG)
If you wish to access your Horizon environment via the Internet, you’ll also need to deploy a Unified Access Gateway or UAG. A UAG is a hardended virtual appliance which is typically located in your DMZ. For the purpose of a PoC (and my lab environment) I deployed only one UAG appliance, although you can setup two or more UAG’s in a load balancing mode. See the following article on the Unified Access Gateway Architecture for more details.
The UAG can support a range of functions, however we’ll only enable the Horizon gateway service. You can download the latest UAG appliance from https://customerconnect.vmware.com/
Once you’ve downloaded the virtual appliance OVA, you can deploy the UAG via a number of methods. The most common is via vCenter, or Powershell if you want to automate the install. The Powershell method is usually used for deploying a large number of appliances and automating the process. There are a number of blog articles on using the Powershell approach too.
Here is an extract from my Powershell deployment script (I started from the example uag-advanced.ini with description text removed)
name=UAG1
source=C:\Users\Admin\Downloads\UAG2503\euc-unified-access-gateway-25.03.0.0-14396117930_OVF10.ova
target=vi://administrator@vsphere.local:PASSWORD@192.168.1.110/Datacenter/host/Cluster
ds=datastore1
diskMode=thin
netInternet=VM Network
netManagementNetwork=VM Network
netBackendNetwork=VM Network
defaultGateway=192.168.0.1
deploymentOption=onenic
ip0=192.168.1.105
netmask0=255.255.255.0
routes0=192.168.1.254/24
dns=192.168.1.102
honorCipherOrder=true
sessionTimeout=39600000
Once the UAG is deployed you can browse to it’s admin interface using https://ipaddress:9443/admin/.
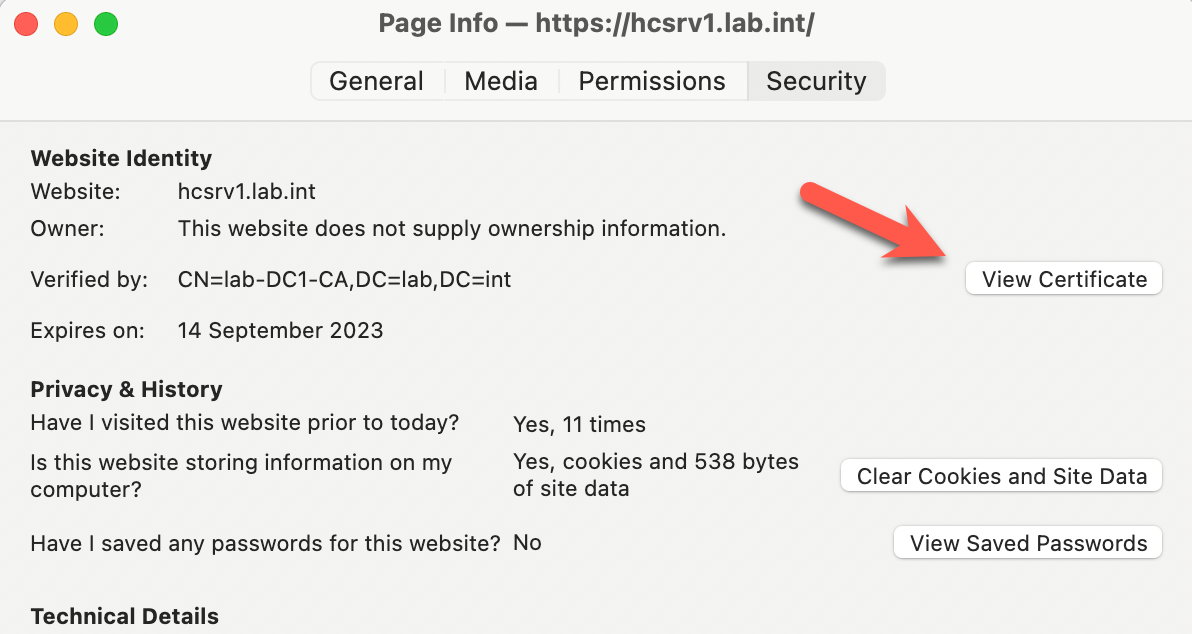
Next browse to your Horizon connection server and copy the certificate’s sha1 value as shown. We’ll need this information shortly.

Now within the UAG admin console, select Configure Manually as shown.

Next to Edge Service Settings, click Show. Select the gear icon next to Horizon Settings. Enter details for your Horizon Connection server, your sha1 details you recorded above along with your external public DNS name for your UAG. Below are the settings from my lab as an example:

Note the :443 and :8443 protocol settings as shown above. If you don’t have the correct settings for Blast External URL, you will likely be able to login to Horizon however might then experience a black screen.
Once you’ve clicked Save, after a while a green icon should display next to Horizon settings, as well as the subcomponents such as Blast and Horizon Destination Server as shown below:

Now to test this out, start up your Horizon client and enter your public DNS name for your UAG which you detailed previously.
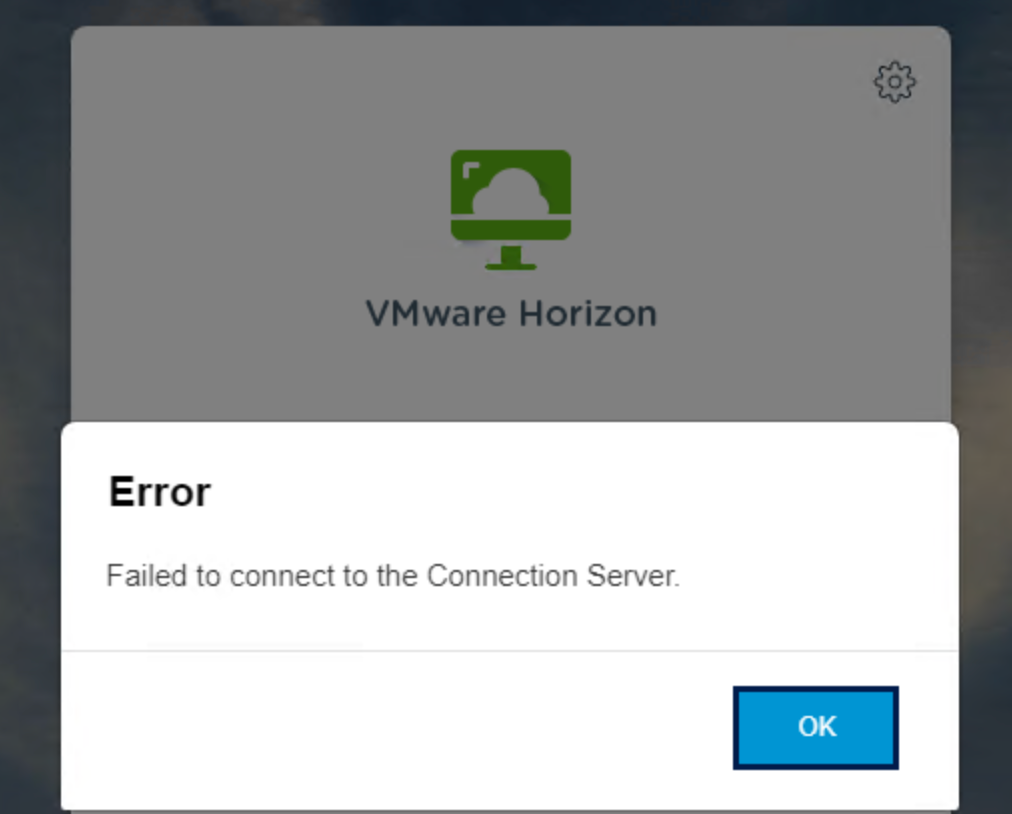
HTML Access probably won’t work through Unified Access Gateway. You’ll probably see the message Failed to connect to the Connection Server.
From Carl Starhold again:
To fix this, configure on each Connection Server the file C:\Program Files\VMware\VMware View\Server\sslgateway\conf\locked.properties to disable Origin Check (checkOrigin=false) see this article by Carl Stalhood.
Horizon 2106 and newer enable CORS by default so you’ll need to either disable CORS by adding enableCORS=false to C:\Program Files\VMware\VMware View\Server\sslgateway\conf\locked.properties, or configure the portalHost entries in locked.properties as detailed at 85801 Cross-Origin Resource Sharing (CORS) with Horizon 8 and loadbalanced HTML5 access.
Once this is all done, you should be able to then login with your appropriate userid/password and access a virtual desktop or application. That’s it !
Conclusion
After completing these sections (and leveraging a range of excellent blogs and VMware resources) you should have successfully installed VMware Horizon.
You have also installed some additional Horizon services which together VMware call JMP (pronounced jump), which stands for Just-in-Time Management Platform. JMP is composed of the following VMware technologies:
- VMware Instant Clone Technology for fast desktop and RDSH provisioning
- VMware App Volumes for real-time application delivery
- VMware Dynamic Environment Manager for contextual policy management
The JMP approach provides several key benefits, including simplified desktop and RDSH image management, faster delivery and maintenance of applications, and elimination of the need to manage “full persistent” desktops.

If you have any further queries on Horizon, I’d recommend posting them on the Horizon Communities forum. Feel free to contact me if you have any feedback or corrections too.
Updates
If you’re upgrading from Horizon 7.10 (7.x) to Horizon 8, see this great blog article by Arnard Pain.
31 March 2022. Added a section for setting up a UAG for remote Horizon access.
2 March 2023. Included link to new Evaluation Guide for VMware App Volumes 4
3 April 2023. Added some information on locked.properties updates for UAGs.
29 May 2023. Added information on the Horizon Installation Pre-req Checker
29 May 2024. Changed free trial to Omnissa URL and changed Events database to Postgres.

2 Comments