
Workspace ONE Access is an integral part of the Workspace ONE platform and supports Workspace ONE Intelligent Hub, Workspace ONE Unified Endpoint Management (UEM) and VMware Horizon.
Many administrators like the ability to then provide a Single Sign-On (SSO) capability into the Workspace ONE UEM console for both admin (console) access and the user self service portal (SSP).
The purpose of this guide is to step you through the configuration to enable this capability.
Self Service Portal
This section details the integration between Workspace ONE Access and UEM for the Self Service Portal (or SSP)
- Open the Workspace ONE Access admin console Download Identity provider metadata from Workspace ONE Access
- Click on Catalog > Web Apps > Settings
- Click on SAML Metadata from the left panel.
- Click on Identity Provider (IdP) metadata link.

5. Right-click on the page and save the idp.xml to the preferred location
6. Login to the Workspace One UEM, navigate to Group and Settings > All Settings > Expand System > Enterprise Integration > Directory Services
7. Below are the Advanced Settings to enable:
- Use SAML for Authentication: Enabled
- Enable SAML Authentication for: Admin and Self-Service Portal as shown:

- Import Identity Provider Settings: Upload the idp.xml file downloaded from Workspace ONE Access.
- Click Save <- This is an important step to then view the imported information
- Change Request and Response Binding Type to POST
- The imported information in my lab is shown below:

- Click Save
- To add the application please log into the Access console as an administrator who has rights to add the application. Navigate to Catalog > Web Apps
- Click on New
- Click on browse from Catalog
- Navigate to the app you want to add. Here we are adding the AirWatch application. There is a plus sign click on that.
- The application will be selected as shown:

6. Personal preference, replace the default icon with this new one and change the wording of the application as follows:

7. Click Next
8. All the details will be pre-filled and it does not need any modification. Details that need to be added are under Configuration > Application Parameters
- AWServerName: <ds URL without https> ie. ds500.awmdm.com
- ac: This is the group id of the OG where the SAML would be set up in AirWatch Side> For my lab it’s eucau
- audience: This is the Service Provider (AIrWatch ID), this needs to be exactly same from AirWatch console, this is found under Directory settings when you enable SAML. Let’s use AirWatch
Note: Please try to keep capitalisation as it is in AirWatch, it should not matter however it is nice to be consistent throughout.
Important Note: AWServerName should be the WS1 Device Services server name.
Here are the application parameters from my lab environment:

9. Click Next
10. Select the default access policy and click Next

11. Click Save and Assign
12. Enter All Users and then click Save

Now login to Workspace ONE Access with a test user and you should be then displayed the new SSP icon as follows:
Click on this application and after a few moments you should be then SSO’ed into the user Self Service Portal for that user as shown:

Workspace ONE UEM Admin Portal
This section details the integration between Workspace ONE Access and the UEM Admin portal.
- Create an administrator in Workspace ONE UEM (basic) with the same userid as the account in Workspace ONE UEM. For example:

- To add the application please log into the Access console as an administrator who has rights to add the application. Navigate to Catalog > Web Apps
- Click on New
- Click on browse from Catalog
- Navigate to the app you want to add. Here we are adding the AirWatch Admin application. There is a plus sign click on that.
- The application will be selected as shown:

7. Personal preference, replace the default icon with this new one and change the wording of the application as follows:

8. Click Next
9. All the details will be pre-filled and it does not need any modification. Details that need to be added are under Configuration > Application Parameters
- AWServerName: <ds URL without https> ie. cn500.awmdm.com
- ac: This is the group id of the OG where the SAML would be set up in AirWatch Side> For my lab it’s eucau
- audience: This is the Service Provider (AIrWatch ID), this needs to be exactly same from AirWatch console, this is found under Directory settings when you enable SAML. Let’s use AirWatch
Note: Please try to keep capitalisation as it is in AirWatch, it should not matter however it is nice to be consistent throughout.
Important Note: AWServerName should be the WS1 Console Server server name.
Here are the application parameters from my lab environment:

10. Click on Advanced Properties and create a new attribute called ObjectGUID with a value of ${user.Externalld}

11. Click Next
12. Select the default access policy and click Next
13. Click Save and Assign
14. Enter an appropriate admin group and then click Save

15. Now login to Workspace ONE Access with an admin account and you should be then displayed the new UEM console icon as follows:
16. Click on this application and after a few moments you should be then SSO’ed into the Workspace ONE UEM Admin console as shown:

That’s it! You’ve now enabled SSO from Access for both SSP and the UEM Admin Console.
Two Factor Authentication
If you wish to enable two factor authentication (2FA) to access the administration console, you can leverage the integrated Intelligent Hub Verify application.
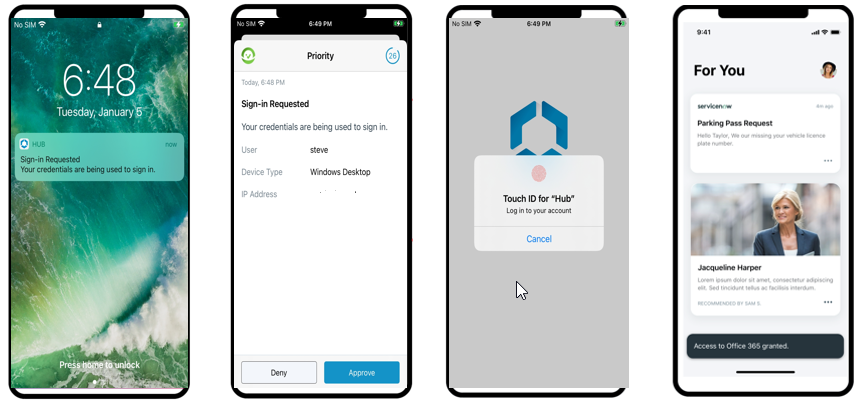
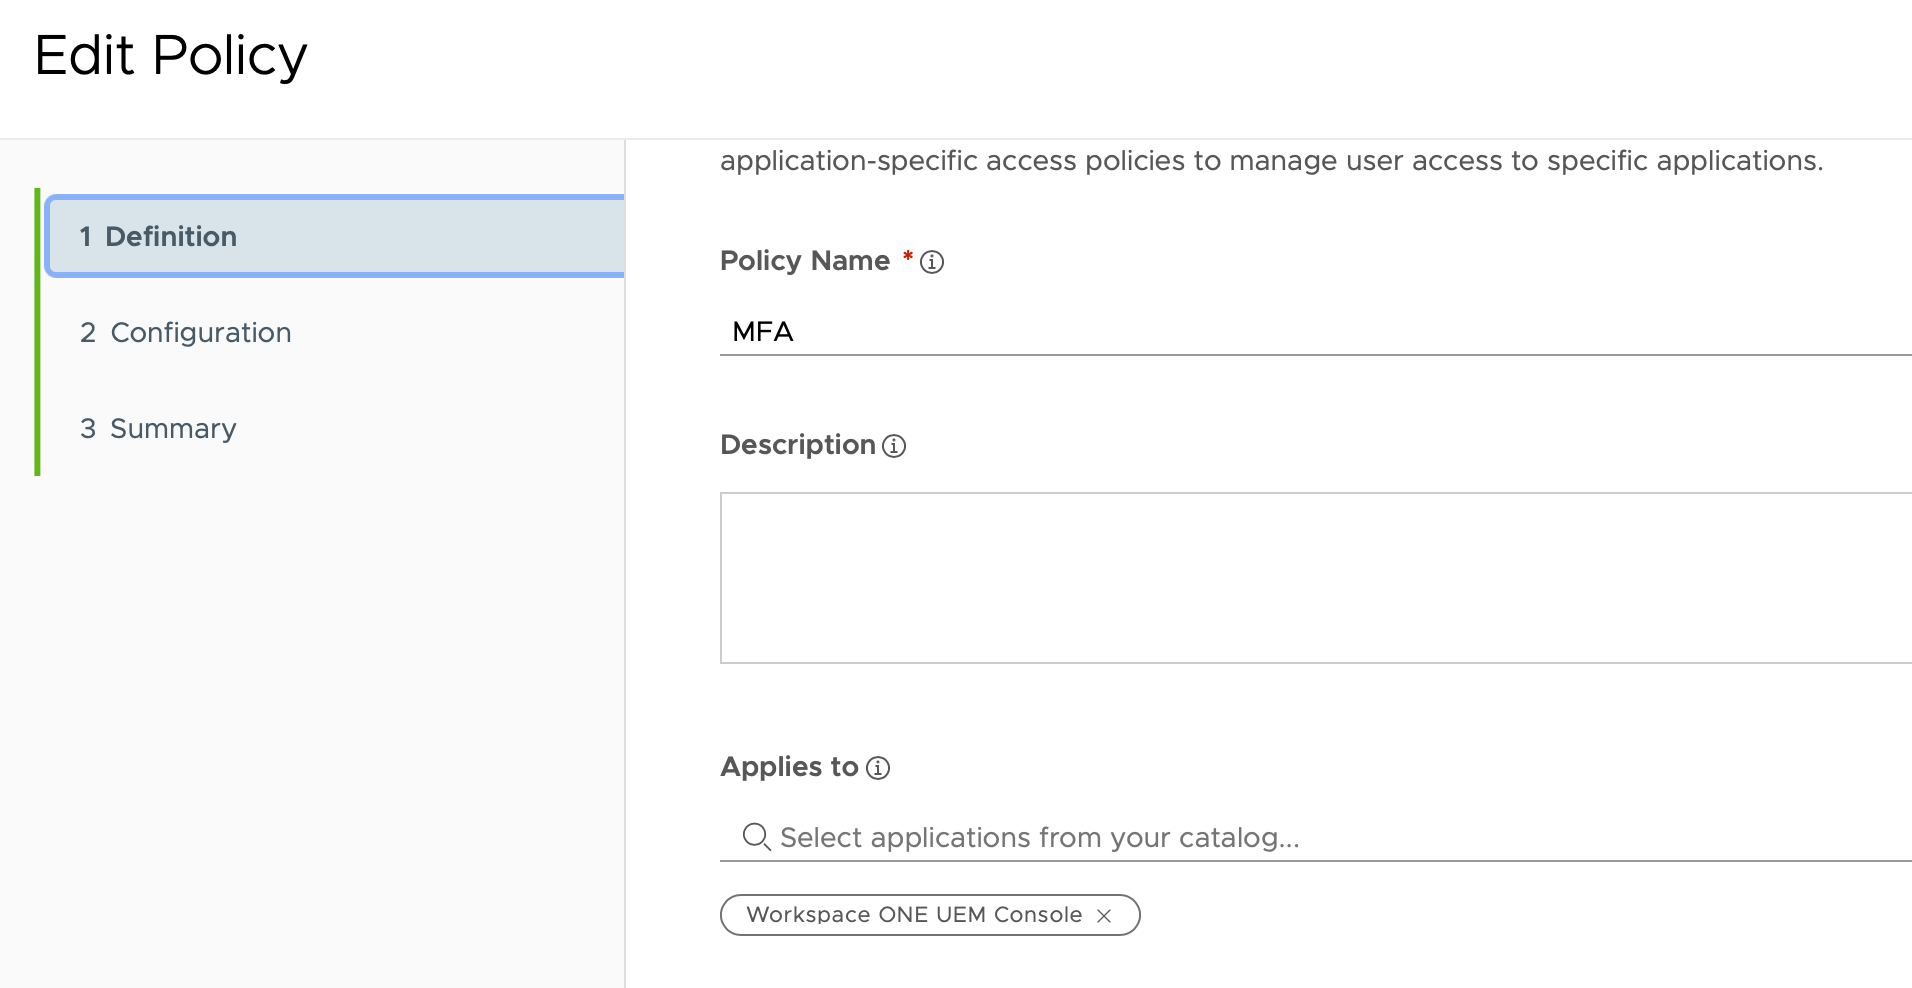
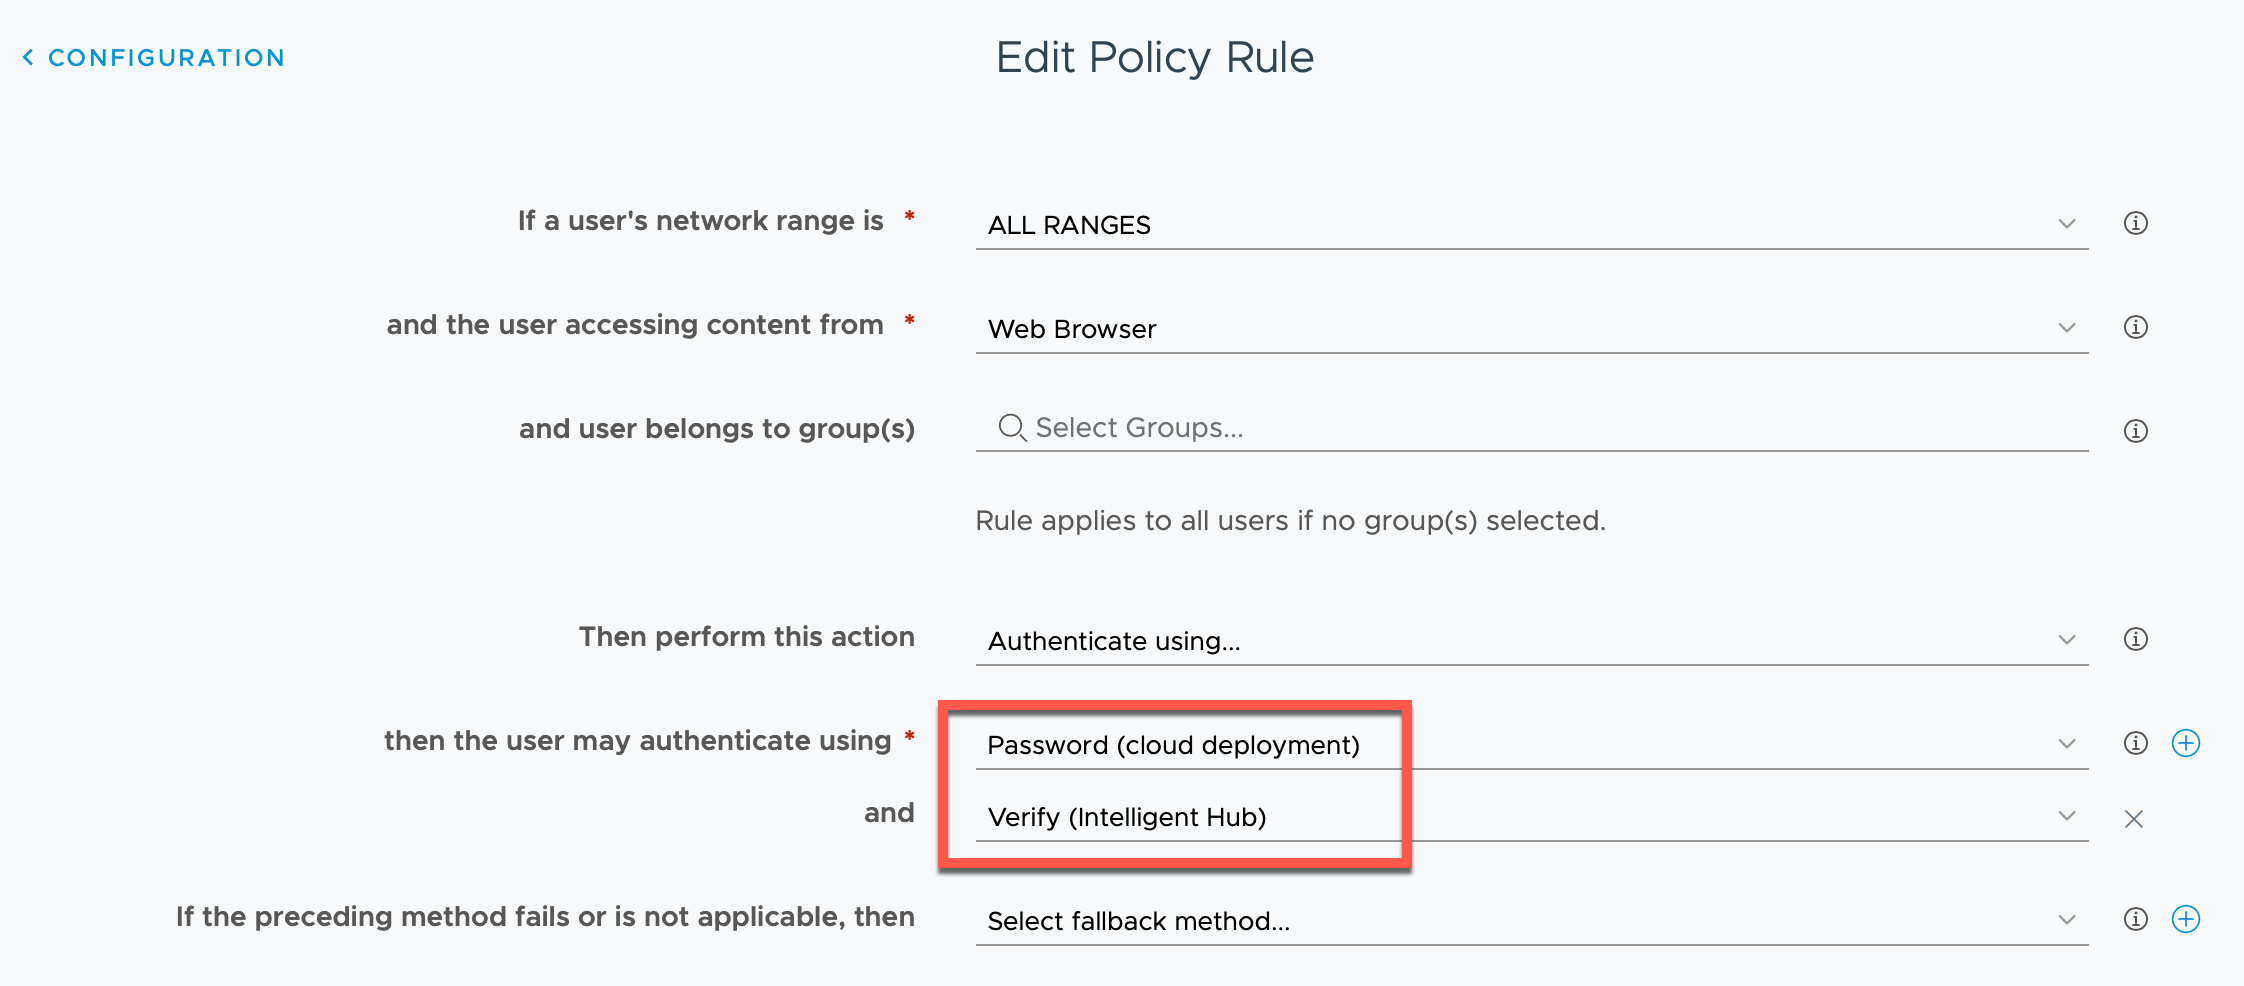
To set this up, check out Steve D’Sa’s excellent article Bringing MFA into the Intelligent Hub. I then created a new access policy called MFA and included the Workspace ONE UEM Console application and a policy for Web Browser device type:
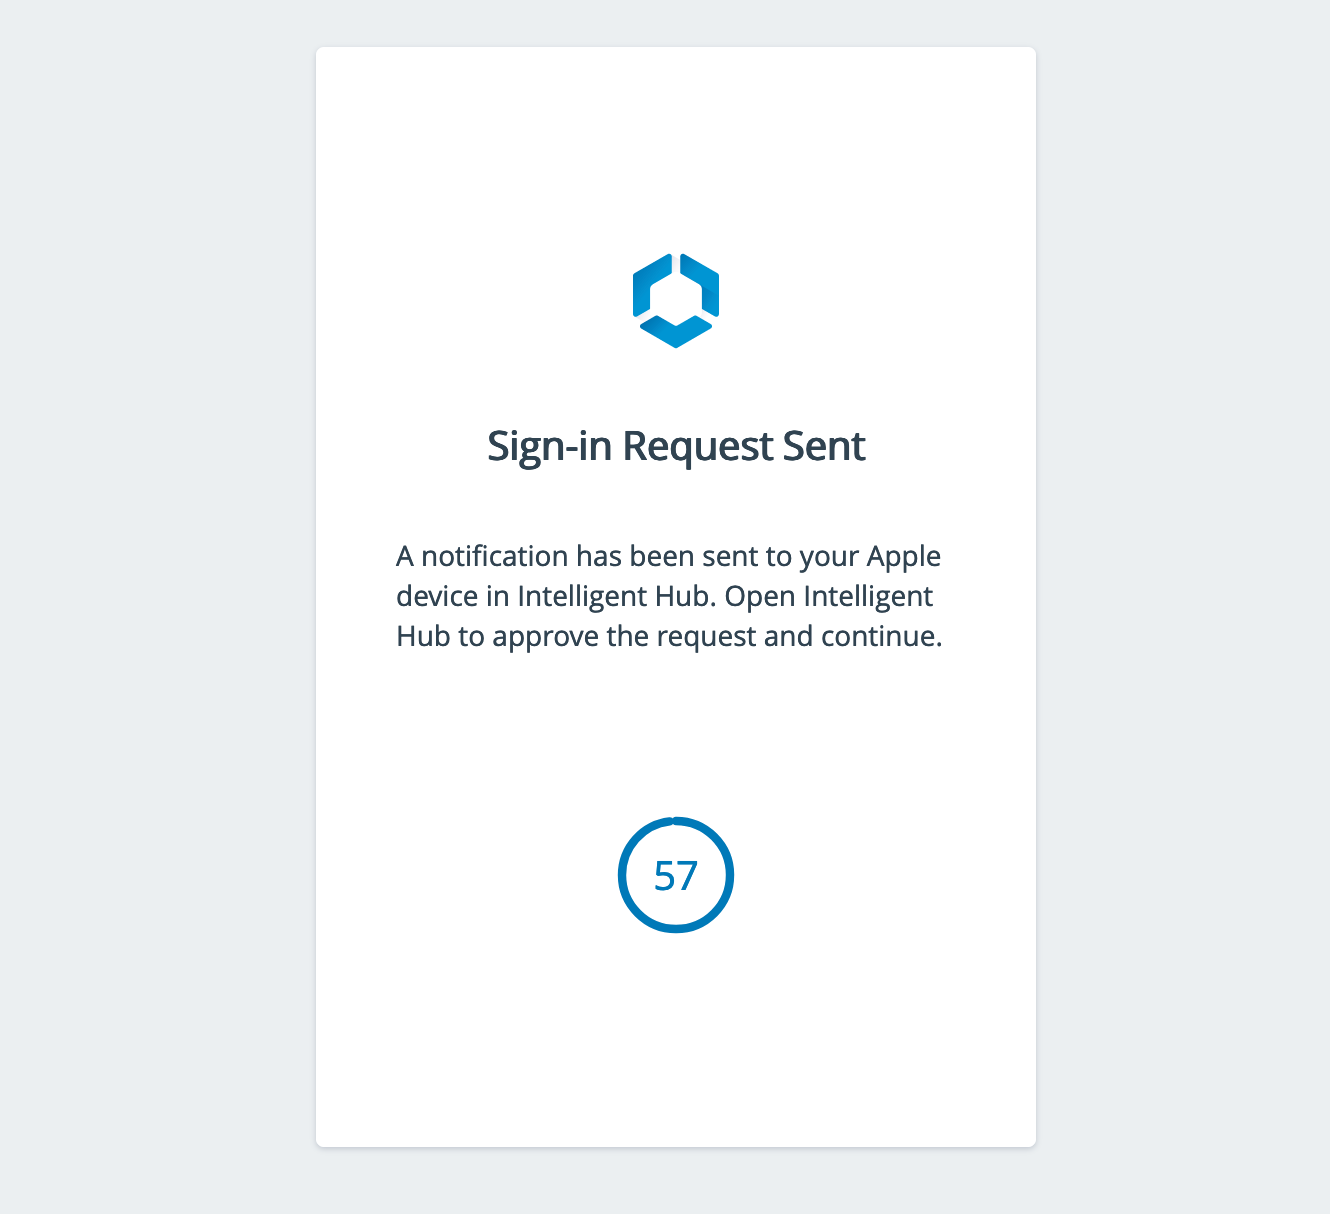
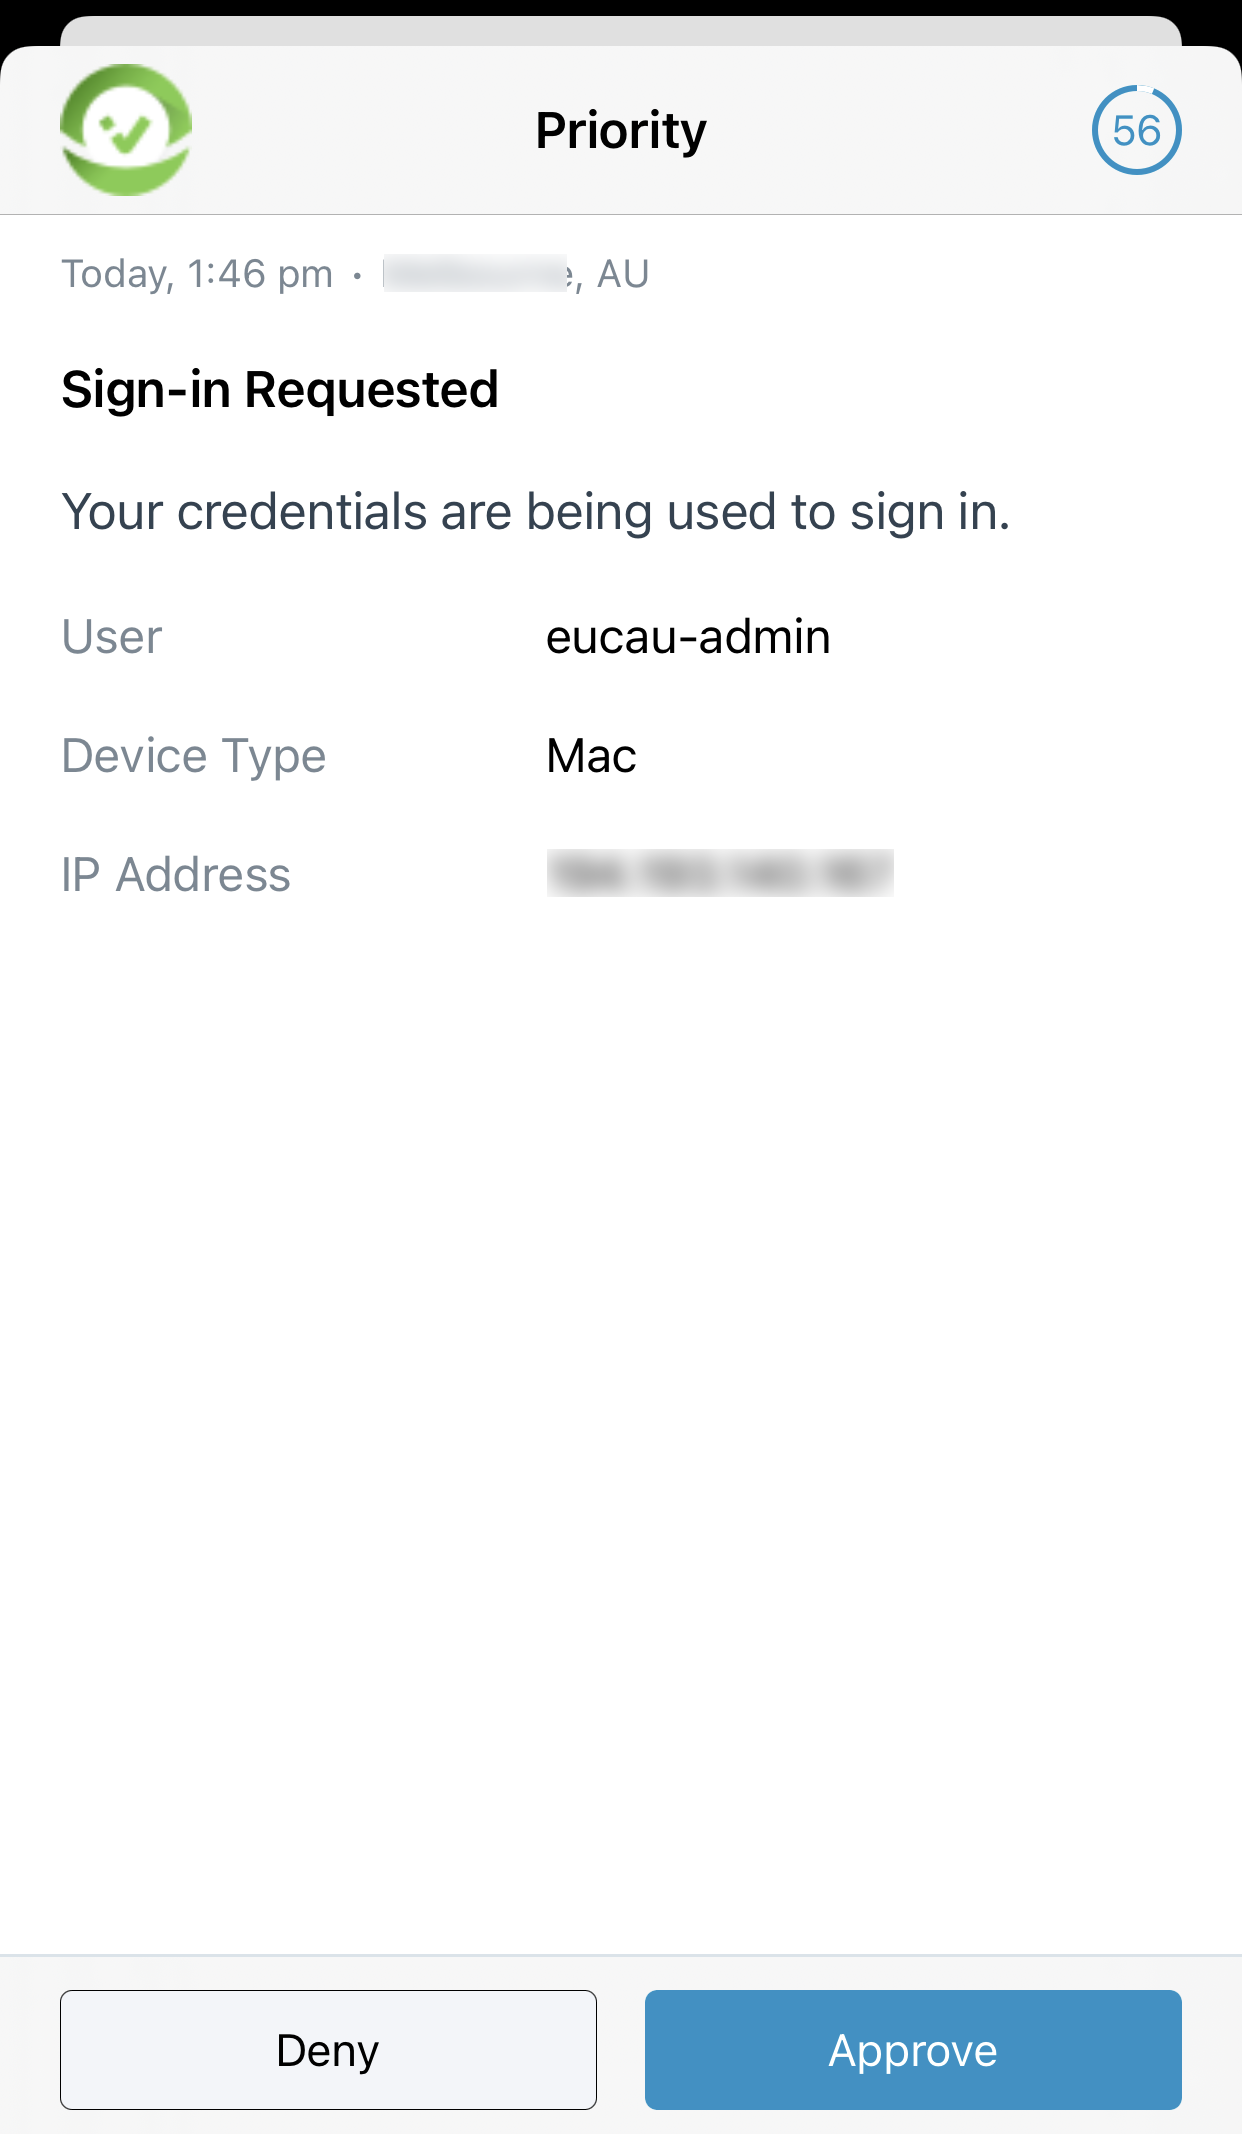
When you then click on the pace ONE UEM Console application you’ll see a message that you need to approve the login on your mobile device as shown:

Great guide Darryl. It was exactly what I was after. Thanks.
Thanks for this guide Darryl. One question, I was able to add the Workspace ONE UEM Admin Portal into the Access Portal, and effectively enabled MFA authentication into that app’s access policy. The thing is that MFA works if I try to enter UEM Admin Portal from within the Access Portal (so that’d be IdP initiated). However, if I just login to the UEM Admin Portal using the link url of the portal (SP initiated login) I don’t get the MFA prompt, since it uses UEM authentication. Is this expected behavior? Thanks again.
2FA Authentication for the UEM Admin console only works when accesing from WS1 Access Portal first. Can it be activated while accesing directly from UEM Admin Console url too? Thanks
Great question. I don’t believe so, but I’ll do some testing and update this blog article with my findings.
Thanks Darryl.
In response to Gastòon, I’ve configured this feature following these instructions on multiple environments, and I’ve always seen it working correctly either from Access portal and from UEM login page, MFA included.
It shouldn’t use “UEM authentication”. You should be redirected to Access login page right after entering the admin username.
Hi Davide, as far as I know, there shouldn’t be any way of enabling MFA when accessing UEM directly from the cnxxxx.com URL. How did you achieve that?
Hi. I’ve only followed the steps on this page, more or less. Actually, I didn’t use the default policy in WS1 Access, but I have created a new policy assigned to WS1 UEM Console app. This policy has “Password-Cloud Directory” and an MFA method (for example, Authenticator App).
In cnxxxx.com login page, after entering the username of an existing Directory admin account, before entering the password, you should be redirected to WS1 Access which should ask user, password and MFA.
Interesting, this is how it looks to me after entering the username, I don’t get any redirection to Access for the password, I have to enter the password on that same screen. https://ibb.co/dk8HXvG